★ AB Coaching Members Vault

The Ultimate
Fitness Vault

Every macro-friendly guide, grocery list, and training resource I've built — in one place. No more digging through five different files. Pick a resource and start.

8Guides
56Product Picks
1Home Base

Nutrition Guides

Nutrition Science

Body Part Guides

Exercise Science

Advanced Exercise Physiology

🔬 The deep end — the graduate-level physiology behind everything I teach. Dense on purpose. Come here when the fundamentals aren't enough.

Want this done for you?

These guides are the map. Coaching is the turn-by-turn. If you want a plan built around your body, your schedule, and your goals — let's talk.

Apply for 1:1 Coaching →
Nutrition Guide · 01

The Costco Guide

Trying to eat high-protein without living in the kitchen? This guide has your back. Every item here was hand-picked to make hitting your macros easier — whether you're meal-prepping for the week, grabbing something quick, or just tired of eating plain chicken breast again. No fluff. Just the best macro-friendly picks — with zero guesswork.

⚠️
Heads up: Costco rotates products often, so this guide will evolve as things change. Macros are per serving as labeled and may shift slightly by region.
No products match — try another search.

Not sure how much to eat?

Knowing the best foods is half the battle. If you want your macros, training, and schedule dialed in for you — that's what I do.

Apply for 1:1 Coaching →
Nutrition Guide · 02

The Walmart Guide

Walmart on a budget, still hitting your macros. Every pick here is high-protein, macro-friendly, and easy to find — from grab-and-go proteins to the sauces and staples that make dieting actually enjoyable. One best pick per item, so you're never guessing in the aisle.

⚠️
Heads up: Macros are per the serving noted on each card and can vary by flavor or region. Whole-food items (chicken, beef, eggs) use standard reference values.
No products match — try another search.

Want the plan, not just the list?

This is what to buy. Coaching is how much to eat, when, and how to train around it — built for you.

Apply for 1:1 Coaching →
Nutrition Guide · 03

The Trader Joe's Guide

Trader Joe's is a macro goldmine if you know where to look. This is every high-protein, ready-to-eat, and low-cal swap worth throwing in the cart — from grab-and-go chicken to plant proteins, high-protein dairy, and the sauces that make it all taste good. One curated list so you skip the trial-and-error.

⚠️
Heads up: TJ's rotates products and reformulates often. Macros are per the serving noted on each card and can shift by batch or region — always glance at the label.
No products match — try another search.

Great picks. Now what's the plan?

A full cart of the right foods is a great start. If you want your macros, training, and schedule built around you — that's what coaching is for.

Apply for 1:1 Coaching →
Nutrition Guide · 04

Fast Food for Fat Loss

In a perfect world you'd meal prep every week — but real life means drive-thrus, airports, and meetings that run late. This is 3 lean, high-protein orders at each of the 14 biggest chains in America — real orders you can use immediately to stay on track. Every pick is modified for the best possible macros.

⚠️
Heads up: Menus and macros change by location and over time, and numbers are approximate as-ordered. Always modify exactly as noted (no mayo, sauce on the side, extra meat, thin crust). Pizza is calorie-dense — portion control matters as much as the pick.
No orders match — try another search.

Eating out and on track?

Knowing what to order is half of it. If you want your macros, training, and schedule built around your real life — that's what coaching is for.

Apply for 1:1 Coaching →
Nutrition Guide · 05

Eating On The Go

In a perfect world you'd cook every meal at home. But real life means airports, road trips, hotel rooms, gas stations, and dinners you didn't plan. This is the full playbook for staying high-protein and on your macros anywhere — before you pack, on the move, and once you land. Jump to the situation you're in right now.

✈️
How to use this: The tap-bar below jumps you to any playbook. Macros are approximate and vary by brand, flavor, and region — always glance at the label. For drive-thru orders, this guide sends you straight to Fast Food for Fat Loss.
Full Guide
The Rules
Pack Your Kit
The Grocery Run
Where You Stay
Gas Stations
Road Trips
Airports
Sit-Down & Diners
🧭

The 6 Rules That Travel With You

Start here

Scenery changes, kitchens change, schedules blow up — but these don't. Learn them once and you're equipped for every trip you'll ever take. Everything else in this guide is just these rules applied to a specific spot.

1

Anchor Every Meal to Protein

No meal or snack without a protein source. Build the plate outward from chicken, eggs, tuna, jerky, or a shake — carbs and fat fill in around it. It's the hardest macro to hit on the road and the one that holds your muscle and keeps you full. If you remember one rule, it's this.

2

Win on Protein-Per-Calorie

Between two options, take the one with more protein for fewer calories. A tuna pouch (70 cal / 16g) beats a granola bar (250 cal / 4g) every time. This one glance-at-the-label habit keeps the whole trip lean without tracking a thing.

3

Eat the Protein First

Physically eat your protein before the carbs and fat hit your fork. It's the most satiating macro, so you fill up on what matters and naturally leave some of the junk behind. Non-negotiable when you're cutting.

4

Don't Drink Your Calories

Default to water, diet soda, black coffee, or a protein shake. Travel dehydrates you and your brain reads thirst as hunger — so half your "snack attacks" are really thirst. A large sweet tea or "healthy" smoothie can hide 400–600 calories you won't even remember.

5

Always Plan the Next Meal

Nearly every bad decision on the road happens in a hunger emergency with no options. Stay one move ahead: pack a shake for the flight, grab the rotisserie chicken when you pass the store. A meal you planned is a meal you control.

6

Consistency Beats Perfection

You won't eat perfectly on this trip — and you don't need to. Nobody got out of shape from one dinner. If you overdo it, don't spiral: make the next meal a protein anchor and move on. Progress, not perfection. That's what keeps you in the game for years.

🎒

Pack Your Travel Kit

Before you leave

The battle is won or lost before you zip the suitcase. When you're starving in an airport at 6 a.m. with a delayed flight, you'll eat whatever's easiest to grab — so make the healthy choice the easy choice. Build this kit once and reuse it every trip. It's insurance: shelf-stable protein that plugs the gaps until your grocery run.

🥡 The Food Kit
  • Protein powder — 3–4 servings in a zip bag, or single-serve packets (easier through security). Your emergency meal: powder + water + a shaker = 25g protein anywhere.
  • A shaker bottle — packed empty, filled past the checkpoint. The single most useful piece of travel gear you own.
  • 2–4 protein bars — David, Quest, Pure Protein, Barebells. Aim for more protein grams than half the calories.
  • Jerky / meat sticks — Chomps, Country Archer, Jack Link's. Pure protein, zero prep, kills a savory craving.
  • 2–3 tuna or chicken pouches — no can, no drain. Tear and eat, or dump on a salad.
  • PB2 / PBfit — powdered peanut butter for oats, yogurt, or shakes. ~60 cal vs ~190 for the real jar.
  • Rice cakes — the ultimate travel carb. Light, hard to crush, clean base for tuna or nut butter.
🧰 The Gear (pack once, use forever)
  • Collapsible food container — flattens in your bag, pops open for leftovers or half a rotisserie chicken.
  • A few zip bags — pre-portion powder, oats, and snacks; store cut fruit. Basically free, endlessly useful.
  • Reusable spork / utensils — so you can actually eat the tuna, yogurt, and rice you packed.
  • Mini cooler or insulated lunch bag — keeps shakes, yogurt, and pre-cooked chicken safe on a travel day.
  • Electrolyte packets (LMNT / Liquid IV) — travel dehydrates you, and dehydration reads as hunger.
  • Small food scale (optional) — only if you're dialed in on a specific goal. Weighs almost nothing.
📌
Coach's RuleIf it needs a fridge or a stove, it doesn't go in the kit — that's what the grocery run is for. The kit is the bridge, not the destination.
Shelf-Stable Picks & Their Macros

Zero fridge, zero cooking — these live in your bag. Macros are approximate; check your brand and flavor.

Tuna / Chicken Pouch

StarKist · Chicken of the Sea
90Cal
16gProtein
Flavored packs eat like a snack. No drain, no smell.

Meat Stick

Chomps · Country Archer
100Cal
10gProtein
Clean ingredients, TSA-proof, glovebox-friendly.

David Protein Bar

Best macros on the shelf
150Cal
28gProtein
Near-perfect travel bar. 0g sugar.

Quest Bar

High fiber, everywhere
190Cal
21gProtein
Filling and sold at basically every store.

Protein Powder

Single-serve scoop
120Cal
25gProtein
Add water in a shaker for an instant meal.

Premier / Fairlife Shake

Shelf-stable RTD
160Cal
30gProtein
The most convenient protein on earth. Sold in airports.

Dried Edamame

Underrated crunchy snack
130Cal
14gProtein
High-protein crunch that survives a bag.

Roasted Chickpeas

Fiber-dense & filling
120Cal
6gProtein
~5g fiber. Satisfies a chip craving.

PB2 / PBfit

Powdered peanut butter
60Cal
7gProtein
Flavor for oats, yogurt, shakes — minus the calorie bomb.

Rice Cakes

The travel carb
35Cal
7gCarb
Top with a tuna pouch or nut butter packet.

Instant Oats Packet

Just add hot water
150Cal
27gCarb
Upgrade with a scoop of powder or PB2.

Protein Cereal

Magic Spoon · Catalina
150Cal
14gProtein
Dry-snack it, or pour a shake over for a 40g bowl.
🛒

The Landing Grocery Run

The #1 move

If you take one thing from this whole guide, take this: the first thing you do when you land is find a grocery store. Before you sightsee, before you nap, before you "figure out food later" — because later is how you end up on gas-station nachos for three days. Fifteen minutes and forty bucks buys a whole trip's worth of protein and control.

📍
Do This FirstPin the nearest grocery store to your hotel/Airbnb before you fly, and hit it on the way in from the airport. No car or too tired? Order Instacart / Walmart / Amazon Fresh straight to the room — front desk will hold it.
🎯 What You're Hunting For
  • Rotisserie chicken — the GOAT. One bird ≈ 70–90g protein, already cooked, ~$6–8. Cold, hot, or shredded onto anything.
  • Pre-cooked proteins — grilled chicken strips, hard-boiled egg packs, pre-cooked shrimp, deli slices. Zero cooking.
  • Greek yogurt & cottage cheese — 15–20g protein a serving. Breakfast and snacks, solved.
  • Deli turkey / chicken — roll it up, layer on rice cakes, or build a sandwich. Days of protein for ~$6.
  • Bagged salad + fruit — the volume-and-fiber move so you're not living on protein and air.
  • Microwave rice + RTD shakes — 90-second carbs and grab-and-go 30g protein for the mini-fridge.
⏱️ The 10-Minute Cart
  1. Rotisserie chicken
  2. Big tub of Greek yogurt + a few Fairlife / Premier shakes
  3. Pack of cottage cheese
  4. Deli turkey
  5. Bagged salad + a bag of fruit
  6. Microwave rice pouches
  7. Box of protein bars + bag of jerky to restock the kit
💵
~$40–50, one trip, and you've got the protein backbone of every meal all week. Now you only eat out when you want to — not because you're stuck.
Easy-Cook & Assemble Staples

Anything from the store you can turn into a meal in ~5–15 minutes with a microwave or a mini-fridge.

Rotisserie Chicken

~5 min to shred · 4–6 meals
140Cal
25gProtein
The single best travel-food hack. Per ~3–4 oz.

Grilled Chicken Strips

Tyson · Just Bare · 90 sec
110Cal
22gProtein
Microwave and dump on rice or salad.

Microwave Rice Pouch

Ben's · Minute · 90 sec
190Cal
44gCarb
Instant carb base for any bowl.

Greek Yogurt

Fage · Chobani · no cook
120Cal
18gProtein
Add PB2 or fruit. Breakfast in 30 seconds.

Cottage Cheese

Good Culture cups
90Cal
13gProtein
High-protein, high-volume, savory or sweet.

Steam-in-Bag Veggies

4–6 min · big volume
50Cal
3gProtein
Your fastest fiber and fullness in the room.

Liquid Egg Whites

Mug-scramble · 90 sec
25Cal
5gProtein
Near-pure protein per ¼ cup.

Microwave Sweet Potato

Pierce & nuke ~5 min
110Cal
26gCarb
Fiber-dense, filling carb. No prep.

Kodiak Pancake Mix

Just add water · stovetop
190Cal
14gProtein
High-protein breakfast that feels like a treat.

Frozen Salmon / Turkey Burger

Pan-sear · a real meal
170Cal
19gProtein
Zero skill required. Great in a kitchen.

Canned Beans

Rinse & add · ½ cup
110Cal
7gProtein
Cheap protein + ~7g fiber. Bulk any bowl.

Bagged Salad Kit

60-sec assembly
160Cal
12gCarb
Add a tuna pouch = complete meal. Watch the dressing.
🏨

Where You Stay: Stack the Deck

Decide before you book

The easiest way to eat well on a trip is to decide where you sleep before you ever think about food. Your lodging is either a cheat code or a handicap — and you pick which when you book.

🔑
The Cheat CodeBook the Airbnb / VRBO / extended-stay hotel (Residence Inn, Homewood Suites, Staybridge) with a kitchen or kitchenette. A fridge, a microwave, even one burner turns rotisserie chicken + microwave rice + bagged salad into a real home-cooked meal for a couple of bucks. For any trip over 2–3 days it pays for itself in food savings. This is the #1 booking tip, full stop.
🛏️ Only Got a Hotel Room? You Can Still Win.
  • Request a mini-fridge & microwave at booking — many hotels provide one free on request. Some have a microwave in the lobby or gym; scope it out.
  • Use the fridge as your base — yogurt, cottage cheese, shakes, deli meat, fruit, string cheese, half a rotisserie chicken. That alone covers breakfast and snacks with zero restaurants.
  • The coffee maker is a hot-water hack — instant oats, or warm a protein pouch in a pinch.
  • Deliver groceries to the room — Instacart / Walmart / Amazon Fresh. You land tired, drop bags, food shows up in an hour.
🍚
The 3-Minute Hotel MealMicrowave rice pouch (90 sec) + rotisserie chicken torn in (60 sec) + a handful of bagged salad = a genuine 40g-protein dinner for a few bucks. Memorize this one.
🍳
Free Breakfast, Done RightGo for scrambled/hard-boiled eggs, Greek yogurt, oatmeal, and fruit. Skip the waffle machine, pastries, and sugary cereal. Free doesn't mean you have to eat it.
🧴
Your FloorAlways keep a shaker and a bag of protein powder in your suitcase. Worst case, any room gives you 25g of protein and water in 30 seconds. You're never truly stuck.

Surviving the Gas Station

On the move

It looks like a minefield, but every gas station has 5–6 things that'll get you 30g of protein. Walk past the middle aisles and hunt the coolers along the back wall — that's where your food lives.

✓ Grab This
  • Fairlife Core Power / Premier shakes — the MVP. 30–42g protein in the cold case. If you grab one thing, grab this.
  • Jerky, Chomps, meat sticks — 9–15g protein, shelf-stable, zero mess. Look for under ~10g sugar.
  • String cheese — 6–7g protein each. Grab two, fat keeps you full.
  • Hard-boiled eggs (2-pack) — 12g protein, ~140 cal. Underrated, in the cold case.
  • Greek yogurt if they carry it — 15–20g protein. Grab a spoon at the coffee counter.
  • Protein bars — David (28g), Quest (20g), Pure Protein. Any of these > a candy bar.
  • Deli sandwich, no mayo — turkey or ham on wheat, add mustard.
  • Tuna / chicken pouches — 15–20g protein, tear and eat.
  • Banana or fruit — a clean carb to pair with your shake instead of chips.
The MoveFairlife shake + 2 string cheese + a bag of Chomps = ~45g protein, ~450 cal, bought in under two minutes. That's a real meal from a gas station. Done.
🚗

The Road Trip

On the move

A road trip isn't a nutrition problem — it's a packing problem. Win it before you leave the driveway and the rest of the drive takes care of itself.

🧊 Pack a Cooler (highest-ROI move)
  • Line the bottom with ice packs or a bag of ice.
  • Load it: Fairlife / Premier shakes, Greek yogurt cups, string cheese, pre-cooked or rotisserie chicken, hard-boiled eggs, grapes / baby carrots, deli roll-ups.
  • A stocked cooler is the difference between "hit my protein all day" and "it was the only thing open."
🎒 Pack a Dry Bag (glovebox)
  • Jerky, Chomps, meat sticks, tuna & chicken pouches, protein bars, rice cakes, bananas.
  • All of it survives a hot car and needs zero prep.
  • Set a "protein every ~3 hours" rhythm so you're not raiding a Wawa on autopilot at hour six.
🍔
Hitting a Drive-Thru? Don't Wing It.Your exact lean orders at McDonald's, Chick-fil-A, Wendy's, Taco Bell, Chipotle & more — already built with macros. Order off it and get back on the road.
Open Fast Food Guide →
🛫

Airports & Flights

On the move

Airports are engineered to make you eat badly — long waits, few options, everything overpriced and beige. Beat it the same way you beat everything else: walk in already fed and already stocked.

🥤 Get Through Security With Food
  • Solid food is fine through TSA — bars, jerky, sandwiches, tuna pouches, rice cakes, dry oats. Pack the kit.
  • Empty shaker + powder — fill at a fountain past the checkpoint for a 25g meal on the plane.
  • Skip the drink-your-calories trap — grab water or black coffee, not a 500-cal frappe.
  • Behind schedule? Nearly every airport has a Hudson/newsstand with Fairlife or Premier shakes and jerky.
🍽️ Buying Food in the Terminal
  • Grilled chicken bowls, salads, and sandwiches over fried baskets and pizza slices.
  • Starbucks / cafés — egg-white bites, protein boxes, Greek yogurt, a protein latte.
  • A fast-food terminal? Order straight off the Fast Food for Fat Loss guide — same rules apply.
  • Hydrate on the plane — cabin air is brutally drying and dehydration feels like hunger.
🍽️

Sit-Down & Diner Restaurants

At the destination

Restaurants are winnable. The whole game is a few rules of thumb you run on autopilot so you're not agonizing over the menu. You don't need a "diet" menu — you need lean protein, extra protein, a veggie side, and water.

📋 The Rules of Thumb
  • Kill the freebies. The bread basket and chips-and-salsa are 400–700 calories before your food arrives — and the easiest thing to skip. Ask them not to bring it, or take one and push it away.
  • Order a lean, non-fried protein. Chicken, turkey, lean beef/steak, or fish — grilled, baked, blackened, or roasted. Avoid most pork (bacon, sausage, ribs run fatty) and anything breaded or fried.
  • Order EXTRA protein. "Can I add extra chicken/steak?" is usually a $3–5 upcharge for a huge portion bump — the cheapest way to double your protein anywhere.
  • Eat the protein first. Satiety and priority — eat the point of the meal before you fill up on sides.
  • Swap the fries. Trade them for a side salad, steamed veggies, or a plain baked potato. Most kitchens will, often free.
  • Drink water or diet soda. Not sweet tea, not lemonade, not a margarita you forget you ordered.
🍝 Worked Examples
  • Italian: Skip the endless breadsticks. Chicken carbonara with extra grilled chicken — the protein balances the pasta.
  • Mexican: Skip the chip basket. Steak or chicken fajitas / tacos, extra meat, corn tortillas, easy on cheese & sour cream. Fajitas are the cheat code.
  • Steakhouse: Sirloin (leaner than ribeye) + steamed broccoli + side salad. Skip the loaded potato and bread.
  • Burger joint: Lettuce-wrapped or ditch the top bun, no mayo, side salad instead of fries. Or double patty, single bun.
🍳 Breakfast Spots
  • Go eggs, omelets, or steak over pancakes, waffles, and French toast (that's dessert with syrup).
  • Ask for an egg-white omelet or half-white to cut fat — load it with veggies + chicken or turkey.
  • Steak and eggs is elite. So is an omelet with meat in it.
  • Get eggs + a lean meat + fruit or dry toast instead of the short-stack combo.

Traveling and on track?

These are the tactics. Coaching is the plan — your macros, your training, and your schedule built around a life that doesn't sit still. If you want it dialed in for you, let's talk.

Apply for 1:1 Coaching →
Nutrition Guide · 06

20 Minute Meals

Twenty meals, and none of them ask for more than 20 minutes of hands-on time. Every card shows the macros per serving, the equipment, and how to scale it up or down for your goal. Learn the base methods once and the sauce does the rest: the same shredded chicken becomes buffalo wraps on Monday and burrito bowls on Wednesday.

⏱️
How to use this: Filter by category with the tap-bar, then open Recipe & variations on any card for the full method. Macros are approximate and shift with brands and portions, so glance at your labels. "Hands-on" means time you're actually working; the crockpot and the fridge do their shifts unsupervised.
20Meals
≤20Min hands-on
38gAvg protein / serving
60+Variations
Full Menu
Batch Prep
Bowls & Plates
Handhelds
Breakfast & Sweet
🧭

The 20-Minute System

Read once

Fast food you cook yourself comes down to three habits stacked together. Run them for two weeks and "I didn't have time to eat right" stops being a sentence you say.

1

Batch a Protein Twice a Week

Taco meat, shredded chicken, or air-fryer chicken. One 15-minute session gives you 8–12 portions of cooked protein in the fridge, and every meal after that is assembly, not cooking.

2

Put Carbs on Autopilot

A rice cooker and an air fryer make your carbs while you do something else. Microwave rice pouches cover you on the worst days. The Carb Bases section below has the exact methods.

3

Sauce Is the Variety

Four base methods and a shelf of sauces beat twenty recipes. Frank's, Sweet Baby Ray's low-cal, G Hughes, salsa, teriyaki: same chicken, completely different dinner. Most sauces here run 20–60 calories a serving.

Ground turkey taco meat in a tortilla with peppers and shredded cheese ⏱ 15 min
SkilletBatch · 12 portions5 meals from 1 cook

Ground Turkey Taco Meat

One 3-lb tray, five different dinners. This is the highest-leverage 15 minutes in the guide.

170Cal
21gProtein
3gCarb
8gFat
per 4 oz portion · meat + seasoning only
Recipe & variations
Ingredients
  • 3 lb tray of 93/7 lean ground turkey (or 93/7 beef; turkey is cheaper)
  • Taco Bell seasoning packets (Walmart and most grocery stores) — or your own blend: salt, pepper, chili powder, ancho, cumin, paprika
  • Low-carb tortillas: Mission, La Banderita (my favorite), or Carb Counter
  • Shredded lettuce, salsa, and guacamole or low-fat shredded cheese
Method
  1. Heat 2 tbsp oil in a large non-stick skillet over medium-high.
  2. Brown the turkey, breaking up chunks as you stir, 7–12 minutes.
  3. Drain the fat in a strainer, return meat to the pan.
  4. Add ⅓ cup water + 1.5 seasoning packets, simmer on medium-low 2–3 minutes.
5 ways to eat it
  • Tacos — low-carb tortillas, lettuce, salsa, guac
  • Quesadillas — fold with low-fat cheese, toast in a pan; dip in salsa or plain Greek yogurt (sour cream stand-in)
  • Burrito bowl — over rice with beans and fajita peppers
  • Loaded potatoes — over diced air-fried potatoes with lettuce and salsa
  • Breakfast — folded into the potato-egg skillet

Cutting: weigh 4-oz portions and let lettuce and salsa do the volume. Bulking: 6-oz portions plus rice and guac gets a taco bowl to ~650 calories without trying.
Shredded slow-cooked chicken in a crockpot ⏱ 10 min hands-on · crockpot cooks 3–4 hr
CrockpotBatch · ~10 portions5 sauce profiles

Slow-Cooked Shredded Chicken

Ten minutes of your time, four pounds of chicken that eats like five different recipes. The crockpot works the shift; you get the credit.

250Cal
44gProtein
5gCarb
5gFat
per 5 oz cooked + sauce · carbs shift with the sauce you pick
Recipe & variations
Ingredients
  • 4 lb boneless skinless chicken breast, fat trimmed
  • Sauce/salsa/seasoning profile of choice (below)
  • Optional: onion, jalapeño, bell peppers
Method
  1. Add chicken to the crockpot with 1 cup of your sauce mixture and seasoning.
  2. Cook on high 3–4 hours or low 6–8.
  3. Dump about half the liquid (90% for the marinara version).
  4. Add 1 more cup of sauce, shred with a meat shredder tool (~$10 on Amazon, also great for ground meat), mix, done.
5 sauce profiles
  • Buffalo — Frank's Red Hot; wrap with lettuce, light ranch, shredded cheese
  • BBQ pulled — Sweet Baby Ray's low-calorie; wraps, sandwiches, or over rice
  • Stir-fry — soy + teriyaki, or BWW Asian Zing / G Hughes Sweet Thai Chili; serve over broccoli and rice
  • Marinara — pasta sauce, extra drained; over Barilla Protein+ with a slice of provolone
  • Mexican — salsa, onion, peppers, taco seasoning; rice bowls or tacos
Heads up: potent sauces need less. Taste before you add the second cup. Cutting: buffalo and Mexican are the leanest profiles. Bulking: BBQ over rice stacks carbs fast.
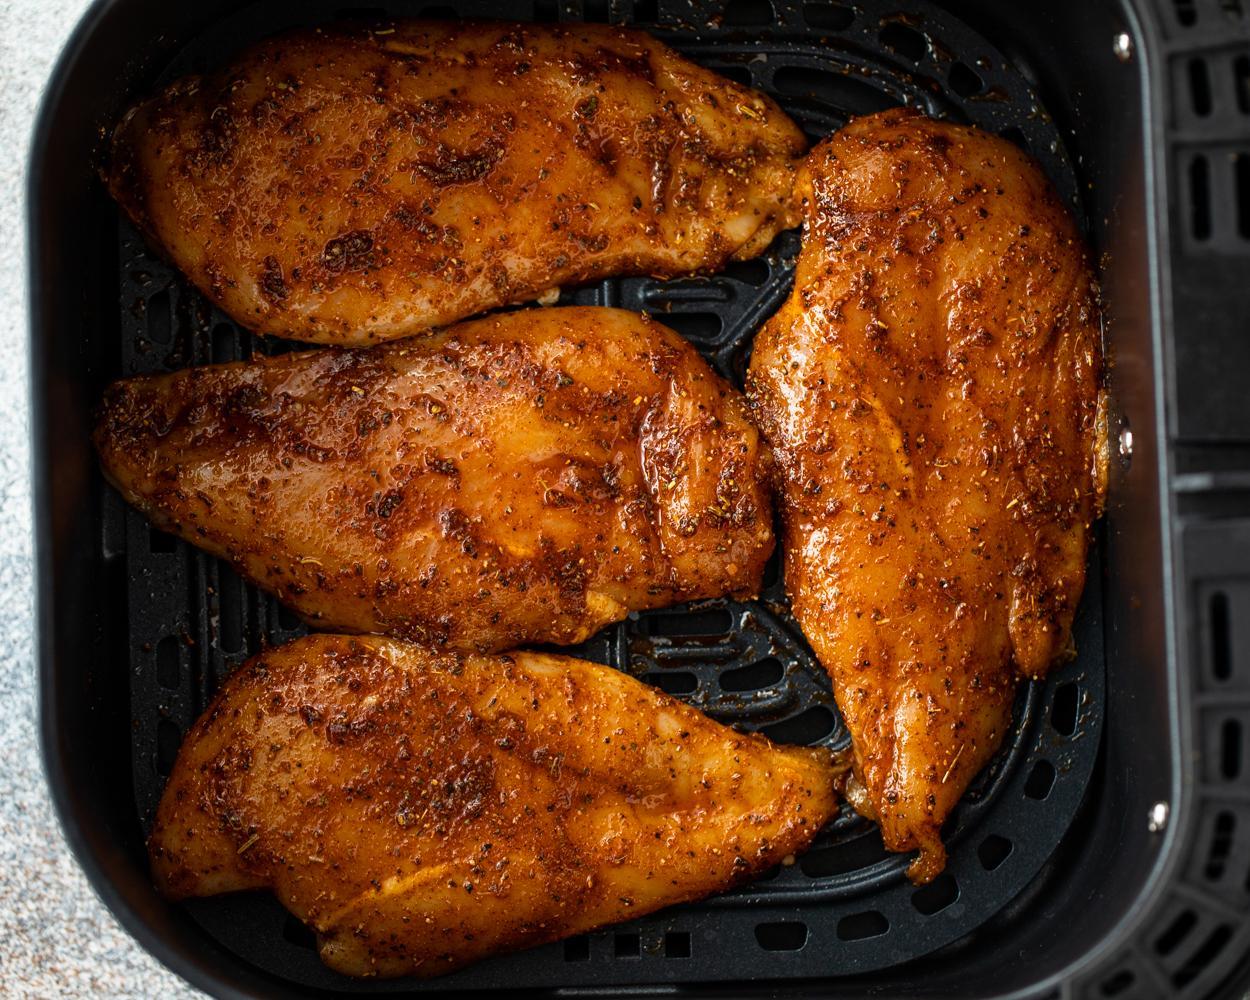
Seasoned chicken breasts in an air fryer basket ⏱ 15 min
Air fryerBatch-friendlyBase method

Air Fryer "Grilled" Chicken

Juicy chicken breast with zero grill and zero babysitting. This is the base protein for half the bowls and handhelds below.

330Cal
50gProtein
0gCarb
13gFat
per 8 oz raw breast + ½ tbsp olive oil
Recipe & variations
Ingredients
  • Boneless skinless chicken breast
  • ½ tbsp olive oil per 8 oz of chicken
  • Seasoning: salt, pepper, smoked paprika, onion powder, garlic powder
Method
  1. Preheat air fryer to 390°F.
  2. Trim excess fat, butterfly the breasts.
  3. Toss in a bowl with the oil and seasoning.
  4. Air fry 9–12 minutes depending on how full the basket is. Cook to 165°F internal; a $10 instant thermometer ends dry-chicken guessing forever.
3 ways to eat it
  • BBQ — slice, toss in 2 tbsp low-carb BBQ sauce; wrap with lettuce and light ranch, or serve over rice
  • Asian — marinate with 2 tbsp soy per 8 oz (skip added salt); serve over rice with G Hughes Sweet Thai Chili and sriracha
  • Buffalo — toss with Frank's; wraps, salads, or with the air-fryer potatoes
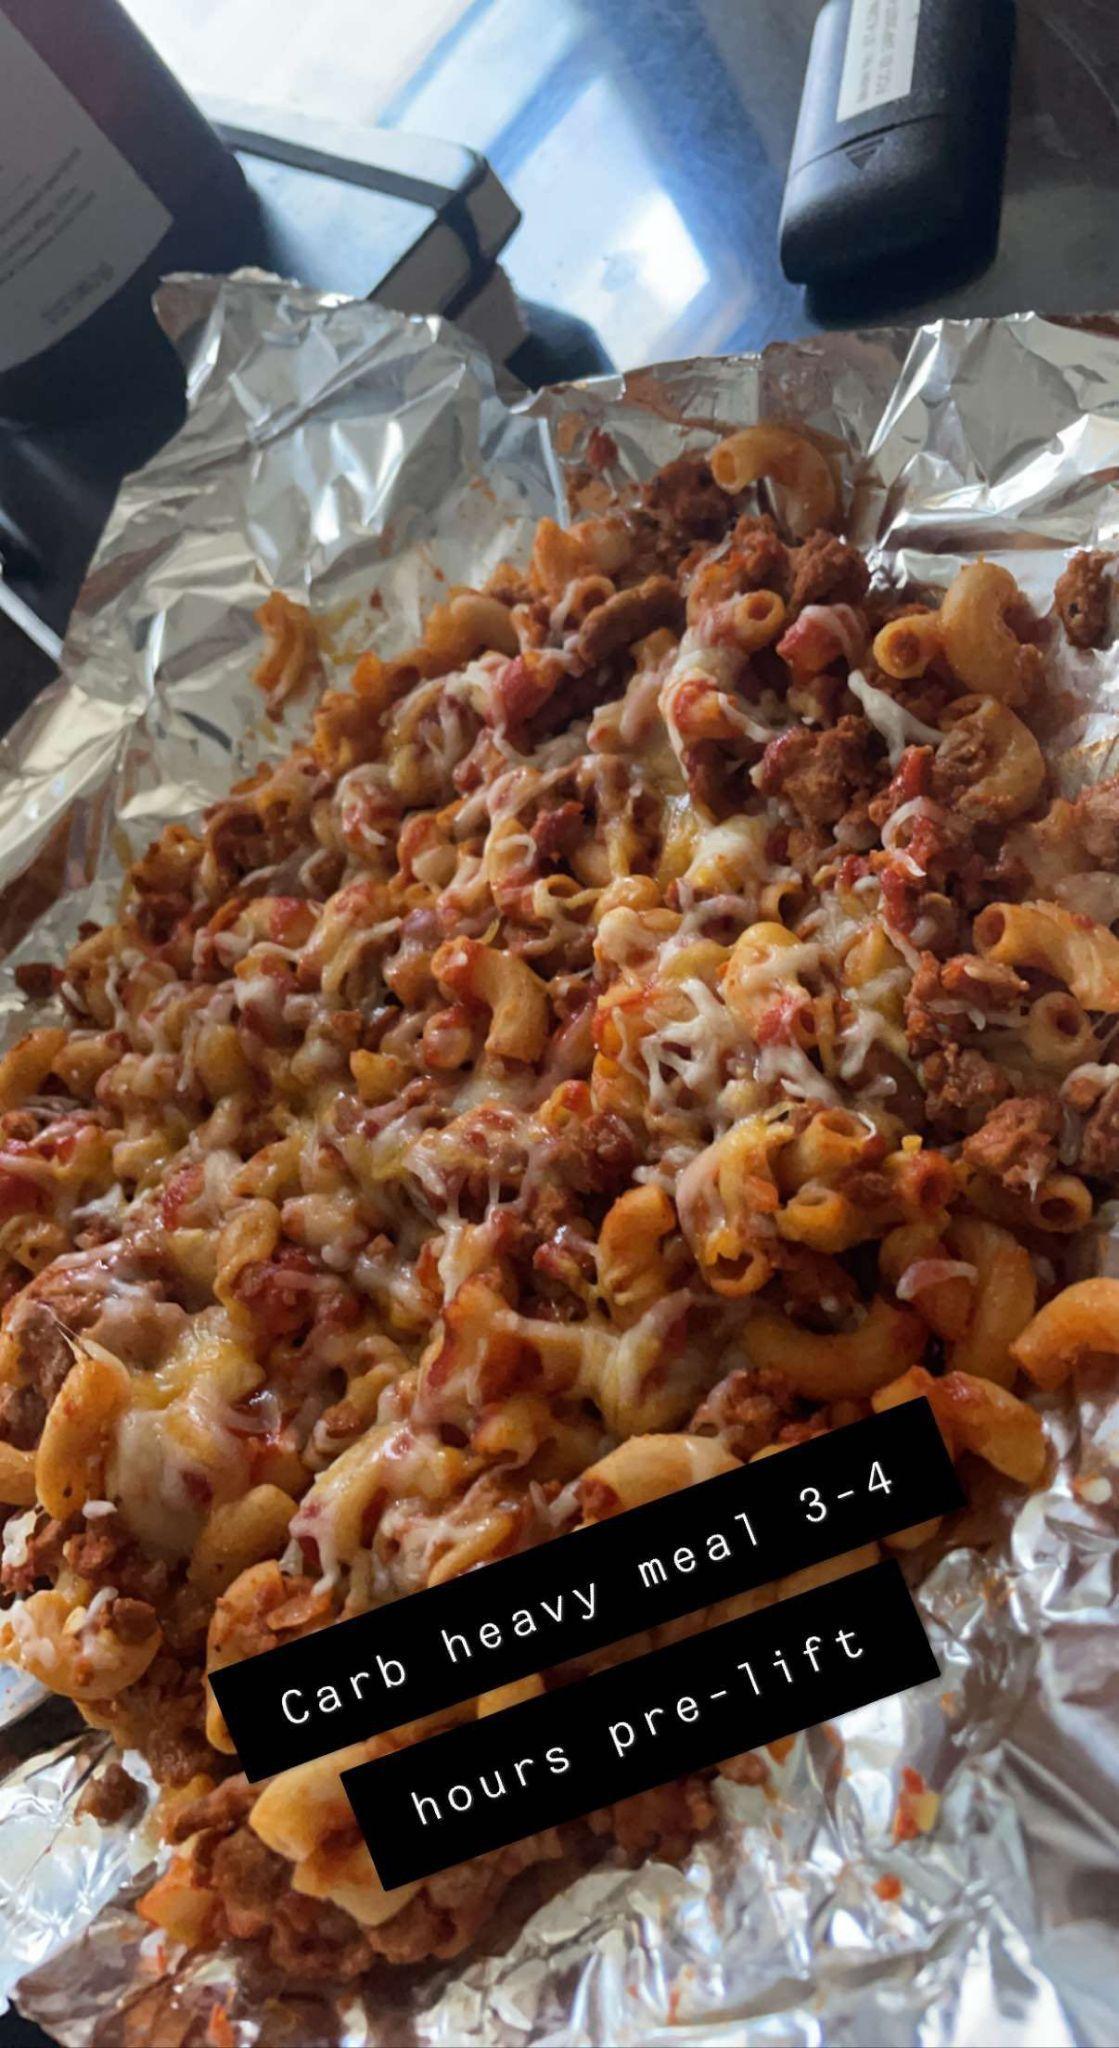
Cutting: drop the oil to a spray coat and save ~50 calories per portion. Bulking: keep the oil, add a rice cooker batch running in parallel.
Large batch of meaty pasta meal prep ⏱ 20 min
Two potsBatch · hugeReheats great

Meaty Pasta Meal Prep

My go-to work-lunch prep. Simple, reheats well, and the macros are balanced enough to build a whole day around.

256Cal
24gProtein
27gCarb
6gFat
per 8 oz serving · the batch makes a fridge-full
Recipe & variations
Ingredients
  • 3 lb tray of 93/7 ground turkey or beef
  • 1 box (14 oz dry) Barilla Protein+ pasta, any shape
  • Two 24-oz jars of marinara-base pasta sauce. I use Prego Italian Sausage & Garlic because it makes the turkey taste like sausage. Skip alfredo and vodka sauces; the fat adds up fast. Check any substitute against Prego's macros.
Method
  1. Boil ~4 quarts of water. Pasta goes in for 9 minutes while the meat cooks in parallel.
  2. Brown the meat in 2 tbsp olive oil over medium-high, 7–12 minutes, breaking up chunks.
  3. Drain the meat, return to the pot, add both jars of sauce. Season to taste (basil, oregano, chipotle chili powder). Simmer 2–3 minutes.
  4. Combine meat sauce with drained pasta in the big pot. Mix. Cool before it goes in the fridge.
Cutting: weigh 8-oz portions; the sauce makes it feel like more food than it is. Bulking: 12-oz portions with a slice of provolone melted on top ≈ 480 calories.
Stack of egg and cheese breakfast sandwiches on English muffins ⏱ 20 min for 6
Oven or skilletBatch · 6 sandwichesFreezer-friendly

Egg McMuffin Meal Prep

Six breakfast sandwiches in 20 minutes, into the freezer, 90 seconds in the microwave on a workday morning. Better macros than the drive-thru and you never leave the house.

280Cal
20gProtein
27gCarb
11gFat
per sandwich
Recipe & variations
Ingredients (makes 6)
  • 6 light English muffins
  • 6 eggs
  • 6 slices Canadian bacon (or turkey sausage patties)
  • 6 slices reduced-fat cheese
Method
  1. Crack the eggs into a greased muffin-top pan or ramekins, break the yolks, bake at 350°F ~12 minutes (or cook rounds in a skillet with an egg ring).
  2. Toast the muffins while the eggs cook. Warm the Canadian bacon in a pan, 1 minute a side.
  3. Stack: muffin, egg, bacon, cheese. Wrap each in parchment or foil.
  4. Fridge for the week or freezer for a month. Reheat 60–90 seconds wrapped in a damp paper towel.
Cutting: swap 3 of the yolks for whites and skip the cheese on half the batch (~220 cal each). Bulking: double the egg or add a second cheese slice; two sandwiches is a legit 560-calorie breakfast.
Teriyaki salmon rice bowl ⏱ 15 min
Air fryerSingle servingOmega-3s

Teriyaki Salmon Bites Bowl

Cubed salmon caramelizes in the air fryer in 6 minutes. Over rice with cucumber it eats like takeout, and salmon is the one protein most lifters don't get enough of.

540Cal
38gProtein
50gCarb
18gFat
per bowl · 6 oz salmon + 1 cup rice
Recipe & variations
Ingredients
  • 6 oz salmon, skin off, cut into 1-inch cubes
  • 2 tbsp teriyaki (G Hughes sugar-free keeps it lean) + 1 tsp sriracha
  • 1 cup cooked jasmine rice (rice cooker or microwave pouch)
  • Cucumber, green onion; edamame if you have it
Method
  1. Toss salmon cubes in half the teriyaki.
  2. Air fry at 400°F for 5–7 minutes, shaking once, until the edges caramelize.
  3. Build the bowl: rice, salmon, cucumber, drizzle the rest of the sauce.
Variations
  • Spicy mayo — 1 tbsp light mayo + sriracha (+50 cal)
  • Cajun — swap teriyaki for cajun seasoning + squeeze of lemon
  • Frozen hack — frozen salmon portions, thawed in cold water in 20 minutes, work fine and cost less
Cutting: ¾ cup rice and sugar-free teriyaki lands ~440. Bulking: 8 oz salmon + 1.5 cups rice clears 700 with elite macros.
Cheeseburger-style bowl with ground beef, lettuce and pickles ⏱ 15 min
SkilletSingle or batchCraving killer

Big Mac Bowl

Everything you actually want from a Big Mac (the beef, the sauce, the pickles) at roughly half the calories and double the protein. The bun was never the good part.

400Cal
38gProtein
10gCarb
22gFat
per bowl · 6 oz 93/7 beef
Recipe & variations
Ingredients
  • 6 oz 93/7 ground beef, seasoned with salt, pepper, onion powder
  • Half a head of iceberg or a bag of shredded lettuce
  • Dill pickle chips, diced white onion, ¼ cup light shredded cheddar
  • Sauce: 2 tbsp plain Greek yogurt + 1 tbsp light mayo + 2 tsp ketchup + 2 tsp sweet relish + splash of pickle juice + paprika
Method
  1. Brown the beef 7–8 minutes, breaking it up. Drain.
  2. Stir the sauce together while the beef cooks.
  3. Bowl it: lettuce, beef, cheese, pickles, onion, sauce on top.
Cutting: 96/4 beef and skip the cheese lands ~300 calories and still tastes like the drive-thru. Bulking: add diced air-fryer potatoes underneath; ~570 and it eats like loaded fries.
Shrimp stir fry with vegetables ⏱ 12 min
One panSingle servingFastest protein here

Honey-Garlic Shrimp Stir-Fry

Shrimp is the fastest protein in the store: frozen to plated in 12 minutes, and the protein-per-calorie is almost unfair.

370Cal
47gProtein
32gCarb
5gFat
per serving, no rice · add 1 cup rice: +200 cal / +45g carb
Recipe & variations
Ingredients
  • 8 oz peeled, deveined shrimp (frozen is fine; 5 minutes under cold water thaws it)
  • 2 cups frozen stir-fry vegetable mix
  • Sauce: 1 tbsp honey + 2 tbsp soy + 2 cloves garlic (jarred minced is fine) + 1 tsp cornstarch + splash of water
  • 1 tsp oil for the pan
Method
  1. Hot pan, oil, vegetables first, 3–4 minutes.
  2. Push veg aside, add shrimp: 90 seconds a side until pink.
  3. Pour the sauce in, toss 1 minute until it glazes. Done.
Variations
  • Spicy — sriracha or chili crisp in the sauce (watch chili crisp, it's oil-heavy)
  • Thai — swap sauce for 2 tbsp G Hughes Sweet Thai Chili
  • Cajun — dry cajun seasoning, no sauce, squeeze of lemon; near-zero carbs
Cutting: as-is over extra veg is one of the leanest full meals in this guide. Bulking: rice underneath and a second sauce batch takes it to ~570 clean calories.
Seared garlic butter steak bites ⏱ 20 min
Air fryer + skilletSingle servingDate-night tier

Garlic-Butter Steak Bites & Potatoes

Steakhouse plate, weeknight timeline. Potatoes go in the air fryer first; the steak needs four minutes at the end.

550Cal
38gProtein
40gCarb
22gFat
per plate · 6 oz sirloin + 8 oz potatoes
Recipe & variations
Ingredients
  • 6 oz top sirloin, cut into 1-inch cubes, patted dry
  • 8 oz potatoes, diced (the air-fryer potato method from Carb Bases below)
  • ½ tbsp butter, 2 cloves garlic, salt, pepper
Method
  1. Start the potatoes in the air fryer: 390°F, 11–12 minutes.
  2. With ~5 minutes left, get a skillet screaming hot. Season the steak.
  3. Sear the cubes 2 minutes untouched, flip, 1–2 more. Don't crowd the pan.
  4. Kill the heat, add butter and garlic, toss 30 seconds. Plate over the potatoes.
Cutting: 5 oz steak, skip the butter, spray the pan: ~420. Bulking: 8 oz steak and the full tablespoon of butter clears 700 and feels like a cheat meal.
Chipotle-style burrito bowl with chicken, beans, corn and salsa ⏱ 10 min assembly
Microwave + fridgeUses batch chickenNo actual cooking

Chipotle-Style Burrito Bowl

This is why you batch. Ten minutes of assembly beats a $14 line, and you control every macro in the bowl.

640Cal
54gProtein
70gCarb
12gFat
per bowl as written · endlessly adjustable
Recipe & variations
Ingredients
  • 5 oz batch chicken (Mexican slow-cooked profile is perfect) or rotisserie chicken
  • 1 microwave rice pouch (90 seconds) or 1 cup rice-cooker rice + squeeze of lime + cilantro
  • ½ cup canned black beans, rinsed
  • Salsa, 2 tbsp guacamole, shredded lettuce
Method
  1. Microwave the rice. Warm the chicken and beans together, ~90 seconds.
  2. Stack the bowl: rice, beans, chicken, salsa, lettuce, guac.
Variations
  • Taco meat version with the ground turkey batch
  • Fajita — sautéed peppers and onions if you have 5 extra minutes
  • Quesabowl — ¼ cup light shredded cheese melted into the hot rice (+80 cal)
Cutting: half the rice, double the lettuce, salsa instead of guac: ~450. Bulking: full guac serving + cheese + extra rice pushes 850 quality calories.
Greek chicken with tzatziki ⏱ 15 min
Uses batch chickenSingle servingFresh + filling

Greek Chicken Bowl

Lemon-oregano chicken, cool tzatziki, cucumber and tomato over rice. Tastes like effort. Isn't.

500Cal
48gProtein
50gCarb
9gFat
per bowl · 5 oz chicken + 1 cup rice
Recipe & variations
Ingredients
  • 5 oz cooked chicken (air-fryer batch, seasoned with oregano, garlic, lemon)
  • 1 cup cooked rice or 1 warmed low-carb pita
  • 3 tbsp store-bought tzatziki
  • Cucumber, cherry tomatoes, red onion, squeeze of lemon
Method
  1. Warm the chicken and rice.
  2. Dice the vegetables while they heat.
  3. Bowl: rice, chicken, veg, tzatziki, lemon over everything.
Variations
  • Wrap it — everything into a big low-carb tortilla; gyro without the gyro math
  • Feta — 2 tbsp crumbled (+50 cal) if you want the real Greek experience
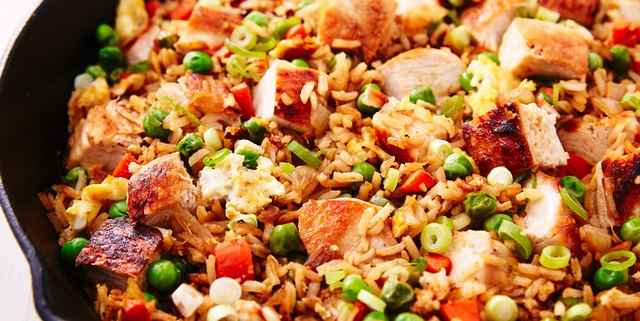
Cutting: swap rice for a chopped cucumber-tomato salad base: ~330. Bulking: add the pita on the side and a full tzatziki serving.
Chicken fried rice with vegetables ⏱ 20 min
Air fryer + panBig single servingLeftover rice hero

Chicken Fried Rice

The best thing that can happen to yesterday's rice. Cold leftover rice fries better than fresh, so this meal is literally built for meal-preppers.

690Cal
58gProtein
65gCarb
22gFat
whole recipe · split it in two for a 345-cal side
Recipe & variations
Ingredients
  • 1 cup cold cooked rice (leftover!)
  • 8 oz chicken breast, diced
  • 2 eggs
  • Frozen broccoli or stir-fry mix
  • Soy sauce, teriyaki, G Hughes Sweet Thai Chili
Method
  1. Toss diced chicken with 1 tbsp oil, salt, pepper, dash of soy. Air fry at 390°F for 8–11 minutes to 165°F; throw the broccoli in for the last 3–5.
  2. Heat 2 tbsp oil in a pan on high. Add the cold rice in a ring, leaving a hole in the middle.
  3. After 1–2 minutes, crack the eggs into the center. Drizzle soy over the rice as it fries.
  4. Scramble, stir everything together, add chicken and broccoli, 1–2 minutes on medium.
  5. Finish with a drizzle of Sweet Thai Chili, off the heat.
Cutting: 1 tbsp oil instead of 2 and one egg saves ~160 calories. Bulking: as written, plus an extra egg. It's already a monster.
Toasted quesadilla cut in half on a plate ⏱ 10 min
Pan or panini pressUses batch chickenSingle serving

Buffalo Chicken Quesadilla

Crispy, cheesy, spicy, and 48 grams of protein hiding in a low-carb tortilla. The batch chicken makes this a 10-minute meal.

400Cal
48gProtein
17gCarb
12gFat
per quesadilla
Recipe & variations
Ingredients
  • 1 large low-carb tortilla (La Banderita Carb Counter)
  • 4 oz buffalo slow-cooked chicken, warmed
  • ⅓ cup reduced-fat shredded mozzarella
  • Light ranch + extra Frank's for dipping
Method
  1. Medium heat, dry pan. Tortilla down, cheese on one half, chicken on the cheese.
  2. Fold, press with a spatula. 2–3 minutes a side until golden and the cheese melts.
  3. Rest 1 minute (saves the roof of your mouth), slice, dip.
Variations
  • BBQ chicken + red onion
  • Taco meat + salsa for dipping
  • Breakfast — scrambled eggs + Canadian bacon
Cutting: ¼ cup cheese and dip in salsa instead of ranch: ~340. Bulking: make it a double-decker with a second tortilla and 2 more oz of chicken.
Crispy chicken sandwich with lettuce and pickles ⏱ 20 min
Air fryerSingle servingFakeaway

Crispy Chicken Sandwich

Air-fried panko chicken that crunches like the fast-food version at a fraction of the fat. This one converts people.

480Cal
47gProtein
40gCarb
12gFat
per sandwich · 6 oz breast
Recipe & variations
Ingredients
  • 6 oz chicken breast, butterflied flat
  • ¼ cup panko + smoked paprika, garlic powder, salt, pepper
  • 1 egg, beaten (you'll use about half)
  • Potato bun, pickles, shredded lettuce, 1 tbsp light mayo (+ Frank's for spicy)
  • Oil spray
Method
  1. Dredge: chicken through egg, then press into the seasoned panko on both sides.
  2. Spray both sides with oil. Air fry at 390°F, 10–12 minutes, flipping once, to 165°F.
  3. Toast the bun in the air fryer for the last minute.
  4. Mayo, pickles, chicken, lettuce. Done.
Cutting: lettuce-wrap it or use a low-carb tortilla: ~370. Bulking: add a slice of pepper jack and run the air-fryer potatoes as fries on the side.
Tuna melt on toasted bread ⏱ 8 min
One panSingle servingPantry meal

Tuna Melt Wrap

The 8-minute emergency lunch. Everything in it lives in your pantry, and 40 grams of protein for 320 calories is hard to beat anywhere.

320Cal
40gProtein
16gCarb
11gFat
per wrap
Recipe & variations
Ingredients
  • 2 pouches tuna (or 1 large can, drained)
  • 1 tbsp light mayo + squirt of mustard + diced pickle or relish
  • 1 slice provolone
  • 1 large low-carb tortilla
Method
  1. Mix tuna, mayo, mustard, pickle.
  2. Tortilla in a dry pan on medium. Cheese down first, tuna on top, fold.
  3. 2–3 minutes a side until crispy and melted.
Variations
  • Spicy — sriracha in the tuna mix
  • Rice cake stack — skip the tortilla, pile it on 2 rice cakes cold
  • Chicken — canned chicken works identically
Cutting: Greek yogurt instead of mayo: ~280. Bulking: double the cheese and add a side of fruit; still a lean 500.
Flatbread pizza ⏱ 12 min
Air fryer or ovenSingle servingPizza night, saved

High-Protein Pizza

Low-carb pita crust, real melted mozzarella, turkey pepperoni. Twelve minutes, 30 grams of protein, and pizza night stops being a diet problem.

360Cal
30gProtein
22gCarb
15gFat
per pizza
Recipe & variations
Ingredients
  • 1 low-carb pita or lavash (Joseph's is the classic)
  • ¼ cup pizza sauce
  • ½ cup part-skim shredded mozzarella
  • 15 turkey pepperoni slices
  • Oregano, chili flakes
Method
  1. Crisp the naked pita in the air fryer at 380°F for 2 minutes so the crust doesn't go soggy.
  2. Sauce, cheese, pepperoni. Back in for 4–6 minutes until bubbling.
  3. Rest a minute, slice.
Variations
  • Buffalo chicken — batch chicken + Frank's instead of sauce and pepperoni
  • The viral one — blend 1 cup cottage cheese + 2 eggs, bake into a flatbread crust at 350°F for ~25 min. Only ~5 minutes of hands-on time, but plan for the bake. Worth trying once; the macros are absurd (~48g protein).

Cutting: ⅓ cup cheese: ~300. Bulking: make two. Nobody's ever been sad about that.
Potato and egg skillet with sunny-side-up eggs ⏱ 20 min
Air fryer + skilletSingle servingWeekend breakfast

Potato-Egg Skillet

Crispy air-fried potatoes folded into eggs. The weekend breakfast that keeps you full past noon, and it happily absorbs any leftover batch meat.

590Cal
38gProtein
42gCarb
25gFat
per skillet as written
Recipe & variations
Ingredients
  • 8 oz russet potato, diced
  • 3 whole eggs + 150 g egg whites (use less if adding meat)
  • 1 tbsp extra virgin olive oil + oil spray for the pan
  • Salt, pepper, onion powder, smoked paprika
  • Optional: 4 oz leftover taco meat or chicken; sautéed bell peppers
Method
  1. Toss diced potatoes with the oil and seasoning, air fry at 390°F for 10–12 minutes.
  2. Meanwhile: skillet on medium-high with a spray of oil.
  3. Cook the eggs and whites your way (I scramble).
  4. Combine potatoes and eggs, top with salsa, hot sauce, guac, or low-sugar ketchup.
Cutting: 2 whole eggs + extra whites and half the oil: ~450. Bulking: add the 4 oz of taco meat: ~760 and it eats like a diner platter.
French toast stack with berries ⏱ 12 min
SkilletSingle servingTastes like a cheat

High-Protein French Toast

Protein powder goes in the batter, so the french toast itself carries 37 grams. Weekend-breakfast taste on a weekday timeline.

430Cal
37gProtein
48gCarb
8gFat
per 2-slice stack with syrup and berries
Recipe & variations
Ingredients
  • 2 slices of a hearty high-fiber bread (Dave's Killer Bread thin-sliced works great)
  • Batter: 1 egg + 100 g egg whites + ½ scoop vanilla whey + cinnamon + splash of almond milk
  • Sugar-free syrup, handful of berries
  • Oil spray
Method
  1. Whisk the batter until the whey fully dissolves (lumps burn).
  2. Soak each slice ~20 seconds a side.
  3. Medium heat, sprayed pan, 2–3 minutes a side until golden.
  4. Syrup, berries, done.
Cutting: one thick slice, same batter; the extra egg white coat makes it eat like two. Bulking: three slices + a full scoop in the batter clears 600 with over 50g protein.
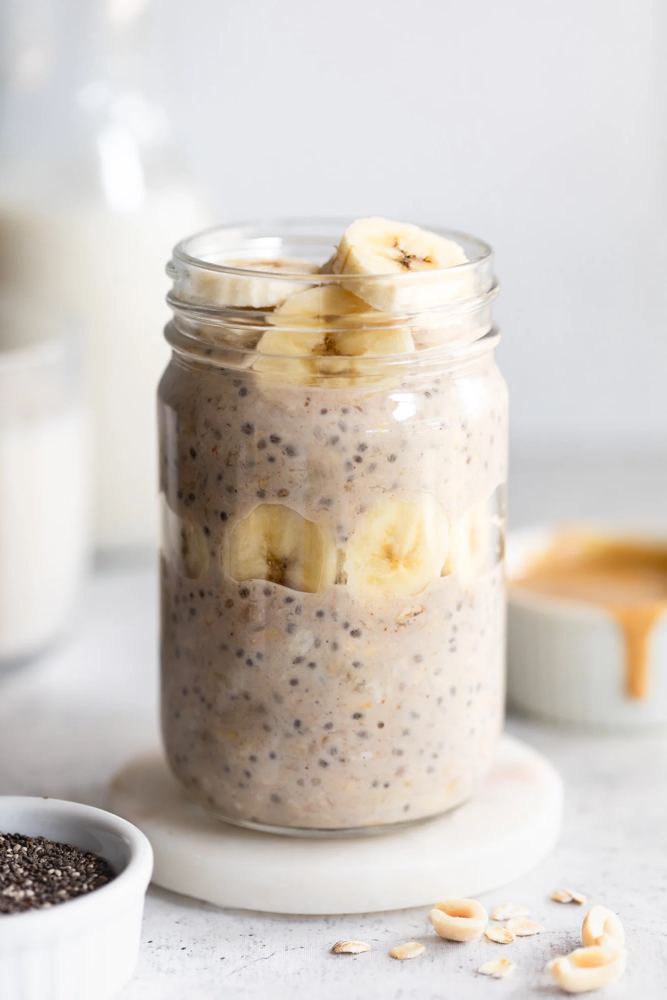
Overnight oats in a mason jar topped with banana ⏱ 5 min + fridge overnight
No cookingPrep 3–4 at onceGrab and go

Overnight Oats

Five minutes tonight, breakfast waiting when the alarm goes off. Make three jars on Sunday and the week's mornings are handled.

455Cal
45gProtein
40gCarb
9gFat
per jar
Recipe & variations
Ingredients
  • 1 Oikos Triple Zero Greek yogurt cup (any flavor)
  • ½ cup old-fashioned oats
  • ½ cup unsweetened vanilla almond milk
  • 1 scoop vanilla or chocolate whey
  • 1 tbsp chia seeds (optional, big texture upgrade)
  • Airtight jar or tupperware
Method
  1. Mix everything in the jar.
  2. Fridge overnight.
  3. Top with sliced fruit or berries in the morning if you want.

Cutting: ⅓ cup oats and skip the chia: ~360. Bulking: full cup of oats + 1 tbsp peanut butter: ~650 of easy calories.
Vanilla protein milkshake in a tall glass ⏱ 5 min
BlenderSingle servingDessert insurance

Protein Milkshake

Tastes like a milkshake, tracks like a shake. This is what stands between you and the ice cream aisle at 9pm.

230Cal
28gProtein
9gCarb
10gFat
per shake · +60 cal with PBfit
Recipe & variations
Ingredients
  • 2 cups unsweetened vanilla almond milk
  • 3 tbsp Breyers Carb Smart ice cream (vanilla or chocolate; Walmart carries it)
  • 1 scoop vanilla or chocolate whey
  • 2–3 ice cubes
  • Optional: 2 tbsp PBfit powdered peanut butter
Method
  1. Everything in the blender cup, powders last so they don't cake at the bottom.
  2. Blend. That's it.
Pro move: pair with Quaker chocolate rice cakes when the sweet tooth is serious. Bulking: a frozen banana and real peanut butter turns this into a 500-calorie mass shake.
🍚

Carb Bases on Autopilot

Set & forget

Half the meals above sit on rice or potatoes. Master these two methods and your carbs cook themselves while you handle the protein.

🍚 Rice Cooker Rice

Fresh white rice in a rice cooker pot
  • Get a rice cooker. Cheap, perfect rice every time, and it holds it warm. If you're already good with a pot, carry on.
  • Which rice? Basmati or jasmine for white, regular brown if you want more fiber. Neither is "healthier"; white digests faster (good around workouts), brown keeps you fuller. Eat the one you digest well and enjoy.
  • Method: rinse 2 cups of rice until the water runs mostly clear. Drain, add 2 cups water (1:1 ratio at any batch size), 1 tbsp olive oil, dash of salt. I add onion and garlic powder for the aroma. Press the button, wait for the beep.
  • Macros: ~200 cal and 45g carbs per cooked cup.
🥔 Air Fryer Potatoes
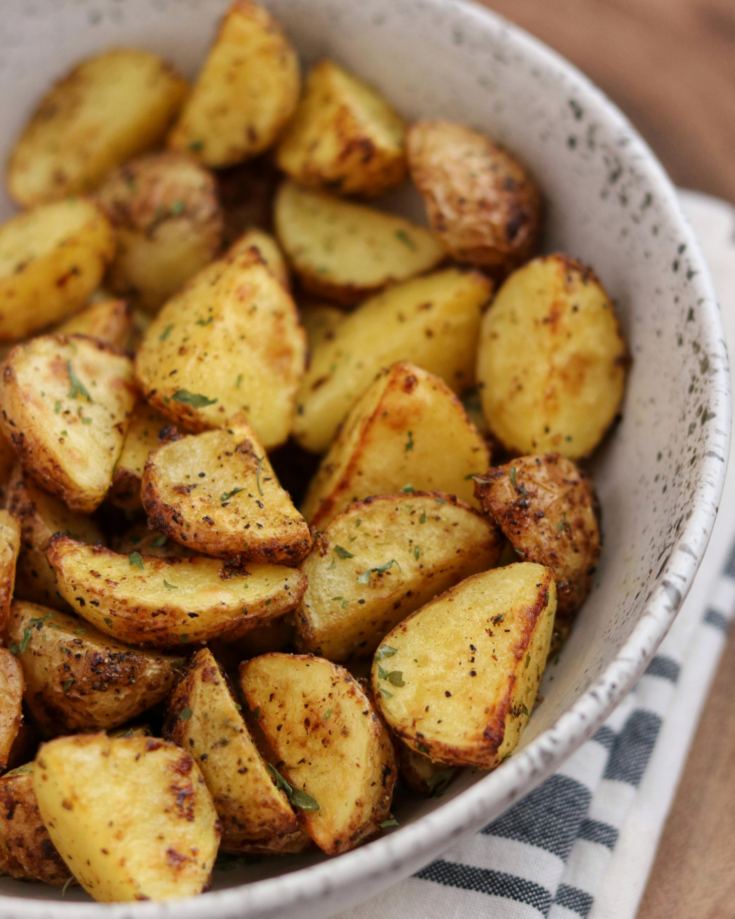
Crispy seasoned air fryer potato wedges
  • Russets are my pick — cheap and they crisp beautifully. Any variety works.
  • Method: peel or scrub 10 oz (2 medium), cut into fries, wedges, or dice. Toss with 1–2 tbsp olive oil, salt, pepper, onion/garlic powder, smoked paprika, chipotle chili powder. 390°F for 11–12 minutes; shake the basket at the halfway mark.
  • The rules: thinner cuts cook faster, a little oil goes a long way, and keep it to a single layer. A packed basket steams instead of crisping and takes forever.
  • Macros: ~220 cal per 10 oz with 1 tbsp oil.
Worst-Day BackupMicrowave rice pouches: 90 seconds, ~220 calories per cup, and no excuse left. Keep three in the pantry and the "no time to cook" argument is over.
📲

Want More Ideas?

Go deeper

My recipes are built for "simple, quick, easy." These creators specialize in mouthwatering high-protein meal prep when you want to expand the rotation: @cooklikeimbook (amazing high-protein, low-calorie prep), @stealth_health_life, @theflexibledietinglifestyle, @jalalsamfit, @fairfiteats, @cookingforgains_, @_aussiefitness, and @panaceapalm. Steal their ideas, run the macros, and check the Grocery & Meal Prep guide for the sauce and seasoning playbook that levels all of this up.

Want the macros done for you?

These meals are the how. In 1:1 coaching I set your exact calories and protein targets, fit them to your schedule, and adjust as your body changes, so all you do is cook and eat.

Apply for 1:1 Coaching →

FOUNDATIONS

How Muscle Actually Grows

There is exactly one driver of muscle growth from exercise: mechanical tension. Everything else — volume, frequency, exercise selection — only makes sense once you understand the single clean chain of logic that turns effort into new muscle.

💡
Why this matters: Wrap your brain around these foundations and you’ll know more than the vast majority of personal trainers — 99% of them, and even more than a lot of physiotherapists. This is prerequisite reading before any intelligent conversation about volume or frequency.

Mechanical Tension, The One Driver of Growth

start here

The whole game — when it comes to exercise, the main driver of muscle growth is mechanical tension, and there’s just one thing. Mechanical tension is simply a pulling force on your muscle fibers. (Other non-exercise pathways exist — anabolic steroids let you sit on a couch and put on muscle — but that’s not what we’re doing here.)

When you perform a movement, your brain sends an electrical signal to a muscle to switch it on, and it starts contracting. The fibers sense that pulling force — likely via a little structure called titin — and through mechanotransduction the mechanical signal is translated into the chemical, downstream processes that actually build muscle. That’s the entire event we’re trying to create.

So the goal of a good training approach is blunt: maximize tension while minimizing muscle damage. Which brings us to two things people thought caused growth but don’t.

“We tear our muscles down to build them back bigger.”

The most detrimental myth of the bunch. Muscle damage just comes along for the ride — you can’t experience high mechanical tension without some damage — so researchers saw damage next to growth and assumed causation. It was correlation, not causation, and it’s been largely disproven. No, we don’t tear our muscles down to build them back bigger — that’s flawed logic. Excessive damage actually gets in the way of growing.

“The pump and the burn are what grow the muscle.”

That’s metabolic stress — the burning sensation from prolonged or numerous contractions. Chasing the pump, the burn, or excessive soreness — just trying to annihilate the muscle — is not a good strategy. Feeling destroyed is not the same as having grown.

The Chain of Logic

4 principles

Here is the whole thing, start to finish. Follow it in order — each link depends on the one before it.

1

A Fiber Must Be Turned On To Experience Significant Mechanical Tension

Passive tension is real: stretch a muscle hard enough and fibers can experience force even without actively contracting. In normal strength training, the growth-relevant tension comes from fibers that are switched on and contracting. Your brain generates the Central Motor Command, an electrical signal whose size is directly correlated to how much muscle fiber gets recruited, and it tracks very closely with your effort. Lifting your arm is a small signal and low recruitment; heaving an 80-lb dumbbell is “all hands on deck” — a big command that lights up as much muscle as it can.

2

Motor units fire in a specific order: smallest to largest

A motor unit is a group of fibers the brain controls together, because wiring up thousands of individual fibers would be hopelessly inefficient — one light switch for a whole group of them. Recruitment follows a very specific order: smallest to largest. It’s all-or-nothing per unit and cumulative — if unit #9 is on, then 8 through 1 are on too. The small units are mostly type one fibers used for daily life (walking, picking up a cup); the larger type two fibers are reserved for strenuous work and are the last to switch on. The brain won’t jump to the biggest unit to lift a cup — it turns on only what it needs.

3

Force-velocity dictates tension on a single fiber

For a single fiber, slower contraction means higher tension: high velocity → low force, slow velocity → large force. The slower that fiber is moving while it contracts, the more tension it experiences.

4

Growth happens when high effort meets slow speed

You need both at once: a high degree of effort to turn on as many muscle fibers as possible, and a slow contraction speed so those fibers experience high levels of mechanical tension. Those special reps, or stimulating reps, happen toward the end of a set taken to failure.

“Lift slowly to put more tension on the fibers.”

You cannot control velocity without controlling effort. Tell someone to move slowly and they do it by reducing effort → reducing central command → lower recruitment — switching off exactly the high-threshold fibers they were trying to train. The slowdown has to be involuntary. The zone where high recruitment and slow speed coincide on their own is roughly the last 4–6 “stimulating” reps before failure.

Which Fibers Actually Grow

Because a fiber must be activated to experience significant tension during strength training, growing all of your muscle means turning all of it on. But the fibers don’t share the workload — or the upside — equally.

First ~50% Type One
MOSTLY MAXED
The first half of your fibers live in the small motor units used all day. About the first ~50% are largely maxed out just from daily life.
Next ~50% Type One
TRAINABLE
The remaining type ones still have room — they’re trainable, but they grow a bit and then they’re done.
Type Two
BIGGEST UPSIDE
The larger, more glycolytic fibers. Very trainable with a far bigger capacity to grow — the vast majority of a training career’s growth happens here.
SIGNATURE MODEL

The Stimulating Reps Model

You’ll hear the one-liner “train hard to grow — blood, sweat and tears.” I don’t disagree with the sentiment, but it’s vague. The better questions are how hard, and where exactly does growth happen? Answer that and you can apply intensity precisely and efficiently.

The model: in a single set taken to failure in a non-fatigued state, the last 4 to 6 reps are the effective, stimulating reps — simplified to five reps. Take a 12-rep max on curls: the first 7 reps are more or less a warmup without much growth stimulus, and reps 8 through 12 are where the vast majority of the growth is triggered.

WHY THOSE REPS ARE SPECIALTwo things must happen at the same time on those last reps: a slowing of contraction velocity (high tension per fiber, via force-velocity) and a high degree of motor unit recruitment (a large percentage of the muscle’s fibers switched on). Both together — which is exactly why intentionally slow reps fail: they sacrifice the recruitment half.

THE MODEL IS A MODELThink of a 5-rep-max set as roughly 20% / 40% / 60% / 80% / 100% of stimulus across its five reps — a rough thought anchor, not hard numbers, since we’ll never actually know. It could be 3, 4, or 7 reps rather than exactly 4–6. Models aren’t supposed to be perfect, but this is the best we have so far.

The Limiter: Fatigue

The boogie monster — fatigue is a temporary, reversible reduction in exercise performance caused by a previous bout of exercise. If you normally bench 255, run a 400m sprint and then try immediately — no chance (unless you’re an extremely conditioned athlete). Rest 30 minutes and you might hit it. The performance didn’t vanish; it was temporarily blocked.

What fatigue does to growth is the important part: at a high level it gets in the way of your ability to recruit motor units. If you can’t turn fibers on, they can’t experience tension, so they can’t grow. That’s why stacking sets has steep diminishing returns — as fatigue builds, later sets carry fewer and fewer stimulating reps.

The stimulus side of this industry is well understood by now. The fatigue side isn’t, and it’s what actually dictates how much training is productive before I’m shooting myself in the foot. Managing fatigue is where advanced programming lives.

Want this applied to your training?

The theory is only useful if you can apply it. I’ll build you a program that turns tension, recruitment, and fatigue into real muscle — with the least wasted input.

Apply for 1:1 Coaching →
THE SCIENCE · NUTRITION

Nutrition Science, Actually

Build a diet the way you'd build a house: lay the foundation first, then work up one layer at a time. The foundation is energy balance. On top of it sit macros, then micros, then supplements. Get the order right and most of the arguments people have about food stop mattering.

💡
How this reads: four layers, bottom to top — Energy Balance → Macros → Micros → Supplements. Calories set how much weight you gain or lose. Protein sets the quality of it. Micros and supplements fine-tune your health and results at the margins. That's the chapter order below.

The Energy Balance Foundation

layer 1

A calorie is a unit of energy, nothing more. Your weight tracks one equation: energy in minus energy out. Eat more than you burn and you're in a surplus; burn more than you eat and you're in a deficit. Intake is the simple half of that equation and the half you actually control. "Energy out" is the complicated half, and it breaks into four pieces (your TDEE, total daily energy expenditure):

1

BMR — about 70%

Your basal metabolic rate: what you'd burn lying on the couch all day just breathing, running your organs, and maintaining the muscle you carry. It's the vast majority of the number, which is why adding muscle is one of the few real levers on the "out" side.

2

NEAT — about 20%

Non-exercise activity thermogenesis: fidgeting, walking to your car, carrying groceries, pacing on a call. It varies a lot between people, but it's a much bigger slice than the thing everyone reaches for first.

3

TEF — the cost of digesting

The thermic effect of food. It takes energy to break food down, and protein carries the highest thermic effect of the macros, so you burn a little more just eating it. A small edge, but a real one.

4

EAT — only 5 to 10%

Exercise activity thermogenesis: the calories you burn actually training, gym and cardio included. Maybe 15% if you're very active. This is the sliver most people try to run their whole fat-loss plan through.

"Do more cardio to burn off the fat."

Exercise is only about 5 to 10% of what you burn in a day. Trying to out-run your diet through that tiny slice is a weak strategy, and thinking about food as "hours on the treadmill" is the wrong frame entirely. Control what you eat, and lift to build the muscle that raises your BMR. That's where the leverage lives.

Once you've found roughly where maintenance sits (a TDEE calculator gets you a ballpark; weigh in daily for a few weeks and adjust by 200 to 300 calories based on the trend), you point it at a goal:

Bulk
+200 TO 500 CAL
A surplus of 200 to 500 calories, and 200 to 300 is likely the sweet spot. Muscle is built slowly, so a bigger surplus just adds fat, not more muscle.
Cut
−300 TO 500 CAL
A deficit of 300 to 500. Most of the loss comes off as fat, and you're far less likely to bounce back. A 1,000-calorie crash deficit strips scale weight fast but takes real muscle with it.
Recomp
AT MAINTENANCE
Eat around maintenance, keep protein high, lift hard. Untrained and heavier lifters can lose fat and build muscle at once. Trained lifters can too; it just moves slower. Low and slow is the way to go.
"Dirty bulk now, cut later — and slam protein in the anabolic window."

A surplus past 500 calories is fat gain, full stop. And the anabolic window (protein within 20 minutes or you lose the gains) was a story told to sell more protein powder. As long as you eat within roughly four hours on either side of training, timing barely registers. If you train fasted first thing, just eat when you get back.

Protein & The Macro Ratio Myth

layer 2

Calories decide how much weight moves. Macros decide the quality of that movement, meaning the ratio of muscle to fat you gain or lose, and protein is the lever that matters most. It's necessary to build muscle and to hold onto it while you're cutting, it keeps you full, and it speeds recovery. Set it by goal:

Protein target

Bulking, aim for 0.8 to 1 g per pound of bodyweight, with 1 g/lb as the clean rule of thumb. Cutting, push it to 1.0 to 1.2 g/lb, and up to 1.4 g/lb if you're already lean and deep in an aggressive cut. If you're carrying a lot of excess weight (say 400 lb), scale off your goal bodyweight instead: 1 g per pound of target weight, or about 0.6 g/lb of current weight.

Fat floor

Keep fat at a minimum of 0.3 g per pound of bodyweight for hormonal health, and don't drop below 0.25 g/lb even in a hard cut. You'll almost always clear this floor just from eating enough protein, so it rarely becomes a fight.

That leaves the carbs-versus-fats argument everyone loves to have. Once protein and the fat floor are set, whatever calories remain can go mostly to carbs, mostly to fat, or split evenly, and the outcome barely budges. The evidence for that is stronger than most people realize, so it's worth laying out properly.

THE EVIDENCE STACK

Why The Carb-to-Fat Ratio Barely Matters

This is only about carbs versus fats. Calories, protein, and fiber still matter and are worth tracking. What the research buys you is freedom from agonizing over the exact split of the calories left after those are set.

TIGHTLY CONTROLLED FEEDING — HALL 2017A meta-analysis of 32 controlled feeding studies that matched calories and protein and varied only carbs and fats. The high-carb group burned 26 more calories a day and about 16 g more fat. Statistically real, practically about a bite of bread.

TWO-YEAR REAL WORLD — SACKS 2009Over 800 people, four macro splits, two years. No meaningful difference in weight loss between groups. The strongest predictor of who succeeded wasn't the split at all; it was how often they showed up to their counseling sessions. Adherence beat macro math.

A YEAR OF LOW-CARB VS LOW-FAT — GARDNER 2018 (DIETFITS)609 people, twelve months, healthy low-carb against healthy low-fat. No difference in body-fat percentage, waist circumference, insulin sensitivity, or blood pressure. Any extra scale weight the low-carb side dropped was likely water and lean mass, since lower carbs empty glycogen and glycogen holds water.

"BUT MY GLYCOGEN"A normal lifting session depletes only about 21% of muscle glycogen, leaving you well clear of the ~250 mmol/kg range where it might start to matter. Depletion becomes a real concern for elite, very-high-volume athletes, not for someone hitting chest and back after work. For normal lifters it's a non-issue.

So if you train once a day and your sessions aren't marathon-length, nail calories, protein, and fiber, then set carbs and fats to whatever fits your life. If you're training twice a day or doing serious endurance work on top of lifting, lean the leftover calories toward carbs.

Fiber — The Most Underrated Nutrient

layer 2 · the sleeper

Fiber is the most underrated nutrient in the fitness space, and it isn't close. It's a carbohydrate your body can't fully break down, so it passes through largely intact and you absorb little of its energy. It comes in two forms that do different jobs. Soluble fiber (oats, apples, flax, psyllium) forms a gel that slows digestion and improves LDL cholesterol and blood sugar control. Insoluble fiber (whole wheat, vegetables, nuts, seeds) keeps you regular, feeds your gut bacteria, and appears to be the main driver behind lower colon cancer risk.

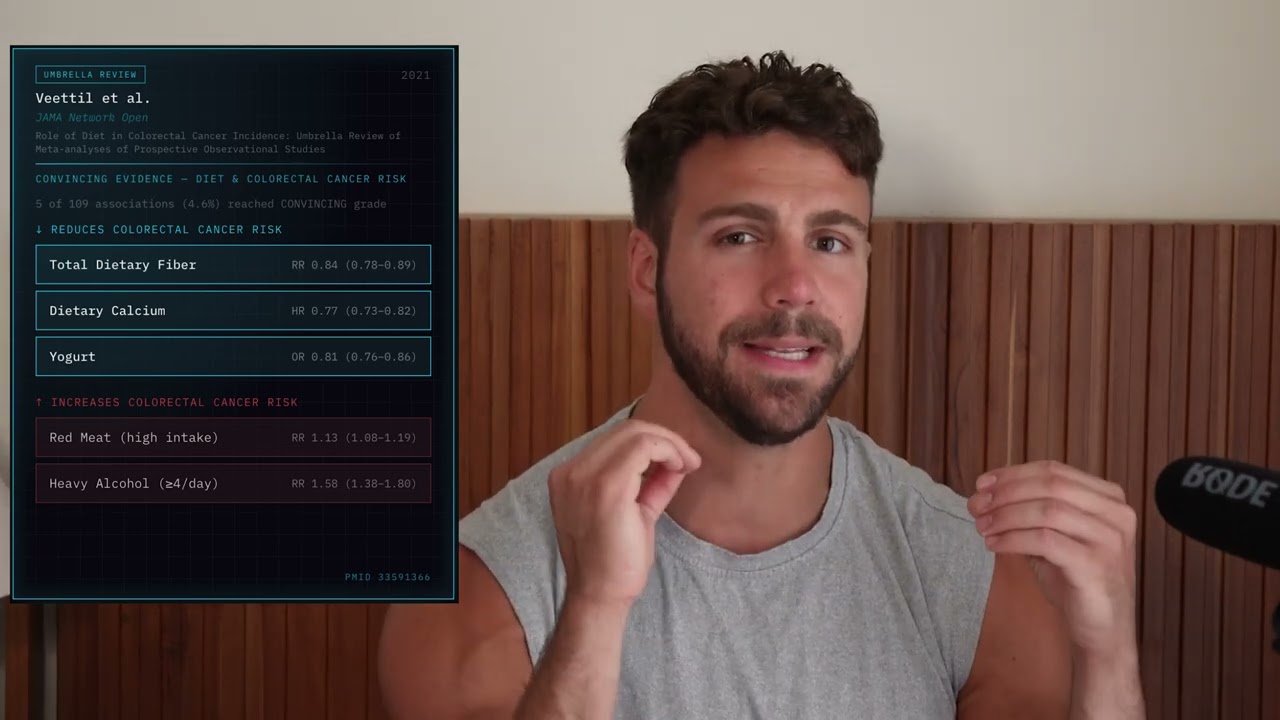
The health evidence is genuinely striking. Reynolds 2019 pooled 185 studies across more than 135 million person-years and found the highest fiber consumers had a 15 to 30% lower risk of dying from anything. Park 2011 tracked 31,000 deaths over nine years and saw a 22% drop in all-cause mortality plus a 56% drop in death from cardiovascular, respiratory, and infectious disease. For cancer, the dose-response is clean: every 10 g of added fiber lowers colorectal cancer risk by about 10%. Type 2 diabetes and inflammation move in the same direction. An umbrella review graded the mortality and CVD findings as "convincing evidence," the top tier in this field.

It's also a quietly powerful fat-loss tool, through appetite. Fiber slows how fast food leaves your stomach and stimulates GLP-1, the fullness hormone that the newer weight-loss drugs target. The practical payoff showed up in a 2001 finding: every 14 g increase in fiber cut spontaneous calorie intake by about 10%. Go from almost none to 28 g and people ate roughly 20% less without being told to. That can be the whole difference between a surplus and a deficit.

The Floor
14 g / 1000 CAL
The standard minimum (2,000 cal → 28 g). It comes from a government policy number built mostly around heart-disease risk. Treat it as the floor, not the target.
The Benefit Zone
25 TO 29 g
Where you capture most of the all-cause-mortality and cardiovascular payoff. The dose-response curves don't clearly plateau, so more still tends to help.
The Ceiling
YOUR GUT
As much as you tolerate without getting bloated and gassy. During a cut, lean on vegetables and low-calorie fruit like strawberries and watermelon to stay full for almost no calories.

Supplementation That Actually Works

layer 4

Two supplements clear the evidence bar decisively. For years I ranked creatine at the top, and it's still elite. After going through the full body of fish oil research, fish oil has passed it as my single top pick. That's an update to the ranking as the evidence came in, not a contradiction, and fish oil doesn't replace creatine; if I could only keep one, I'd keep the fish oil.

Creatine monohydrate — 3 to 5 g/day, everyone

The most researched sports supplement there is. Safe, and it reliably raises power, strength, and muscle over time, with emerging cognitive upside on top. Take 3 to 5 g every day; miss a day, take it the next. Stick to plain monohydrate. The exotic forms like HCl are marketing, not better results.

Fish oil — 2 to 4 g EPA+DHA/day, with a fatty meal

The health case is broad (heart, brain, mood, joints, sleep, insulin sensitivity), and the training case is real too: higher muscle protein synthesis capacity, less muscle lost during forced layoffs, direct 1RM gains, and lower muscle-damage markers. Aim for 2 to 4 g of combined EPA and DHA at roughly a 2:1 ratio, taken with a meal containing fat to absorb it. Read the back label for actual EPA and DHA milligrams, not the big "total fish oil" number on the front. Dose it consistently for at least four weeks; it does nothing the morning of. Cap it around 5 g total and never exceed 4 g of pure EPA, which can raise atrial fibrillation risk.

"The label says what's in the bottle."

Supplements aren't FDA-regulated, and nobody's checking that the label matches the contents. One study bought 30 products off Amazon and found 17 of 30 mislabeled: 13 listed ingredients that weren't in the product, 9 had ingredients that weren't listed. Only buy third-party tested products, where an outside lab verifies what's actually inside. Search "[brand] third party tested" before you trust it.

Micronutrients — The Quiet Optimizers

layer 3

Micronutrients are the vitamins and minerals you need in small amounts, and if you eat mostly whole foods while hitting your calories and protein, they largely take care of themselves. Five deficiencies show up most often in lifters and the general population, and each has a fix on your plate before it needs a pill:

Vitamin D
FATIGUE · WEAKNESS
Low D shows up as fatigue, bone pain, and muscle weakness. Salmon, eggs, and sun exposure; supplement if a panel comes back low.
Iron
STRENGTH · ENERGY
Very common, especially in women, and it drags down strength and energy. Red meat, seafood, eggs.
Calcium
BONE HEALTH
Bone strength depends on it. Dairy is the easy route; Greek yogurt and cottage cheese bring protein along for the ride.
Magnesium
CRAMPS · RHYTHM
Low magnesium brings cramps, fatigue, and irregular heart rhythm. Spinach, almonds, black beans, baked potato with skin.
Zinc
METABOLIC
Ties into resting metabolic rate. One study saw a person raise theirs by 500 calories on zinc alone — an outlier, but it shows the dialing-in matters. Seafood, red meat, eggs.

Get a vitamin and mineral panel from your doctor, fix gaps with whole foods first and targeted supplements second, and a general multivitamin is a reasonable insurance policy if your diet isn't perfect. This section stays short on purpose: there's no dedicated micronutrient deep-dive behind it yet, so I'm keeping it to what's well supported rather than padding it out.

"Seed oils, sugar, and carbs are what's making you sick."

Specific villain ingredients are almost never the problem. The dose makes the poison: seed oils only cause trouble through the calorie overload of a fried-food diet, and sugar in controlled amounts without a calorie surplus doesn't harm a healthy person. In one controlled study, a whole-grain group and a refined-sugar group ate the same carbs with almost no difference in outcomes, and what little gap appeared traced back to the sugar group eating almost no fiber. It's energy toxicity, not the ingredient.

Want this built into your diet?

Knowing the science is one thing; turning it into calories, protein, and fiber that fit your week is another. I'll dial in your numbers and adjust them as your body responds.

Apply for 1:1 Coaching →
THE SCIENCE

Volume & the Dose-Response

How much should you actually do? The honest answer is there’s no clean universal number — but the evidence points hard in one direction: low volumes are highly effective, and more work brings steep diminishing returns.

💡
The bias, stated up front: My bias towards lower volume isn’t dogma, it’s pragmatism. Set quality, adherence, and joint health all favor doing less, better.

Define Volume First

count the right thing

You can’t prescribe what you can’t define — volume simply refers to how much of something, and we need to say how much of what. The obvious metric, volume load (sets × reps × weight), sounds scientific but does not correlate well with growth.

Proof: take a 100-lb bench that’s a 12-rep max. Do three sets of 4 (rack it, rest, repeat) and you get little to no growth. Do a single set of 12 to failure and you get significant growth. Same volume load, wildly different results, and the literature agrees with this consistently. Why? Because not all reps are created equal. In a 10-rep max, the first five reps do next to nothing, and the next five reps do a lot.

So researchers moved off volume load and count what actually matters: the number of hard sets, per muscle group, per week, taken close to failure. That’s the metric to use.

“Volume load is a good proxy for growth.”

It isn’t — equal volume load can produce completely different growth (3×4 vs. 1×12). And doo doo reps lead to doo doo results — rep execution and proximity to failure decide the outcome, not the raw math.

The Dose-Response

what the data says

The Schoenfeld 2017 meta-analysis pooled 15 studies (each ≥6 weeks, comparing different training volumes, using ≥65% of one-rep max) and bucketed weekly sets per muscle group into low (1–4), medium (5–9), and high (10+). Three findings:

1

More volume does grow more muscle

Low → medium → high showed a clear trend: more weekly sets produced more measured size. Direction of the effect is not in dispute.

2

The returns diminish — steeply

That increase flattens fast. The low-volume group averaged about 3 sets to get one unit of growth. To get double that growth you don’t add another 3 — you add another 15 to 22 sets. If we did three and we got one unit of muscle growth, to get another unit it’s not another three sets. It’s another 15 to 22. Crazy.

And some of that “size” may not be muscle

The newer Pelland 2025 meta-analysis found hypertrophy trending up and to the right — but strength flatlines after about 6 weekly sets. That divergence is a red flag. Measurement tools (DEXA, MRI, ultrasound) measure distance, not composition, and higher volume means more damage, inflammation, and swelling — which can last days in trained lifters, right inside the window studies take their measurements. Plausibly, at higher volumes a growing chunk of the measured “size” is non-contractile: cell swelling, inflammation, and fluid. If it were real contractile tissue, strength wouldn’t flatline.

“More volume is unequivocally better for growth.”

More work is not linearly better. We don’t get double the muscle growth from doing ten sets compared to five. And remember: you as an individual are not an average. Studies report averages that hide outliers. Maybe you’re the outlier. Use the science as guardrails, then experiment.

Why the curve bends — the reason more sets stop paying off is fatigue: it erodes motor-unit recruitment, so later sets carry fewer of the stimulating reps that actually drive growth. That mechanism gets its own deep-dive — here the takeaway is the shape of the curve. What to do with it (how many sets, how close to failure, how to arrange them) is the job of the Training Blueprint.

Want a program built on quality, not junk volume?

I’ll dial in your sets, loads, and proximity to failure so every session earns its keep — and your joints last decades, not months.

Apply for 1:1 Coaching →
THE SCIENCE

Why You Hit Failure

Failure isn’t your muscles running out of energy. It’s a brain safety mechanism — and once you understand the “effort cup” pouring into that decision, you understand why heavy beats light and exactly how close to failure you need to train.

💡
The reframe: Failure is central, not local. Your muscle could still produce force at the moment you fail. Your brain just stopped asking it to.
MASTER MENTAL MODEL

The Effort Cup

Most people think you hit failure because your muscles run out of energy. That is not the case. Failure is a neurological phenomenon — a brain safety mechanism. You reach your maximum tolerable perception of effort, the most pain and unpleasant sensation your brain will tolerate before it down-regulates how many fibers you’re using. The proof is the voluntary activation deficit: strap someone into a dynamometer, watch their force fall 100 → 90 → 80 → 70, then apply electrical current directly to the muscle and force shoots back up, sometimes past the original. The muscle could still produce force. The brain just stopped sending the signal.

Picture your capacity for effort as a cup you fill with different “liquids.” Only one is productive: corollary discharge — a same-size copy of the Central Motor Command sent to the effort-perception part of the brain. Big command → big corollary discharge → high motor unit recruitment → good for growth. The rest are junk: breathlessness, the burning of metabolites, and stability/bracing demands. They don’t recruit any extra fiber — they just take up room. When the cup overflows, that’s failure.

WHY HEAVY BEATS LIGHTA light 20-rep max to failure starts around half your fibers on and gives burning and breathlessness a long time to fill the cup — so it overflows before you reach maximum recruitment. A heavy 5-rep max demands near-maximal recruitment from rep one, banking real fiber activation before the junk sensations kick in. Both fail at the same threshold; the heavy set just spent its cup on productive effort. This is the case for training in the 5–10 rep range.

YOU CAN MAKE THE CUP BIGGERMotivation and arousal enlarge your effort capacity — a pushing training partner, positive self-talk, high-BPM music. Well documented to measurably increase strength. Boost your arousal in a good way, not the weird way. The overarching job: fill your cup mostly with corollary discharge, minimally with the junk.

“You hit failure because your muscles run out of energy.”

Failure is not caused by your muscles giving out. It’s about your brain reaching its limit. It’s central, not local — and it’s not even a fixed point: failure is defined by the task rules you set (strict form vs. cheat reps). Failure is not a static thing.

How Close To Failure?

You have to get close — sets must be taken somewhere close to failure to get a hypertrophic outcome, because that’s where the stimulating reps live. Leave 5–6 reps in the gas tank and you walk away with almost no benefit.

But you do not have to grind to failure on every set. Roughly one rep in reserve (1 RIR) tends to be the sweet spot for managing stimulus and fatigue. Close enough to buy the stimulating reps, not so deep that fatigue wrecks your next set. The reframe I give clients: this is calculated and precise, not suffering for its own sake. You’ve already done the vast majority of the set. Give me ten more seconds of effort. Give me four more reps and you will walk away with way better results.

Want every set spent on the productive effort?

I’ll set your loads, rep ranges, and proximity to failure so your cup fills with recruitment — not junk. Real results from less suffering.

Apply for 1:1 Coaching →
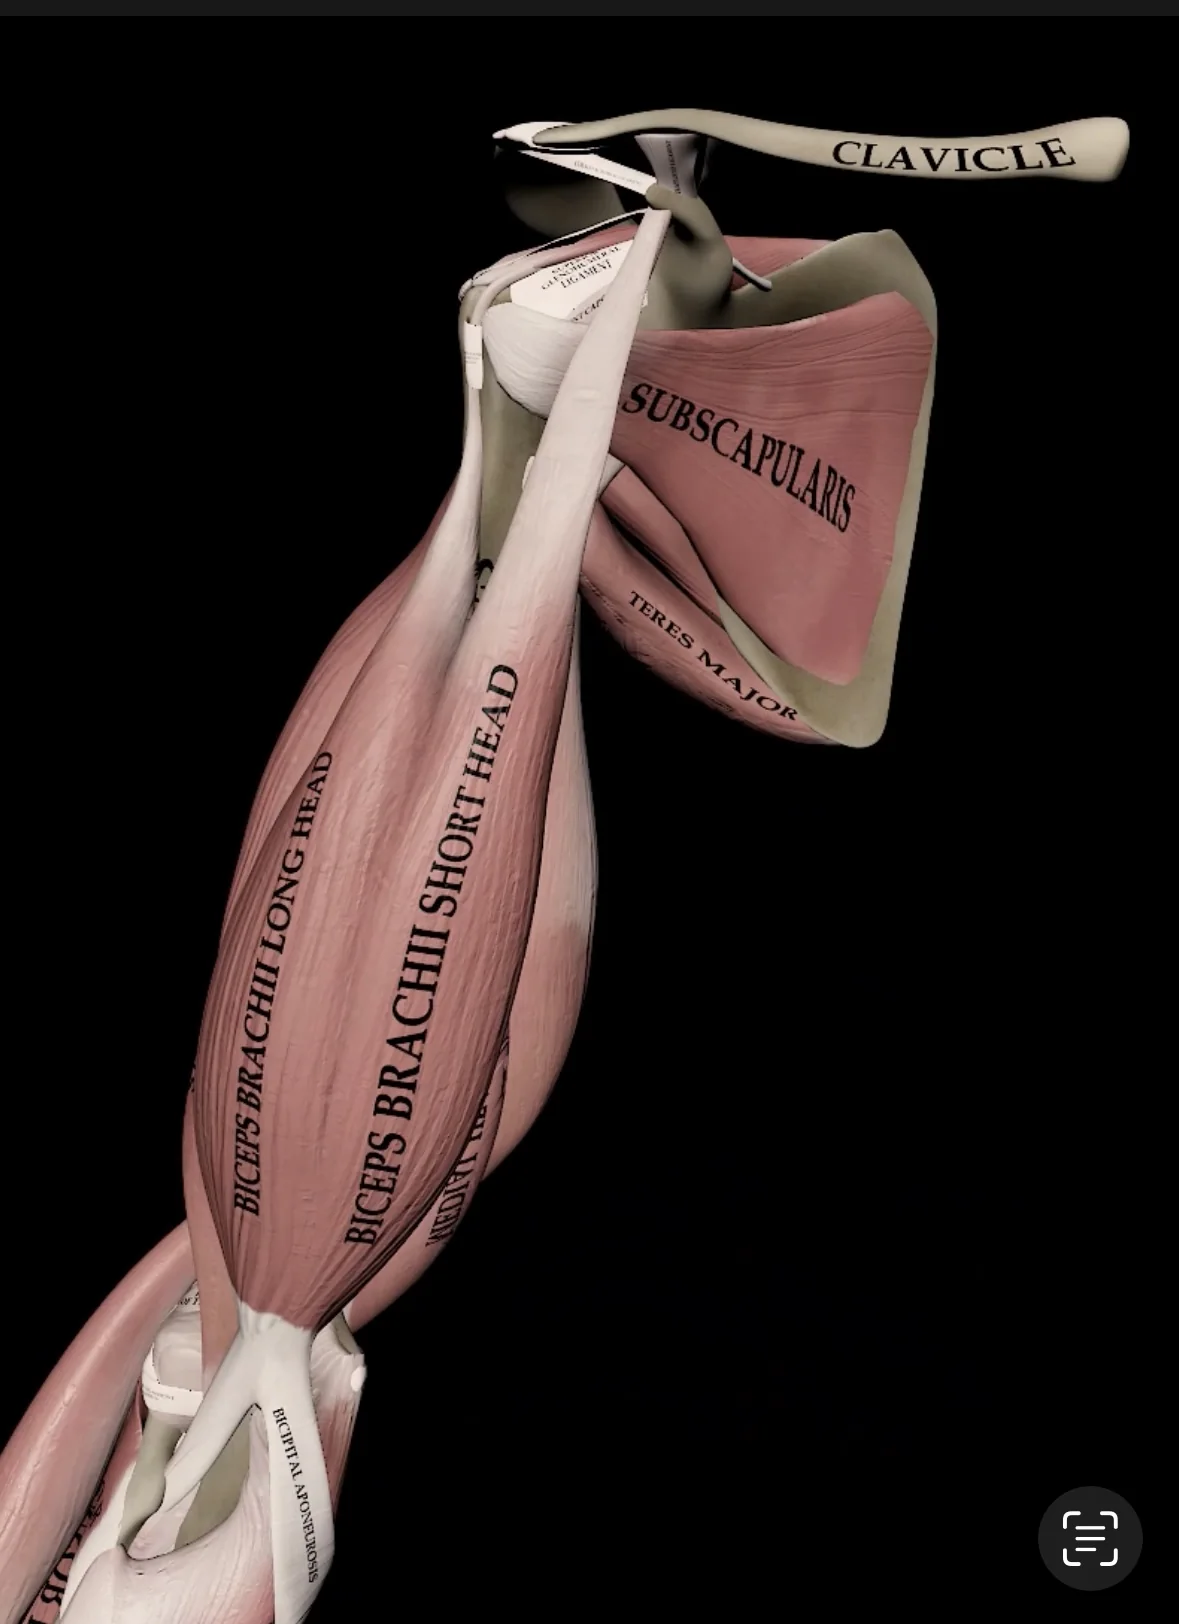
The Science · The Deep End

The Fatigue Deep-Dive

Almost everything you were taught about fatigue — “running out of energy,” muscle fibers “tearing,” lighter weights being “safer” — is wrong. Underneath all of it sits one master variable: calcium. Control that, and you control your growth, your recovery, and how often you can train.

💡
Fair warning: this is the deep end — a distillation of a researcher-level lecture. You don’t need any of it to get results. But if you want to know why the rules work, this is the machinery underneath them.

First, What “Fatigue” Actually Is

The definition matters — fatigue is not a feeling. It is an objective, measurable drop in performance caused by a previous bout of exercise. That distinction is not pedantic. You can have powerful fatigue mechanisms grinding away inside a muscle while a stopwatch reads zero fatigue, because a potentiation effect is quietly cancelling them out — walk into the gym motivated, recruit a few more motor units, and the local fatigue never shows up on the bar.

So the useful move is to stop treating fatigue as one blurry thing. A movement is really a chain of steps — the brain pulls a stored motor program off the shelf, cranks up the command to recruit fibers, fires the signal down the nerves, and inside the muscle an electrical signal is converted into a chemical one (calcium) that finally lets actin and myosin pull. Every fatigue mechanism is just an interference at one specific link in that chain. Name the link, and the mechanism stops being mysterious.

The Three Kinds of Fatigue That Matter

one enemy, one friend, one gatekeeper

Ignore the textbook zoo of mechanisms. For a lifter, local fatigue sorts into two opposite camps, plus one global effect coming from the brain. Knowing which is which tells you whether a mechanism is stealing your gains or handing them to you.

Calcium Fatigue
THE ENEMY
Stops calcium from signaling actin and myosin to bind. No cross-bridge, no tension, no growth stimulus — this fiber is done.
Metabolite Fatigue
THE FRIEND
Phosphate and acid don’t stop cross-bridges — they freeze them, holding tension while velocity crashes. Bad for speed, great for hypertrophy.
Supraspinal Fatigue
THE GATEKEEPER
The only truly global mechanism. Born in the brain from effort, breathlessness and inflammation — it decides whether you reach maximum recruitment at all.
The One Idea That Ties It All Together

Calcium Is the Master Variable

Every time an electrical signal reaches the muscle, calcium is dumped into the cell to trigger the pull — and the system that pumps it back out is deliberately leaky. A little calcium is always left behind. That leftover calcium is not a bug. Your heart muscle doesn’t have this problem, which is the tell: it was installed on purpose, as a circuit breaker.

When calcium piles up, it wakes a protein-chewing enzyme (calpain) that snaps the tiny proteins holding the signal junction together. The junction pops apart, like pulling a plug out of a socket. Electrical signals still arrive, but nothing happens. That fiber gets no further growth stimulus for the rest of the workout — its privileges have been withdrawn. This is why cramming endless sets stops paying off: the dose-response to volume is curvilinear, not a straight line up.

ONE BOTTLENECK, TWO TIMELINESThat same calcium accumulation is the single bottleneck for all post-workout fatigue too. Whatever calcium builds during the session sets your muscle damage, your soreness, and your recovery window. In-workout circuit breaker and days-later fatigue are the same event, measured at two moments. Control calcium and you control the whole story.

The Machinery, In Plain English

1

The circuit breaker trips near failure

While the fiber’s mitochondria have room, they soak up the excess calcium and essentially nothing bad happens. Then in the last couple of reps they run out of space, the calcium goes stratospheric, and the breaker trips across your fast fibers — that sudden speed collapse at the end of a hard set. On a moderate (10-rep-max) load, leaving about 2 reps in reserve dodges most of it. Estimated trip points: the last rep on a heavy 5RM, the last two on a moderate 10RM, the last three on a light 15RM.

2

Your fast fibers get cooked first

Fewer mitochondria means less buffer, so the fastest, least-oxidative fibers hit the breaker first. This is also why people differ so much: someone who is roughly 80% fast-twitch gets knocked sideways by a short intense bout, while a slow-twitch-dominant lifter can repeat it all day. Same workout, wildly different fatigue — it’s largely fiber-type proportion.

3

Supraspinal fatigue is the only global gate — and it’s binary for strength

Breathlessness, burning, and inflammatory signals from lactate all feed “effort” into the brain until it caps your output. This is the one mechanism that carries across the whole body — get out of breath on pulldowns and it follows you into your pressing. Critically, it treats two goals differently: increasing motor-unit recruitment is all-or-nothing — miss maximum recruitment and that adaptation simply doesn’t happen — whereas hypertrophy is graded, dinged but not cancelled. So protect against gassing yourself out when strength is the goal; be more relaxed about it when growth is.

4

Metabolites are how light loads still grow muscle

Trapped acid and phosphate keep a fiber producing tension even as it slows to a crawl — that’s a hypertrophy stimulus. But there’s a cliff. Below about 30% of 1RM, the muscle can’t squeeze its own veins shut, so the metabolites squirt out and are lost — basically no growth. Around 35% (“light”) the veins stay closed, metabolites are trapped, and you grow. Strap blood-flow-restriction cuffs onto a very light load and it behaves like a light load again. Metabolites aren’t the enemy — for growth they’re the point.

Five Myths, Busted

“Muscle damage comes from eccentric tearing forces.”

It’s biochemical, not mechanical. Concentric-only workouts still cause damage, and — the slam dunk — damage measured right after a workout is only about a tenth of what shows up 2–3 days later. Most of the damage happens after you’ve left the gym, driven by calpains and the inflammatory clean-up crew. A tearing force can’t do that. End of discussion.

“You fatigue because you run out of energy — ATP depletes.”

Dead. Animal studies found ATP simply does not deplete, no matter your starting glycogen — researchers were so surprised they re-ran it after fasting the rodents 24 hours, to make sure they weren’t stashing bread rolls in their pockets. Fatigue is a signaling process built to stop you running out of energy — it never lets you actually hit empty.

“Light loads under 30% 1RM just need a bit of managing.”

No — they need to come out entirely. They don’t occlude the veins, so they don’t grow muscle, and they still generate extra fatigue. If a fatiguing variable earns its keep (like eccentrics for injury-proofing) you mitigate it. If it does nothing for you, you eliminate it. Very light loads are pure cost.

“Different exercises cause different kinds of fatigue.”

They can’t. Because everything bottlenecks through calcium accumulation, every exercise that exists or ever will produces the exact same post-workout mechanisms — only the magnitude differs. There’s no special “CNS-frying” lift with its own private fatigue type. It’s all the same machine, turned up or down.

“Ice baths and ibuprofen are a free recovery win.”

They genuinely speed up strength recovery — but they likely blunt growth. Killing the inflammation leaves damaged myofibrils sitting in place, never cleared and never properly re-stimulated in later sessions. Faster recovery, less muscle. Use them when performance is the priority, not when you’re chasing size.

The Five Levers

everything that controls calcium

If calcium accumulation runs both your growth ceiling and your recovery bill, then the whole game is controlling calcium. Exactly five variables do that — three that apply to any set, plus two that only appear when a fiber is stretched under load.

1
VolumeMore sets, more accumulation. The reason the growth curve bends over instead of climbing forever.
2
Proximity to FailureThe last reps are where the breaker trips. Deep grinding sets pour on calcium fastest.
3
Rep RangeLonger sets mean more time for calcium to build inside the fiber before you rack it.
4
Resistance ProfileLoading the stretched position opens extra calcium channels — a stretchy exercise accumulates far more.
5
Eccentric IntensityHard eccentrics flood calcium fastest of all — the growth benefit plateaus after roughly 3 max-effort sets.

Putting It To Work

1

Live around 2 reps in reserve on moderate loads

Those last two reps of a 10RM set are where the circuit breaker trips and most of the downstream damage is born. Stopping just short keeps the growth and skips the wreckage — the single highest-leverage habit here.

2

Put stretch-position work later in the session

A stretch-heavy exercise switches off fibers you may need next. Do a stretchy lat pulldown before a row and you’ve already withdrawn fibers the row wanted. The reverse order is fine — so save the stretchy, deep-range moves for the back half.

3

Never train glycogen-depleted

Glycogen has no fatigue mechanism of its own, but a rapid drop makes the brain manufacture tiredness — and it turbocharges the exact two mechanisms you least want: supraspinal fatigue and EC-coupling failure. Show up fueled.

Ration your eccentrics, respect the recovery math

Because hard eccentrics build damage so fast, spend them only where an eccentric adaptation is the goal, then cap the volume. And take fatigue accumulation seriously — recovery windows roughly add up. Train the same muscle hard every day and the fatigue stacks; strength loss climbs toward ~50% and hypertrophy can’t keep rising underneath it, no matter what a swelling-inflated study seems to show.

Want the science turned into your program?

Knowing the machinery is one thing — building a week that respects your fiber type, your recovery, and your goals is another. That’s what coaching is for.

Apply for 1:1 Coaching →
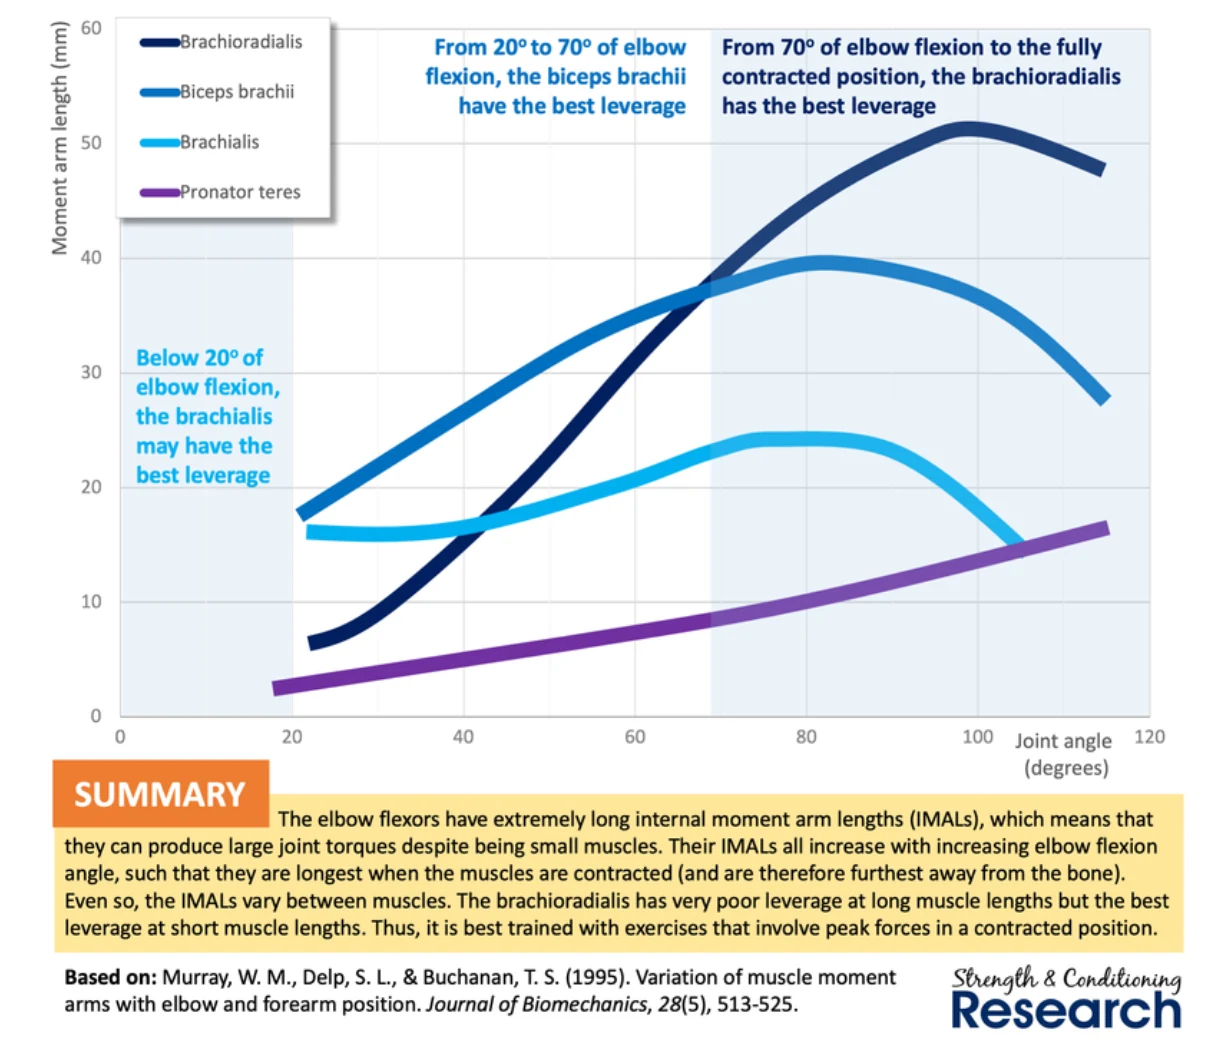
THE SCIENCE

Torque & External Moment Arms

The number printed on a weight can lie to you about the actual challenge delivered to a muscle. What really determines the challenge is torque — and once you can see it in the gym, everything from exercise selection to reading a study changes.

💡
The bedrock: Torque is the foundation of all human movement — the fundamental bedrock that everything else is built off of. Master the trends, not the arithmetic.

Torque 101: Force × Moment Arm

the bedrock

Pick up a 25 lb dumbbell and let it hang by your side — it’s little-to-no challenge to the biceps. Curl the elbow and it gets significantly harder. Unless this is a magic dumbbell, the weight didn’t change. So what did? In one word, torque.

DEMAND = FORCE × MOMENT ARM ARM HANGING 25 LB MOMENT ARM ≈ 0 line of force runs through the elbow ≈ 0 TORQUE CURLED TO 90° 25 LB MOMENT ARM = MAX PEAK TORQUE
Let that 25 lb dumbbell hang and it’s almost no challenge; curl to 90° and it’s much harder. The weight never changed. What changed is the moment arm — the perpendicular distance from the elbow to the line of force. That distance is the torque.

Torque is rotational force, and you already understand it. Every joint — elbow, shoulder, hip, knee, ankle — is simply a rotational axis, and every movement you perform — even motion that looks perfectly straight — is rotation about your joints. Each time you lift, you apply torque to your joints externally, and your muscles generate torque internally in response. That’s how we fundamentally train muscles.

The equation is Torque = linear force × moment arm. Don’t do math with the numbers — care about the trends. It’s a lot of drawing. You find torque by drawing two things:

Line of Force
WHERE IT PULLS
For free weights, always straight down due to gravity. For cables, always along the cable — so its direction changes through the range.
Moment Arm
THE LEVER
The perpendicular distance from the axis to the line of force — meeting it at a 90° angle. Double the moment arm, double the torque.
Resistance Profile
THE MAP
Chart how much torque there is at each point in the range of motion and you have a resistance profile — very powerful information.
1

The wrench teaches the rules

To turn a nut, push up on a wrench 1 meter from the axis and draw the perpendicular moment arm. Grab it twice as far out and the moment arm doubles — double the moment arm = double the torque for the same force. This is why when you grab a wrench, you don’t grab it right up by the nut. Push at a bad angle instead of straight up and the perpendicular moment arm shrinks — less torque.

TORQUE = FORCE × MOMENT ARM SAME PUSH, GRABBED TWICE AS FAR OUT = TWICE THE TURN FORCE 1× MOMENT ARM → 1× TORQUE FORCE 2× MOMENT ARM → 2× TORQUE the 90° box: the lever only counts perpendicular to the force
To turn a nut you don’t grab the wrench up by the head — you grab it far out. Double the moment arm, double the torque for the same push. One catch: the lever only counts perpendicular to the line of force, so a bad angle quietly shrinks it.
2

Free weights: torque follows the moment arm

Because gravity pulls straight down and a 25 lb dumbbell stays 25 lb the whole way, torque is proportional to the moment arm. In a biceps curl, the moment arm is small at the bottom, roughly doubles by mid-range, and peak torque occurs at 90° of elbow flexion — then drops off near the top. In a dumbbell lateral raise, torque is very, very small at the bottom (the line of force runs straight through the shoulder) and maxes out at 90°.

THE DUMBBELL CURL’S RESISTANCE PROFILE CHART THE TORQUE AT EVERY ANGLE → YOU SEE WHERE THE MUSCLE IS ACTUALLY CHALLENGED TORQUE ↑ PEAK @ 90° 90° FULL FLEX ELBOW FLEXION → tiny lever LONGEST LEVER shrinking again
Gravity pulls straight down and the dumbbell stays 25 lb the whole way, so torque just follows the moment arm: tiny at the bottom, peaking at 90° where the forearm is horizontal, then falling off near the top. Map that across the range and you’ve got a resistance profile.
3

Compounds are hardest at the bottom

A press looks linear but two joints rotate — shoulder and elbow. At the top, your joints are all stacked and the lines of force are basically running through the axes, so moment arms and torque are almost zero. As you descend, the demand on both joints climbs; the bottom is where torque is largest. Pressing 200 lb dumbbells at lockout is cool, I guess; pressing them from the bottom is much more impressive, and the reason is torque.

WHY A PRESS IS HARDEST AT THE BOTTOM TWO JOINTS ROTATE — SHOULDER AND ELBOW. STACK THEM AND THE LEVERS VANISH. LOCKOUT (TOP) force runs through both axes ≈ 0 TORQUE BOTTOM shoulder elbow SHOULDER LEVER ELBOW LEVER
At the top your joints stack and the lines of force run through the axes — moment arms and torque fall to almost zero. Descend and the demand on both joints climbs; the bottom is where torque is largest. Locking out 200s is cute — pressing them out of the hole is the real feat.

Form tweaks re-aim the load

On a Bulgarian split squat, the same weights held in a different position change the moment arms. Lean over with the weights forward and the knee moment arm grows — more quad-biased. Stay upright with the load close to the hip and the balance shifts toward the glutes. Subtle form differences drastically change which muscle you bias, and torque lets you see it.

SAME WEIGHT, RE-AIMED MOVE WHERE THE LOAD SITS → MOVE THE MOMENT ARM → MOVE THE MUSCLE LEANED · WEIGHTS FORWARD knee KNEE LEVER ↑ TALL · LOAD AT THE HIP hip HIP LEVER ↑ ◀ MORE QUAD MORE GLUTE ▶
The same dumbbells, held differently. Lean over with the weight out front and the knee’s moment arm grows — quad-biased. Stay tall with the load stacked at the hip and the balance slides toward the glutes. Subtle form changes re-aim which muscle works — and torque is how you see it.
“The number on the weight tells you the challenge.”

Weights can lie. The challenge to the muscle is torque, not the printed load — that’s why the bottom of a lateral raise with 50–60s is unimpressive while holding them out at the top makes someone a freak of nature.

Ready to see the load your muscles actually feel?

Torque and resistance profiles are how I pick every exercise. Let’s aim the challenge where your target muscle actually grows.

Apply for 1:1 Coaching →
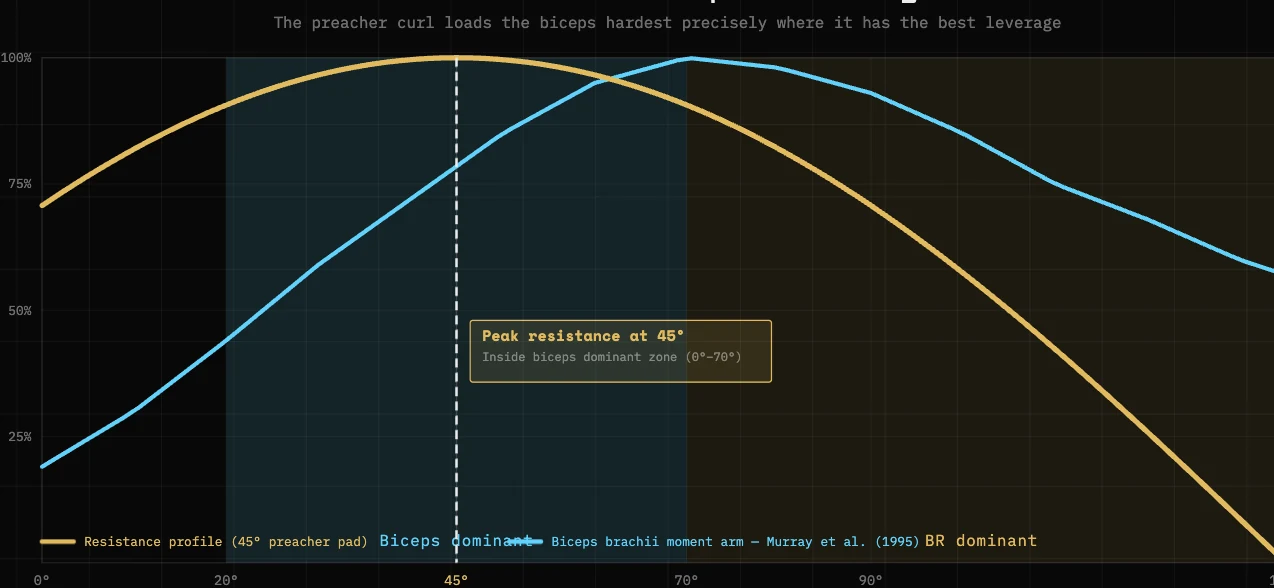
THE SCIENCE

Internal Moment Arms & Muscle Targeting

The weight is the demand. Your muscles are the supply — and your brain hands the work to whichever one has the best leverage. Learn to read those internal moment arms and you can conclusively target a muscle with the right exercise.

💡
The payoff: Match where an exercise is hardest to where your target muscle has the best leverage, and that’s when you unlock a whole new level of efficiency.

Demand vs Supply

inside the body

The weight supplies the demand (external torque). Your muscles are the supply (internal torque) — if this external torque is the demand, think of the internal torque your body generates as the supply. Both obey force × moment arm, but now the force is generated by the muscle and the moment arm is the perpendicular distance from its line of pull to the joint center.

Two identical lads — same size, same training. One maxes a 40 lb curl, the other a 60. The only difference: the biceps tendon inserts 4 cm from the elbow on the weak one versus 6 cm on the strong one. Those 2 cm — a 50% torque advantage, a 50% strength advantage without gaining a single gram of muscle. You can’t change where your muscle inserts; it’s the illustration that matters.

1

Neuromechanical matching

Your brain is constantly scanning your body for these internal moment arms, because it wants to assess what muscle has the best leverage to perform the movement pattern. You have only so much central motor command to distribute, so it goes to the best-leveraged muscle first — most output for least input, which is the definition of leverage. That muscle gets recruited maximally and biased for growth. Caveat: muscle size matters too — if the best-leveraged muscle isn’t big enough, the brain calls in the others to help.

2

Angle and wrist change the winner

Among the three elbow flexors, the biceps lead from about 20°–70°; after 70° the brachioradialis takes over for the rest of the range. Wrist position shifts it even harder: supinated (palm up) gives the biceps the most leverage, neutral is the middle, pronated (palm down) the least. A pronated curl worked from 70°–120° hands the brachioradialis a much larger moment arm — so that’s what grows.

Same motion, opposite muscle

In a pullover, the pecs have a much bigger moment arm overhead (drawn as 2–3× the lats’) while the lats gain leverage as the arm comes down. Layer the external profile on top: the dumbbell pullover is heaviest overhead where the pecs lead → a pec exercise. The cable pullover is heaviest down low where the lats lead → a lat exercise. When you know the specific goal and target of an exercise, that’s when you unlock a whole new level of efficiency.

THE NEVER-DISCUSSED FACTOR

The resistance profile decides where the stimulus goes

A cable is not just a dumbbell on a string. Because the cable’s line of force changes direction through the range, the cable lateral raise carries the opposite resistance profile to the dumbbell version — maxed out in the stretched bottom position instead of the shortened top, when your muscles are all bunched up. Same muscle, same pattern, opposite loading.

So the tool isn’t a detail — it dictates where in the range the muscle is challenged. Pick free weights or cables based on where you want resistance to peak (stretch vs. squeeze), and match that peak to where your target muscle has the best internal leverage. That overlap is how we conclusively target muscles with specific exercises.

USE THE DATA — DON’T WORSHIP ITPublished internal moment-arm data is real and useful, but it comes with caveats: most of it is cadaver data — we’re making inferences about live trained lifters based on a handful of not-alive specimens — it’s locked to a single 2D plane, and growing a muscle enlarges its own moment arm, so big round delts push the line of pull further out. That’s partly why, starting shoulder presses at 13–14, it took me forever to build a chest because my delts would just take over every single movement. The Murray (~2002) study found biceps moment arms ranging 4.2–5.4 cm among similar limb lengths. I am not throwing away the data; understanding its limits makes it even more dangerous.

“Just read a study and copy the best-leverage angle as gospel.”

The data carries serious caveats — cadavers, single 2D planes, individual variation, muscles that reshape their own moment arms. Come to your own conclusions before reading the author’s conclusions, and use research as one tool among biomechanics, anatomy, physiology, and experience.

Want your exercises to actually hit the target?

Matching resistance profiles to internal leverage is how I choose movements for every client. Let’s aim each lift at the muscle you’re chasing.

Apply for 1:1 Coaching →
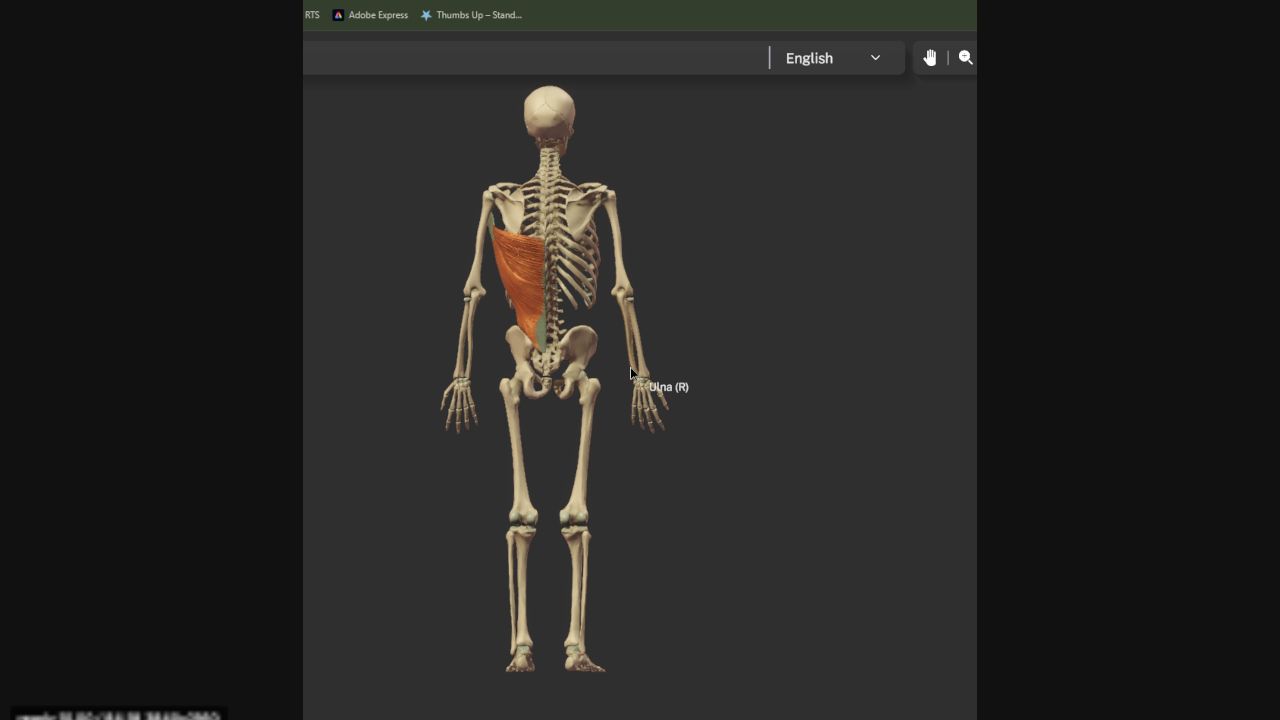
THE SCIENCE

How to Read Flawed Research

Research is a tool, a piece of the puzzle — not gospel. Error can enter at every stage of a study, and almost all of it lives in the parts people skip. Here’s how to read one properly, from who was in it to what the statistics actually mean.

💡
The mindset: to really love something, you get intimate with its flaws. Use research alongside biomechanics, anatomy, physiology, and experience — never on its own.

Where Error Creeps In

the whole study, A to Z

Error can enter at every stage. Walk a study from top to bottom and check each one:

1

Who was in the study

Small samples are expensive and hard to recruit — low sample size, no bueno. Studies fit a semester, so they run 6–12 weeks (12 is long) while real growth happens over years; at ~4 weeks neural adaptations still confound the “growth.” And the same stimulus produces completely different responses in a trained vet vs. a noob — you must know who a finding is for. Diet, sleep, stress, exams, and lifters training outside the protocol all leak in.

2

The resistance profile no one reports

The resistance profile of a machine is everything to the stimulus, and it’s never talked about. A seated hamstring curl with resistance heavy at the top (where the hamstrings are strong) matches the muscle’s capability; flip the profile and 5 reps with the same weight stack is a completely different stimulus. A crappy machine makes the alternative look better by default, and it’s essentially never reported.

3

ROM and RIR are slippery

Full ROM means touch the bar to your chest — but for whom? A 6'5" lifter with long arms and a thin ribcage travels far further than a short, thick-ribcage powerlifter — very different work per person. And RIR depends entirely on the subject gauging themselves: if they claim 3–4 RIR, I don’t know, and they don’t know either. Studies also routinely fail to report RIR, ROM, the failure definition, or which machine was used.

4

The ruler is bendy

The accurate tools — biopsy (turns out people don’t like getting cut) and MRI — are invasive or expensive, so studies lean on the error-prone ones. DEXA can’t separate individual muscles and measures lean mass (muscle plus bone, water, glycogen). Ultrasound shifts with technician, applied pressure, a pump, or a carb-load. A tape measure chasing fractions of a millimeter is kind of a crapshoot.

5

Statistics vs. reality

Statistically significant does not mean practically significant. A leg extension beating a squat by 0.45 mm of quad growth can be significant on paper — but do we care about 0.2 mm? Look at the effect size, the magnitude. And null results — squat equals leg extension — often vanish: they don’t get published because they’re not sexy, when in reality this is important data.

Don’t skip to the conclusion

The average reader — some of your favorite YouTubers included — reads the sexy title, maybe the intro, then scrolls straight to the conclusions once the methods get boring. That’s a grave mistake, because the conclusions lack all the context found in the methods and data.

“It was statistically significant, so it matters.”

Statistical significance isn’t practical significance. Weigh the effect size against every error source before you act on 0.2 mm. Beware of those speaking in absolutes. If somebody draws absolutes from uncertain experiments, think twice about taking that advice.

Want someone who’s read the methods, not just the headline?

I build programs from biomechanics, physiology, and the research read properly — not from whatever study went viral this week.

Apply for 1:1 Coaching →
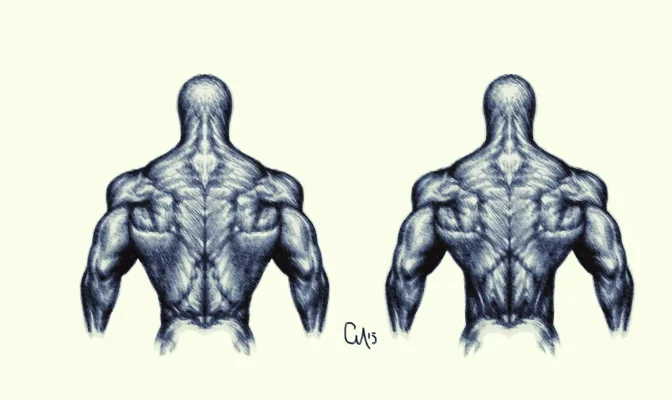
Body-Part Playbook · Chest

The Chest Playbook

The chest can be a stubborn muscle — especially without the genetics for it. But once you understand how the pec is actually built, you realize you don’t need nearly as much variety as you think. A few well-chosen presses and flys, done with the right principles, train the whole thing — you don’t need more variety than that.

💡
Read this first: The exercises are the easy part. The anatomy and the global form principles below are what make them work — don’t skip straight to the movements.

The Anatomy

Every pec fiber inserts on the same spot — your upper arm bone (the humerus). It’s the origins that fan out. That one fact drives almost everything about how you train the chest.

Clavicular head
UP & ACROSS
Originates along the collarbone — the “upper chest.” Smaller than most people think.
Sternal fibers
STRAIGHT ACROSS
Off the sternum — the bulk of the muscle.
Costal head
DOWN & ACROSS
Along the lower ribs — the “lower chest” that gives the appearance of size.
Pectoralis major over the ribcage — fibers fanning from collarbone, sternum and ribs to the humerus
Every fiber converges on one point — the humerus. The origins fan out across the collarbone (clavicular), sternum (sternal), and lower ribs (costal), which is why the up-and-down pulls cancel to a net “across.”

Here’s the payoff: the up (clavicular) and down (costal) pulls cancel each other out, so the net force of flat work is simply “across.” That’s why flat pressing and flat flys train the entire chest — you might not need as much variety as you think. Angles let you specialize, but for 99% of people it’s presses and flys, meat and potatoes.

One more fact that pays off later — a bigger ribcage pushes the pec’s line of pull further from the shoulder, giving it a longer internal moment arm: more leverage, and a chest that grows better relative to the delts. Thin-ribcage lifters get less chest leverage — which is exactly why the ribcage flare tool in the spotlight below matters.

Global Form Principles

1

Set a slight arch — then lock it in stone

A slight upper-back arch puts most of your pec fibers in a stronger-leverage position. It doesn’t need to be excessive. Once you set it at the start of the set, your ribcage stays locked in stone for every rep. The real mistake is caving completely at the top, which hands the rep to your front delt and beats up your shoulder.

2

Train your ACTIVE range of motion

Pecs grow best in the mid and lengthened range, so a stretch matters — but only within your active range: as far back as your body can pull itself at your normal grip. Load can shove you deeper than that; the extra range adds no growth, just joint and connective-tissue stress, and it caps how much you can lift. Stop short = too cold. Go past active range = too hot. End of active range = just right.

“The bar should touch your chest.”

Not valid as a universal cue. End range is individual — set by your joints and mobility. Train your active range.

Bottom of a chest press — hands roughly in line with the chest
End of active range: hands drift roughly in line with the chest.
Bottom of a chest press — you can barely pull your hands back any further
Your stopping point: where you can barely pull back further — not wherever the load shoves you.

The Movements

3 complementary picks
Smith machine chest press
01
Stable PressConverging machine or Smith — full range, maximal recruitment.
Dumbbell press showing the ~45° elbow slot
02
Incline DB Press~30° bench, ~45° elbow tuck — upper chest and balanced loading.
Roller cable fly on an incline bench
03
Roller Cable FlyThe fully shortened range you otherwise never train.

Signature Spotlight — Fly Mechanics

The contrarian take

The Ribcage Flare

The popular rule is “proud chest, never flare.” But remember — the bigger your ribcage, the longer your chest’s internal moment arm, and the better it works. Flaring the ribcage keeps the shoulder roughly in place while the sternum travels forward — it simulates having a bigger ribcage, handing about 80% of your pec fibers (the sternocostal head) far better leverage.

Yes, it biases the mid-to-low chest slightly. But that’s most of the muscle, and the lower chest is what actually gives the appearance of size. So if you have a thin ribcage and don’t feel your chest working, tilt it up — you’ll get more chest out of every rep. A slight tilt is good for a lot of people; going way overboard is excessive.

Why you slide toward the weight at the topWith a straight arm, the weight sits about twice as far from your shoulder as with a bent arm — twice the distance, twice the torque, twice the demand on everything around the shoulder. That’s the fly’s shortened-range challenge, and why the movement is unique.

Don’t get fooled by the dataA lot of internal-moment-arm data comes from cadavers — and many are atrophied, a poor stand-in for a living, muscular body. Respect the data, but if you can’t visualize the moment arm, you’ll get fooled by it.

Steven — a monitor-mount model standing in for the arm and chest
Meet “Steven.” A monitor mount standing in for the mechanics: the vertical post is your arm, the center hub is your shoulder joint, and the band is your chest’s line of pull. The green bar is the internal moment arm — how much leverage your chest has on the joint.
Smaller ribcage
Shorter internal moment arm — line of pull close to the joint center
Shorter moment arm → less chest leverage
Bigger ribcage
Longer internal moment arm — line of pull pushed further from the joint center
Longer moment arm → more chest leverage
Flaring the ribcage pushes the line of pull further from the joint — simulating a bigger ribcage, and handing ~80% of your pec fibers better leverage.

Press vs Fly — Technique

Press: find your elbow slot (~45–70°)

Elbow position changes which fibers you hit, but comfort comes first. A high (~90°) elbow gets pinchy in most shoulders; tuck to find your slot — usually 45 to 70 degrees. Tighter than 45° pulls in a lot more front delt and triceps. Where do you feel strong and comfortable? Start there. On the way down, row into the bottom and pinch the shoulder blades; on the way up, be forceful with the ribcage locked but let the blades move a little — don’t obsess over pinning them.

Fly: let the shoulder blades move

Opposite of a press — here the blades should slide around the ribcage to reach a full contraction. Row into the bottom, then let them wrap on the way up. Just don’t let them run all the way out and collapse the ribcage, and keep the torso locked.

Programming Blueprint

Three complementary, non-redundant patterns cover the entire chest. Don’t stack near-identical movements (flat barbell → flat dumbbell → flat machine is the same function three times — “stepping over a dollar to pick up a penny”). And you don’t have to do all three the same day — spread the presses across your week.

1
Stable PressConverging machine or Smith. Full range, maximal recruitment.
2
Incline DB Press~30° bench, ~45° tuck. Upper chest + even, balanced loading.
3
Roller Cable FlyThe fully shortened range you otherwise never train.

Want your training built for you?

This playbook is the map. Coaching is turn-by-turn — your body, your leverages, your schedule, dialed in.

Apply for 1:1 Coaching →
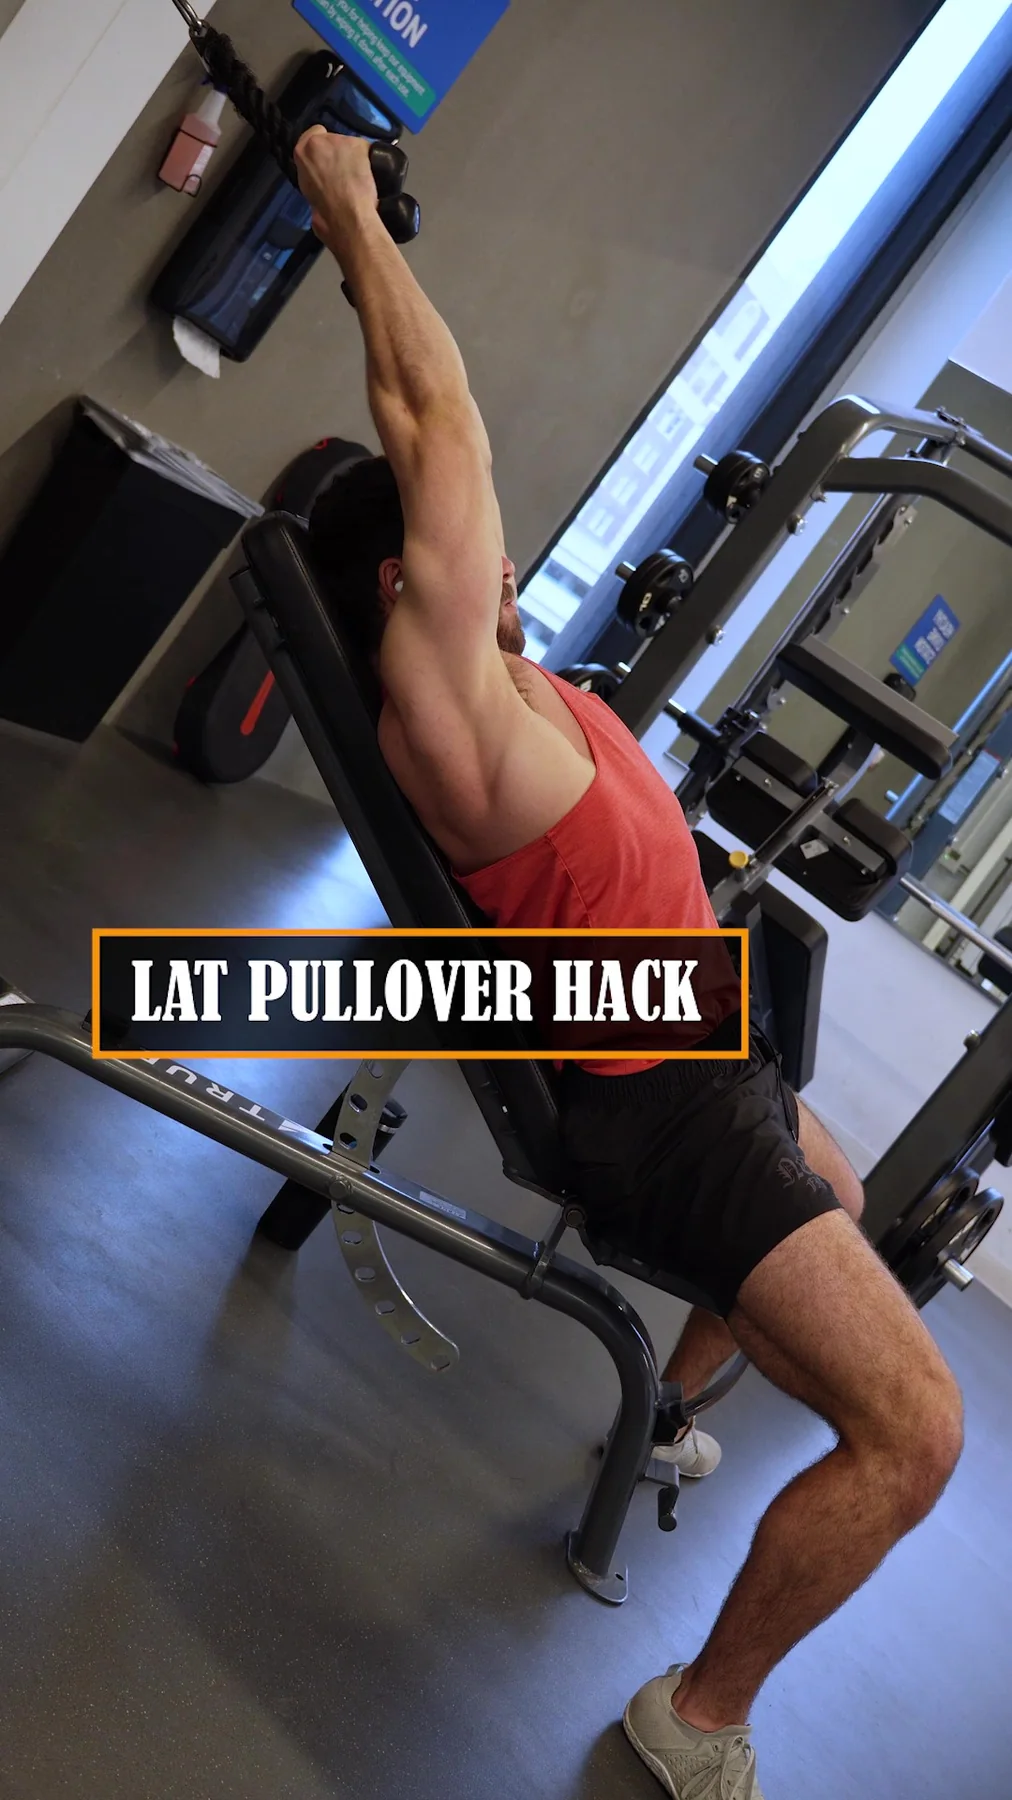
Body-Part Playbook · Delts

The Delts Playbook

If I had to copy-paste one muscle group onto a beginner to maximize size and aesthetics, it would be big, round delts. They widen your silhouette, create the illusion of a taper, and make the “tie-in” of your arms look far better. Pound for pound, fiber for fiber, the delts have the most impact on the appearance of size and aesthetics on a physique.

💡
Read this first: Understand the three regions and their mechanics, then target each with the right movement and form. The anatomy below is what makes every exercise work — don’t skip straight to the movements.

The Anatomy

All three regions share the same insertion — the deltoid tuberosity of the humerus (your upper arm bone). It’s the origins that differ, and that one fact drives everything. The deltoid is like a shell wrapping around the shoulder — the most mobile joint in the body. Fun fact: by mass, the delts are the largest muscle group in the upper body.

Front delt
PULLS ARM UP
Originates on the clavicle. Arm at side, it pulls straight up; arm out front, it pulls across the body.
Side (middle) delt
PULLS UP & OUT
Originates on the acromion process. Creates the capped, 3D look and the broad-shoulder taper.
Rear delt
PULLS BACK
Originates on the spine of the scapula. The “bowling ball” that pops your shoulders out backward — and the most underdeveloped head across lifters.
Front and rear shoulder anatomy showing how the deltoid wraps around the shoulder joint
The delt is a shell around the shoulder. The front, side, and rear regions share one humeral insertion but pull from different origins.

Because the origins differ, the fibers run in different directions and pull the upper arm in different directions. That’s also why internal and external rotation change which fibers you hit: raise the arm out to the side with a neutral or internally rotated arm and the side delt is on top of the joint, best suited to lift; go into a lot of external rotation and the front delt is now best positioned. Degrees of rotation during a movement change the target.

One more — delts are commonly thought of as three heads, but some studies identify up to seven distinct heads. A fun fact, but it doesn’t change how we train them practically: three regions, three go-to movements.

Global Form Principles

1

Match the region to the movement

Any press (flat, incline, overhead) trains the front delts, and the more “up” you press, the more front-delt involvement — overhead takes the chest almost entirely out. Pressing hits the side delts to some extent and pulldowns/rows fire the rear delts. But to maximally grow the side delt you must add a lateral raise, and to maximally grow the rear delt you need a reverse fly. The compounds get you partway; the raises finish the job.

2

Stability equals output

A recurring theme. Press seated, not standing — standing introduces knees, hips, balance, and coordination that steal delt output; seated is more stable, so more motor-unit recruitment, which matters for growth. Same logic behind lying down for lateral raises and using cuffs instead of handles: the more stable the environment and the fewer limiters (grip, forearms, balance), the more the delt itself works.

3

Think OUT to the corners — not up, not back

On raises, let all motion come from the shoulder joint. Imagine you’re a statue, and the only joint you were blessed with is the shoulder. The biggest mistake is bouncing knees, hip momentum, or flexing the spine to help. Thinking “up” on a lateral makes you shrug (that’s traps); thinking “back” on a rear delt turns it into a row. Think out to the corners of the room, everything pivoting around the shoulder.

“The side delts just do shoulder abduction.”

Too rigid. The shoulder has many degrees of freedom — depending on body position and rotation, the side delt can do plenty of tasks that aren’t cleanly abduction.

“Chase a maximal stretch on your rear delt flies.”

Going from front to way-back is mostly the scapula sliding around the ribcage — you’re stretching traps and rhomboids, not lengthening the rear delt. Don’t obsess over the stretch.

“You can’t go wrong with the bench press.” Or so we thought.

Over-benching builds a big front delt but leaves the mid and rear delts flat. Most intermediate-to-advanced lifters don’t need more front delt work — they need side and rear.

The Movements

3 picks

Signature Spotlight — Resistance Profile

The contrarian take

Match the Tool to Your Strength

A resistance profile describes the challenge to the joint at different points in the range. The lying cable lateral raise — my personal favorite — has a ton of challenge at the bottom and little to none at the top, which matches your strength profile exactly. Anatomically your delts produce far more force at the bottom than the top: roughly 100 lbs of force pushing into an immovable scale at the bottom versus maybe 20–30 lbs near the top.

The dumbbell lateral raise is the complete opposite — almost no challenge at the bottom, tons at the top. It’s hard where you’re weakest and easiest where you’re strongest. That mismatch is why I prefer the cable: when the tool is hardest where you’re strongest, you get smooth grinder reps through failure all the way through the range.

You can still win with dumbbellsNone of this means dumbbells are bad — you can build excellent side delts with them. Cables are just arguably a bit more efficient. Any implement works with correct setup and form; the point is to understand why one feels smoother.

Raise Technique — Side & Rear

Side: find your slot (~45–80°)

Where you raise to is individual — the deltoid sits slightly forward or backward on everyone, and shoulder joints differ. Find the slot that feels best, roughly 45 to 80 degrees of shoulder abduction. If arm-straight-in-front and arm-straight-out-to-the-side are the extremes, halfway between and back is good — just don’t go too far back.

Rear: know your range of motion

Start with the arm straight out in front — it can come slightly across if the cables allow, but don’t worry about the “stretch.” Call the end range once the arm is pretty much straight out to the side. Going further back just retracts the shoulder blade (traps and rhomboids) or puts the shoulder in a weird, stressful position.

Lateral raise setup with shoulder-angle guides marking the individual raise slot
Side-delt slot. Work in the angle that feels strongest and cleanest, usually somewhere between roughly 45° and 80° from straight ahead.
Cable rear-delt fly performed with the torso stable and motion coming from the shoulder
Rear-delt finish. Think out toward the corners and stop when the upper arm reaches the side rather than turning the rep into a row.

Programming Blueprint

Three variables set your programming: training status, current physique, and goals. Beginners keep it simple — a chest press, an overhead press, and a row or pulldown will grow the delts just fine; add a reverse fly only if it doesn’t come at the expense of compounds. Never swap a rowing movement for a rear-delt movement — that’s stepping over a dollar to pick up a penny.

Intermediate and advanced lifters are more individual, but the broad truth is most don’t need more front-delt work — allocate more hard sets to side and rear delts. Sometimes it’s about rebalancing: a lifter who benched three times a week for years may pull the overhead press out entirely and hammer laterals and rear flies. If you’re gung-ho on growing, spread ~5 to 10 sets over the week, hit the muscle about twice a week, over at least two sessions (say 3 + 3). Start on the low end; only add volume if you stop progressing. It’s highly individual. That’s where coaching comes into play.

1
Overhead PressFront delts (and some side). The cornerstone compound — seated.
2
Lateral RaiseSide delts. Add it to maximally grow the capped look.
3
Reverse FlyRear delts. Small muscle, huge payoff — the most underdeveloped head.

Want your delts built for you?

This playbook is the map. Coaching is turn-by-turn — your leverages, your physique, your volume, dialed in.

Apply for 1:1 Coaching →
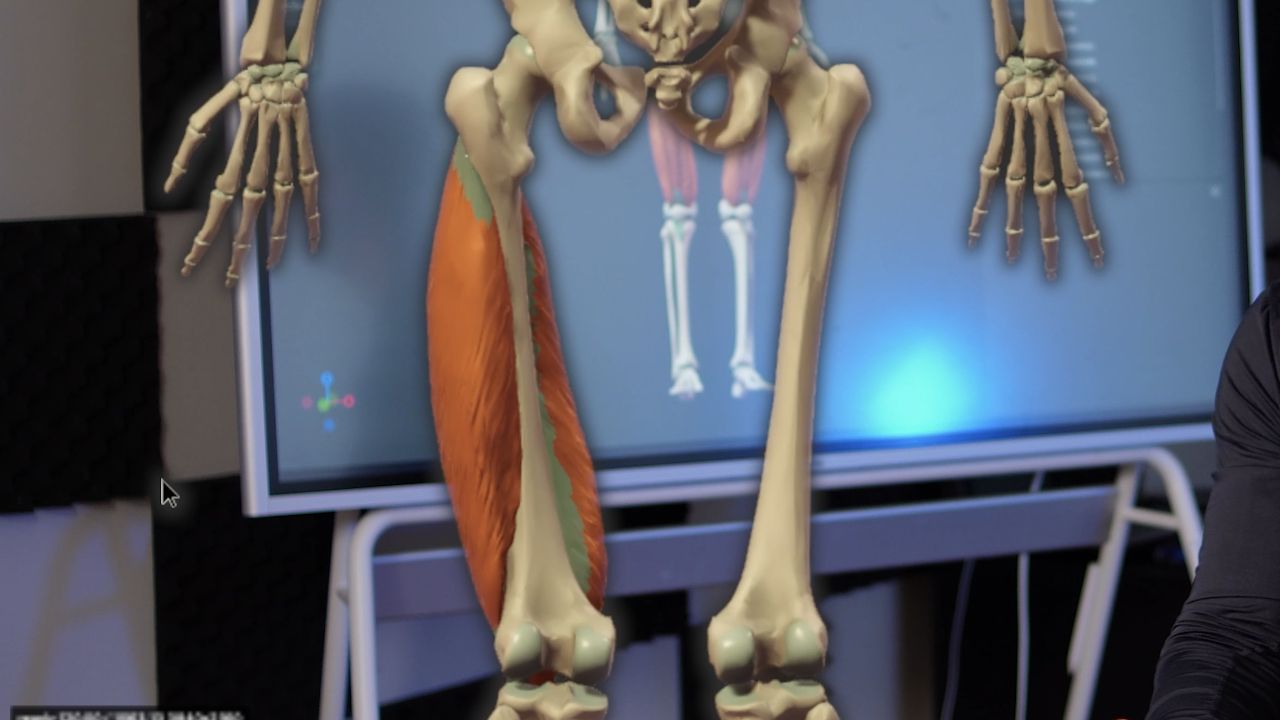
Body-Part Playbook · Triceps

The Triceps Playbook

Cut the arm off and look at the cross-section and it becomes obvious where the size lives. Over 75% of that cross-sectional area is triceps — so if you want big arms, big triceps are a necessity. Understand the three heads, select exercises around three factors, and use three complementary movements to hit them all while protecting your elbows for the long haul.

💡
Read this first: Head targeting is governed by shoulder position, and healthy elbows are essential for long-term gains. The anatomy and the three selection factors below are what make the movements work.

The Anatomy

Three heads make the “triceps,” and all three share basically the same insertion on the ulna (your forearm bone). A muscle creates a bone-to-bone pull — contracting drags its origin and insertion closer. Two of the heads have one job; the third is a special case.

Long head
ARM AT SIDE
Origin on the scapula — it crosses the shoulder joint (biarticular). Elbow extension plus a very weak shoulder extension. The part pressing neglects.
Lateral head
ELBOW EXTENSION
Origin on the upper arm bone. Cares only about elbow extension — that’s all those two are good for.
Medial head
ELBOW EXTENSION
Origin on the upper arm bone, a bit lower, and hidden underneath. Elbow extension only — you only see it if you peel the other two back.
Posterior upper-arm anatomy showing the three heads of the triceps and their shared elbow insertion
Three heads, one shared elbow action. Shoulder position changes the contribution of each head because only the long head crosses the shoulder.

There are two ways to stimulate the triceps: pressing (multi-joint — the elbow and shoulder both move) and pure elbow extension (upper arm stays still, only the elbow moves). Which head gets emphasized comes down to where your shoulder is:

Arm down at your side → long head

In pure elbow extension with the arm by your side, the long head produces much more force than the medial or lateral. This is the position pressing can’t reach — so if you only prioritize one triceps movement, make it an arm-at-side extension.

Arm elevated to ~90° → medial & lateral

Elevate the upper arm and the medial head comes up with a lot of force, the lateral head nearly peaks, and the long head still contributes but less. About 90 degrees is a great sweet spot. Go all the way overhead (180°) and every head’s force production drops slightly.

Any press → medial & lateral (long head shut off)

Pressing is shoulder flexion plus elbow extension, and it’s almost entirely the medial and lateral heads. Because the long head is a shoulder extensor, it would fight the movement — so the CNS decreases its recruitment. That’s antagonist inhibition, and it’s why your normal chest and shoulder pressing already covers medial and lateral.

Arm positions progressing from the side of the body to fully overhead
Shoulder elevation changes the job. Arm-at-side work emphasizes the long head; around 90° brings the medial and lateral heads up.
Graph comparing triceps head force as the shoulder moves from the side to overhead
The force curves behind the recommendation. This is why one arm-at-side extension and one elevated pattern complement pressing.

Global Form Principles

3 selection factors
1

Alignment — line of force through the elbow

Align the resistance with the joint you’re trying to influence. The lower arm should fold up directly over the upper arm — the only way a hinge joint wants to move — and the line of force (straight down for free weights, along the cable for cables) should run right through the elbow. Misalignment dumps load onto connective tissue: a high elbow flare pulls the elbow sideways, and over 5–10 years that hinge joint will ache over time. It won’t explode the first rep — it’s a longevity issue.

2

Range of motion — no deep stretch needed

The triceps don’t need a deep stretch (see the spotlight). A safe bet is 0 to 120 degrees of elbow flexion — a good stimulus in the lengthened range without going deep, where the triceps lose leverage and your scapula tips over the top to finish the rep. Partials are likely fine. The one real caveat: keep your chosen range consistent through the whole set, or you can’t track progressive overload.

3

Resistance profile — match the hardest point to your strength

A resistance profile explains where an exercise is hardest, based on joint torque. Peak torque lands where your forearm forms a 90-degree angle with the line of force; take a step back on a cable and that point shifts. Altering it can bias different heads — exactly which is a little bit of guesswork right now. The safe bet: include different profiles across your training career — not five at once, but change it up between cycles.

“Fixed grips like the EZ-bar or straight bar are great triceps builders.”

Generally not recommended. Fixed grips leave your hands stuck, forcing poor alignment or full pronation for most structures — the elbows want to flare, especially on bigger lifters.

“The long head grows better overhead.”

That came from one study, fairly poorly done, and several better studies line up against it. It would take several more to change my mind, and it makes sense biomechanically.

The Movements

3 picks

Signature Spotlight — The Stretch Myth

The contrarian take

The Stretch Is NOT the Point

“The stretch is the most important part of the rep” is a blanket statement that’s true for some muscles — quads, for example — but not for the triceps. The takeaway: they likely do not benefit from a deep stretch, contrary to what a lot of people will say.

The reason is the length-tension relationship. The triceps fall entirely on the plateau of the length-tension curve — their sarcomeres never reach much passive tension no matter how much you lengthen them, and passive tension is the driver of stretch-mediated hypertrophy. No passive tension, no stretch-mediated benefit.

And the biomechanics agreeOn a pushdown, if you go all the way up into a deep stretch the triceps lack the leverage to complete the movement — so your body tips the scapula over the top to push down. That’s bad for the shoulder joint. Cap it around 120° and you keep the good lengthened stimulus without the cost.

Programming Blueprint

Three complementary, non-redundant movements cover all three heads — and they’re a great starting point for most people, not strict must-dos in a fixed order, so get creative. Your medial and lateral heads already pick up stimulus from your normal chest and shoulder pressing, which is exactly why — if you only prioritize one triceps movement — it should be the arm-at-side extension for the long head, the part pressing neglects.

1
Arm-at-Side ExtensionLong head. The cuffed single-arm extension pressing can’t replace.
2
Banded JM PressMedial & lateral. The compound — shoulder and elbow both move.
3
Elevated ExtensionMedial & lateral. Arm at ~90° for the elevated sweet spot.

Want arms built for you?

This playbook is the map. Coaching is turn-by-turn — your leverages, your elbows, your resistance profiles, dialed in.

Apply for 1:1 Coaching →
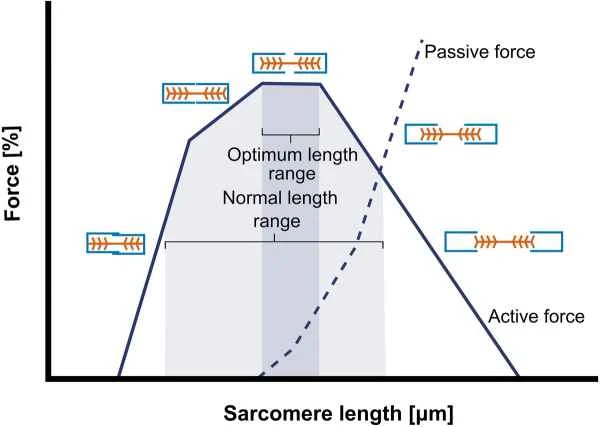
Body-Part Playbook

The Biceps Masterclass

The biceps grow one way — elbow flexion under mechanical tension. Once you understand torque, moment arms, and how your brain subconsciously hands out recruitment based on leverage, you can train the entire elbow-flexor complex with just three exercises.

💡
The whole thesis: You cannot preferentially isolate the long vs. short head. Your brain chooses which muscle fires based on physics — so pick exercises that stack the leverage in your favor.

The Anatomy

4 elbow flexors

The biceps are made of two muscles — the short head and the long head (hence “bi”). Both share the same insertion on the radial tuberosity, a little notch in your radius, so they both pull on the same forearm bone. They only differ at the origin: the long head comes up and wraps over the top of your humerus, while the short head goes straight up to the coracoid process of the scapula. Those origins sit very, very close together.

Which is exactly why the classic “curl this way for the long head, that way for the short head” advice falls apart. My verdict — for all intents and purposes, these are either going to grow together or they’re going to shrivel up into nothing together. There is no evidence you can preferentially activate or grow one head over the other.

Biceps (long + short)
PRIME FLEXOR · SUPINATED
Best relative leverage from 20–70° of elbow flexion. Shared insertion on the radial tuberosity.
Brachialis
UNDER THE BICEPS
Ulna to humerus. Sits beneath the biceps and quietly assists across the range.
Brachioradialis
FOREARM · PRONATED
Radius (near the wrist) to humerus. Takes over max recruitment at and past ~70°.
Front view of the biceps anatomy, showing the long and short heads attaching from the scapula to the radius
One insertion, two nearby origins. The long and short heads share the radial-tuberosity insertion, which is why changing curl style does not cleanly isolate one head.

Two other muscles contribute significantly to elbow flexion — the brachialis (which lies underneath the biceps) and the brachioradialis (the hunk of forearm that pushes up against the biceps). That’s four muscles total across the complex. Your brain chooses which of them to recruit for you, subconsciously, based on leverages and physics. Your brain is going to choose for you because it’s smarter than you. Screaming “brachioradialis” while you curl does nothing.

The strategy is to understand what the brain does automatically, then pick an exercise that takes advantage of it.

Global Form Principles

The foundational law — A muscle’s main function is to manage torque at a given joint. Take that one with you, store it somewhere in your brain and keep it for the rest of your life. Torque is rotational force: linear force times the moment arm. The longer the moment arm, the more torque for the same exact force.

1

Alignment

The elbow is a hinge joint — like the knee, it only wants to bend in one plane. Keep the lower arm folding straight over the upper arm, no elbow flare. Off-axis forces from internal rotation or a too-wide/too-narrow grip yank the elbow sideways in a direction it was never designed to move.

2

Stability

The more stable a movement, the more output you get from the target muscle. Removing joints you don’t need — like jamming your arm into a preacher pad to kill shoulder torque — lets the biceps become the limiter.

3

Resistance Profile

Where is the exercise hardest? With a free weight the line of force always points straight down. Match the exercise’s peak resistance to the muscle’s peak leverage window and you’ve engineered a great movement.

The leverage map (1995 research)

A team measured every elbow-flexor’s internal moment arm across the full range. From 20° to 70° of elbow flexion the biceps have the highest moment arm — so the brain maximally recruits them there. At ~70° the brachioradialis takes over the top spot. Grip matters too: supinated > neutral > pronated for biceps leverage (pronated recovers a bit around 90°).

The two rules that fall out of it

To target biceps: use a supinated grip and pick an exercise with peak forces from ~20–70° of elbow flexion. To target brachioradialis: use a pronated-ish grip with peak forces at or after 70°. Your brain goes, “Hey, biceps have the most leverage to pull. I guess you’re getting recruited buddy.”

Let it all come from the elbow

Movement should come only from the elbow joint. Swinging the upper arm shifts tension off the biceps and onto the front delt — that’s not curling, that’s using momentum to try training our biceps.

Research summary graph comparing elbow-flexor moment arms across the curl range
The leverage map. The biceps dominate earlier in elbow flexion; the brachioradialis gains the advantage later in the range.
“Curl this way for the long head, that way for the short head.”

No evidence exists that you can preferentially activate or grow one head over the other. They grow together or they shrivel together.

“Curls build the biceps because they also flex the shoulder.”

The biceps only assist shoulder flexion from ~0–45°, where the front delts and upper chest are the prime movers. You will NOT grow biceps doing shoulder flexion.

“Go fully pronated to really hammer the forearms.”

Fully pronated forces the upper arm out of position and causes wrist and structural issues for most people. Settle for as much pronation as you can hold without elbow flare — “pronated-ish.”

The Movements

3 picks

Signature Spotlight — The Single-Arm Preacher Curl

The GOAT, One-Exercise Pick

If I could only curl one way forever

Graph overlaying the preacher curl resistance profile with the biceps leverage curve
Why the 45° pad works. Peak external resistance lands inside the biceps-dominant leverage window.

Imagine an alternate reality where you were forced to choose only one biceps exercise to maximize growth for the rest of your life. My answer is the single-arm dumbbell preacher curlquite possibly the goat of biceps exercises. Run it through my four-lens analysis and it wins on every count.

AlignmentThe single-arm setup lets you twist your torso so the lower arm folds directly over the upper arm — an alignment you simply can’t get from a fixed-grip EZ-bar or many preacher machines, whose grips force a slight off-plane yank on the elbow over time.

StabilityThe whole back of the arm is supported, which removes the shoulder joint from the equation. When you jam your arm into that pad, you don’t have to manage any torque about the shoulder joint. It’s just all biceps. No front-delt demand means the elbow flexors become the limiter — exactly what you want for hypertrophy.

Resistance ProfileFree weight, line of force straight down. With a pad angle around 45°, peak elbow torque lands at roughly 45° of elbow flexion — smack dab halfway between 20 and 70, the biceps’ best-leverage window. This is an incredibly well designed movement to target the biceps specifically.

The bonus perkBecause it’s so stable and single-sided, it leans on the bilateral force deficit — one arm at a time is slightly stronger than both at once, eking out extra recruitment. And it’s wildly convenient: any dumbbell plus a preacher pad, or just set a bench to a ~45° (up to ~60°) incline.

The honest caveatDon’t take it literally. Over the long term, the best way to grow your biceps is not by doing one exercise for the rest of your life. The one-exercise pick is a fun theoretical — keep varying your movements. Bing bada boom, veritable goat.

Programming Blueprint

These three aren’t redundant — each covers a different range and grip, and together they train the whole complex. None are strictly “must-do” (similar alternatives exist), but progressively overloading these over time is a complete elbow-flexor program.

1
Single-Arm Preacher CurlSupinated · peak ~45° · lengthened-to-mid. The GOAT — prioritize it.
2
Alternating Dumbbell CurlSupinated · peak ~90° · mid-to-short. Biceps + brachioradialis mix, easy setup.
3
Pronated-ish CurlsPronated-ish · peak ≥90° · biases the brachioradialis to round out the complex.

Ready to build the guns you’ve always wanted?

Stop guessing about grips and heads. Let’s put the leverage, the ranges, and the progression to work on a plan built for you.

Apply for 1:1 Coaching →
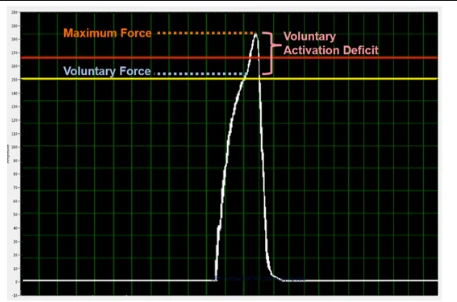
Body-Part Playbook

The Lats Masterclass

The lats are a hard muscle to grow — because unlike the triceps, they’re never the only muscle doing their job. Rear delts, teres, biceps, and traps all want a piece of every pull. That makes form paramount, more than for almost any other muscle.

💡
The whole thesis: It’s more about how you’re doing the movements than what exactly you’re doing. Train the lats through all their functions, use straps, and tilt the form-vs-overload slider toward form.

The Anatomy

many origins, one insertion

If you want to intelligently train a muscle — you need to understand its anatomy. Muscles create a bone-to-bone pull: they attach on one bone, attach on another, and when they contract they slide over one another and pull one end toward the other. The lat is a big, fan-shaped muscle with many origins — all along the spine, along the hip, some of the lower 3–4 ribs, and for about a third of people it even attaches directly to the scapula. All of those converge to one insertion on the humerus, your upper arm bone. That’s the fact everything hinges on: the lat cares where your upper arm is — it doesn’t attach to your hand.

Posterior anatomy view with one latissimus dorsi highlighted from the lower trunk to the upper arm
Many origins, one humeral insertion. This masterclass anatomy frame makes the fan-shaped lat and its single upper-arm endpoint visible.
Shoulder Extension
ROWS · PULLOVERS
Driving the upper arm down and back behind the body.
Shoulder Adduction
PULLDOWNS · FLAPS
Pulling the upper arm down toward the side — plus everything in between.
Weak Internal Rotation
DON’T LOAD IT
A real function, but you can’t load it enough to grow, and the rotator cuff would be really pissed.

One more expectation-setter: the tendon is the middleman between muscle belly and bone, and everyone has different insertion points and tendon lengths. This is genetically preset and cannot be changed. You can’t grow tendons like you grow muscle fibers. No matter how thick or wide you build the belly, you can’t make the lat sit lower than its insertion point. So don’t hold your set of lat genetics up to somebody else’s and be like, “I want to look like that. How do I train my lower lats?” That’s not how it’s going to work.

Two back illustrations comparing naturally higher and lower lat insertions
Insertion height is genetic. Training can thicken the muscle belly, but it cannot move where the tendon attaches or make a naturally high lat sit lower.

Global Form Principles

Why form is king here — the triceps are the only elbow extensor, so decent form plus elbow extension grows triceps. The lats have no such luck: rear delts, teres, biceps, and traps all share their functions. Slap heavy load on a bar and just pull, and the dominant helpers take over while the lats barely work. So I’m more of a stickler for form on lat-biased movements relative to many other movements.

1

All motion from the shoulder joint

The biggest mistake in rows is leaning forward then heaving back to build momentum — that’s spinal erectors, not lats. Keep the body still and let the shoulder do the work.

2

Upper arms tight, shoulders down

The more you abduct the shoulder, the less lat. Keep the upper arms close to the torso and don’t shrug — row down here, not up here.

3

Forearm in line with resistance — “elbow to hip”

Don’t curl the weight in with your biceps. Keep the forearm aligned with the direction of resistance and think of your hands as hooks, driving through the elbows. Elbow to hip — that’s a winning cue.

4

Shoulder-width grip

Choose an attachment that keeps your hands about shoulder-width. Too wide abducts the shoulder. The narrow V-handle is its own trap — it loads internal rotation at the shortened end, forcing the shoulder to work where it can’t handle much load and limiting ROM.

Form vs. overload is a sliding scale

Chase numbers and reps get sloppy; obsess over perfect reps and you under-load. Find the happy medium, but for lats nudge the slider slightly toward form. Constantly self-audit: “Was that a clean set, or did I use a bunch of my erectors?”

Mind-muscle connection is feedback, not stimulus

It was vastly overemphasized in the past and it is NOT a driver of growth — but it IS a useful feedback signal that the muscle is contracting, especially at the fully shortened position of a row. It’s far from being everything, but also not nothing.

“Do this variation to hit the lower lats.”

My hunch: no meaningful difference between biasing upper vs. lower lat. The evidence — EMG in isometric external rotation, an 8-cadaver moment-arm study — is too weak to convince, and people grow the whole lat. Either way the training is the same: hit all the functions.

“Just get strong at the pulley and the lats will grow.”

That works for a sole mover like the triceps. The lats share their functions with too many muscles, so getting strong sloppily just grows the helpers.

“Straps are a crutch.”

Grip is the near-universal weakest link in pulls. Without straps you might fail at 8 reps on your forearms; with straps you hit 12 — that’s ~4 added stimulating reps. You quite literally just 2 or 3x’d the growth stimulus just from using straps. So please use them.

The Movements

3 picks

Signature Spotlight — The Bench-Supported Cable Pullover

My Favorite Third Movement

A brutal movement pattern that matches your strength curve

Bench-supported cable pullover with the torso braced and arms reaching toward the cable
Bench-supported setup. The bench removes balance from the equation and makes the long overhead reach repeatable.

The pullover is most traditionally shoulder extension with a fixed elbow — you lock the elbow and focus on pure shoulder extension, unlike a pulldown where the elbow moves a lot. Skip the dumbbell-on-a-bench version (the overhead position makes it more pecs); cables generally do the trick, and my favorite is the bench-supported cable pullover.

Why the benchIt makes the movement much more stable so you can fully focus on shoulder extension, and it lets you fully lengthen the lat. The setup hassle is worth it versus standing.

The setupSit on the bench at about a 45° angle, extend your arms overhead, and imagine shooting lasers out of your fingertips. Set the cable pulley height to where those lasers would meet the cable.

Why it’s so goodThe resistance profile matches your strength curve beautifully: almost no torque at the top overhead, torque maxes around 90°, then eases off again down low. And it resolves the apparent contradiction with the pulldown’s “don’t go overhead” rule — at the top there’s no extension torque, but the cable pulls your whole shoulder blade up, which you use the lats to pull back down. It’s light where the pecs would work, heavy where the lats work, then levels off as you get weaker. A really, really good match up, and a brutal movement pattern. I suggest everyone try it at least once.

Programming Blueprint

6–10 sets/week total

Two movements are great for most people; three may optimize it for someone super gung-ho on a lat-focused program. The two core picks are a lat-biased row plus a medium-wide grip pulldown — the row covers extension, the pulldown covers adduction, so together they train all the functions. Add an optional pullover (or a flap, or another pulldown) for the third slot by preference.

Sequencing — do the row first. It’s more of a mid-to-shortened-position exercise, while the pulldown is lengthened-range and generates more fatigue; leading with the shortened-position movement lets the pulldown be more effective. Reverse the order and the row suffers.

1
Lat-Biased Row (first)Extension · mid-to-shortened. My pick: the hip-supported row. Always include.
2
Medium-Wide PulldownAdduction · lengthened. More ROM than the widest grip. Cap ~140°, maybe 120°.
3
Pullover (optional)Pure shoulder extension. My favorite: bench-supported cable pullover.
Volume & Frequency6–10 hard sets/week across all movements combined, spread over 2 (maybe 3) sessions.

Ready to grow a massive set of wings?

Lats reward precision over ego. Let’s dial in your form, your functions, and your weekly volume so every pull actually builds the muscle you’re after.

Apply for 1:1 Coaching →

Body-Part Playbook · Quads

The Quads Playbook

To grow the quads maximally you don’t need a rotating menu of exercises — you need two movement patterns done well and overloaded over time: one squatting/pressing pattern that reaches deep knee flexion, and one leg extension. Understand the anatomy and the whole thing simplifies. All you need is two good movements and to just get strong at those two movements.

💡
Read this first: If you want to intelligently train any muscle, understanding its anatomy is key. The exercises are the easy part — the anatomy and the global form principles below are what make them work.

The Anatomy

All muscles do fundamentally is create bone-to-bone pull — they attach on one bone, attach to another, and pull the two closer together. The quads are four muscles that all share one insertion point: they insert onto the kneecap via the same tendon and pull the tibia toward the femur. It’s the origins that separate them — and that one fact drives everything.

Anterior thigh anatomy with the quadriceps heads visible around the femur
Four heads around one femur. This crop from the final quads masterclass shows the anterior thigh group and the shared direction toward the knee.
Vastus Intermedius
MONO-ARTICULAR
Originates along the femur, crosses only the knee — its only job is knee extension.
Vastus Lateralis
MONO-ARTICULAR
Off the femur, knee joint only. It doesn’t care where your hip is.
Vastus Medialis
MONO-ARTICULAR
Off the femur, knee joint only — pure knee extension.
Rectus Femoris
THE ODDBALL · BI-ARTICULAR
Originates from the pelvis, crosses hip AND knee — does knee extension and hip flexion.

The three vasti originate along the femur, so they’re mono-articular — they cross only the knee and do one thing: knee extension. The rectus femoris originates from the pelvis, crosses both the hip and the knee, and can do both knee extension and hip flexion. That has big implications. The knee is a hinge joint like the elbow — it folds up over the thigh, and all four heads create one line of pull: knee extension, straight up. The knee cannot be pulled out to the side by muscular contraction.

The two-joint problem — in a squat you’re doing knee extension plus hip extension on the way up. The rectus femoris wants to do hip flexion — the opposite — so the CNS turns it down. Your brain is like, “Oh no, no, you’re no good for the job. Let’s turn that down.” The result: the rectus femoris gets no meaningful growth from squatting or leg pressing. The fix is to hold one joint fixed and train the other — keep the hip fixed and train just the knee. That’s the leg extension. (The hamstrings have the same problem in reverse, which is why they don’t grow well from squats either.)

Two physiology facts — the quads are a big muscle group with a large voluntary activation deficit: they’re hard for the brain to fully recruit, so stability and setup are critical and they may recover a bit faster. And they operate on the descending limb of the length-tension relationship — lots of passive tension — so they respond exceptionally well to being loaded in a stretched position. Outcome data and anecdote agree.

Length-tension curve showing passive force rising as a muscle moves beyond its normal length
Why depth pays. The quads can produce meaningful passive tension at long muscle lengths, making loaded knee flexion valuable.
Force graph illustrating the gap between voluntary quad force and maximum possible force
The activation deficit. Stable machines and aggressive bracing help close the gap between what the quads can produce and what you can voluntarily recruit.

Global Form Principles

1

Stability is a growth lever, not a nicety

Because of that large voluntary activation deficit, the quads are hard to fully recruit — and a more stable environment makes it easier for the brain to fire muscle fibers. A machine that gives your hips, spine, and shoulders a pad to brace into removes the weak links so you can push the quads to what they’re actually capable of. Bracing and stability are the whole game.

2

Load the stretch — chase deep knee flexion

The quads live on the descending limb of length-tension, so deep knee flexion and loaded stretched positions drive growth. Deep flexion means the calves coming into contact with the hamstrings. Your femur/torso structure affects how easily you get there — but reach as much comfortable, pain-free flexion as you can, because that’s where the stimulus lives.

3

Own your setup — feet, stance, shoes

Set feet slightly wider than hip width with toes and femurs turned out slightly, so you get the hip flexion to sink into full knee flexion. Maintain even pressure through the whole foot — outside, ball, and heel — and grip the ground. Knees track directly over the toes, in the same direction they point. Elevate the heels (two tiny plates, or ideally squat wedges / squat shoes with a built-in heel-elevated platform) to reach depth without running out of ankle mobility. Descend controlled and hold tension at the bottom — don’t dive-bomb, slap, and bounce.

Heel-elevated squat shoe
Squat shoes. A built-in heel gives you a repeatable way to reach more knee flexion when ankle mobility is the limiter.
Pair of metal squat wedges for heel elevation
Squat wedges. The portable alternative when you want the same heel-elevated setup without changing shoes.
“Rotate your foot out to hit the teardrop, in to hit the sweep.”

False — it ignores knee biomechanics. All four heads create one line of pull, so rotating the leg just side-loads the knee and stresses ligaments and connective tissue. I put this myth early on purpose: if I save somebody’s knees out there, then I’ll count that as a win.

“Narrow stance builds the outer sweep, wide stance builds the inner sweep.”

That’s all bogus. All targeting of the individual vasti is not based on reality. The only meaningful biasing you can do of the quads is whether or not the rectus femoris is involved.

The Movements

6 picks

Signature Spotlight — The Hack Squat Resistance Profile

The contrarian take

Reverse-Band the Hack Squat

The hack squat’s challenge is wildly uneven: up top it’s pretty dang easy, at the bottom it’s a different story. But it has little to do with the weight — 200 lb on the sled is 200 lb the whole way. What changes is the torque delivered to your knee. As the knees travel further from the midline of your body, the challenge gets harder and harder — the bottom is where the real torque, and the real growth, live. If there’s more torque to the knee, the quads have to do more work and they grow better.

Here’s the problem that creates. Without a band you’re limited by the load you can control at the hardest point — the bottom. If you can only handle 250 lb there, that’s all you can load; go to 350 and you’ll just do little half reps like most people. So the top half gets under-trained. The reverse band fixes it: hooked up high, completely slack at the top, it stretches and adds tension on the way down. Load ~300 on the sled — at the bottom the band assists so it’s effectively ~250 (controllable for full reps), and as you rise and the band goes slack it’s closer to 300 up top. We are making the bottom easier, but we are making the top harder. You match the resistance profile to your strength profile and get an even stimulus through the whole range.

Reverse band attached high on a hack squat so assistance increases toward the bottom
What the setup looks like. The band is slack near the top and stretches as the sled descends, supplying the most assistance where the squat is hardest.

The strength-profile analogyA guy doing the top two inches of a four-plate squat isn’t impressive; a guy doing two inches at the bottom of a parallel squat is strong. You generate far more torque at the bottom than the top — so that’s where the load has to be honest.

SafetyAnchor the band only to something welded and solid — never anything plastic. If you break equipment, I am not responsible for it and you’re an idiot.

Nailing the Compound — Technique

People butcher the hack squat all the time — usually via bad setup, short range of motion, or bouncing. The formula is simple.

Setup: glue in, then find your feet

Shoulders push into the pad; spine and hips stay glued to the pad the whole time. Start with your feet low on the platform and shimmy them forward/up using friction until you feel flat and stable and can reach full knee flexion without the hips coming off the pad and without the heels floating. Feet too high and the heels lift at the bottom, killing force transfer. Micro-adjustments matter — small tweaks, not big two-inch moves. Toes out roughly 10–15°, stance a bit wider than hip width as your hips need. On some machines (Arsenal Strength, Atlantis) don’t recline the plate all the way — then only friction holds your foot, it can slip under heavy load, and it can feel bad on the knees; you want the plate pushing back into you. If the plate is geared too high (older Cybex), drop it a couple notches.

Execution: controlled down, pause, drive through the whole foot

Descend slow and controlled — no longer than four seconds — as deep as you can until the hamstrings meet the calves (tissue on tissue), or as deep as pain-free. Take a slight pause at the bottom: don’t dive-bomb and bounce. Bouncing is a collision between your joints — like throwing a tennis ball at a wall, except the medium transferring that force is your connective tissue. Then drive up hard through the whole foot — the heel, the ball, and the outside make a tripod, with the heels taking a bit more pressure. Brace at the top of every rep, hold that brace (hold your breath) to the bottom, exhale and drive up, and reset the brace each rep.

“These squatting patterns are dangerous for your knees.”

I don’t believe any of these patterns are inherently dangerous — misapplication of form and load is what causes issues. And full depth is not an absolute necessity: if you have orthopedic knee issues, go to what’s comfortable and pain-free and you can still grow quads just fine.

Programming Blueprint

Two movement patterns, done well and overloaded over time. Pick one compound and get brutally strong at it — don’t program-hop. Pair it with a leg extension to cover the shortened range no squat reaches. Choose whatever squatting pattern is working for you and feels best, and just get brutally strong at that and your quads will grow. If you do both in one session, put the leg extension first — it’s less fatiguing and warms up the knees.

1
Leg Extension FirstWarms the knees, trains the fully shortened range, and grows the rectus femoris. ~90° start.
2
One Deep CompoundPick one — pendulum, banded hack, heel-elevated squat — and get brutally strong at it.
3
Squeeze the AdductorsThey create front-view leg width and full legs. Throw in some squeezy ends.

Want your legs built for you?

This playbook is the map. Coaching is turn-by-turn — your leverages, your depth, your setup, dialed in so every rep counts.

Apply for 1:1 Coaching →
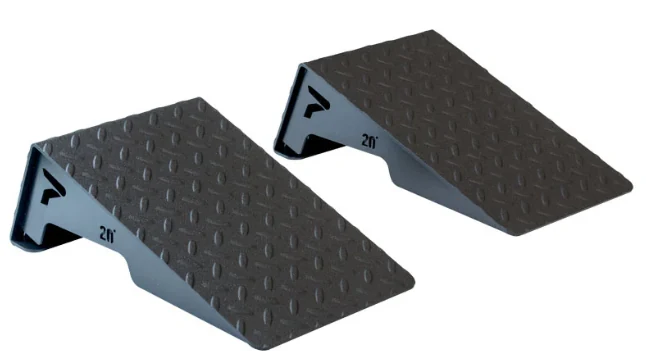
Body-Part Playbook · Hamstrings

The Hamstrings Playbook

Build your hamstrings around knee flexion at long muscle lengths plus hip extension — solving the two-joint problem by holding one joint fixed and training the other. The single best movement is the seated hamstring curl. Prioritize the lengthened range, manage your volume, and remember that how you do things is so much more important than what you decide to do.

💡
Read this first: Understanding the anatomy of a muscle is the first step to an intelligent conversation about how to train it. Don’t skip to the movements — the anatomy tells you why squats aren’t on this list.

The Anatomy

Muscles create bone-to-bone pull: when fibers slide over each other they pull one bone closer to another. The hamstrings are four muscles, and the key split is how many joints each one crosses.

Posterior skeleton with the hamstring group highlighted on one thigh
The posterior thigh group. The highlighted masterclass frame shows the hamstrings spanning the back of the femur toward the pelvis and knee.
Biceps Femoris Long Head
BI-ARTICULAR
Ischial tuberosity origin, fibula insertion — hip extension + knee flexion.
Semitendinosus
BI-ARTICULAR
Sit-bone origin, medial tibia insertion — hip extension + knee flexion.
Semimembranosus
BI-ARTICULAR
Sit-bone origin, medial tibia insertion — hip extension + knee flexion.
Biceps Femoris Short Head
THE ODDBALL · MONO-ARTICULAR
Femur origin, fibula insertion, crosses the knee only — knee flexion only.

Three of the four heads originate from the ischial tuberosity — the “sit bone” you feel digging your hips into a chair — and cross both the hip and the knee, making them bi-articular. They do hip extension (pulling your hips from tilted to upright) and knee flexion. The biceps femoris short head is the oddball: it originates on the femur, crosses only the knee, and can only flex the knee. So the fully lengthened hamstring is a straight knee plus a flexed hip; fully shortened is a fully flexed knee plus an extended, upright hip.

The two-joint problem — in any squat or leg-press concentric you do hip extension and knee extension at the same time. The hamstrings can do the hip extension, but they also want to do knee flexion — and a muscle can only contract, it can’t fire at the hip but not the knee. So the CNS turns them way down. Squats and leg presses are not hamstring exercises — a study had subjects squat and found virtually no hamstring growth, while the quads and glutes did grow. The fix is to hold one joint fixed and train the other: knee flexion with a fixed hip (a leg curl), or hip extension with a fixed knee (a hinge).

Two physiology facts — the hamstrings operate into the descending limb of the length-tension relationship, so there’s significant passive tension and strong stretch-mediated hypertrophy — load them in a lengthened position (head-to-head, the seated curl crushes the lying curl). But they’re an outlier with very high voluntary activation: by Henneman’s size principle, driving activation up recruits the largest, most glycolytic, damage-prone type II fibers — and lengthened-range work is already more fatiguing. So manage your volume; the hamstrings may recover a bit slower. One anatomy tiebreaker: only three heads act on the hip, but all four act on the knee — so if forced to choose, lean toward knee flexion.

Four graphs comparing hamstring head lengths in seated and prone leg-curl positions
The seated position lengthens the hamstrings. Hip flexion changes starting length across the heads before the knee even begins to curl.
Study summary comparing growth from seated and prone leg curls across four hamstring regions
And the growth data follows. Seated leg curls produced more growth than prone curls across the measured regions.

Global Form Principles

1

Solve the two-joint problem — hinge and curl

Because squats don’t train the hamstrings, you need dedicated work for each function. Hold the hip fixed and train knee flexion (seated or lying leg curl); hold the knee fixed and rotate the pelvis to train hip extension (a hinge). That narrows the entire universe of hamstring training down to a leg-curl motion and a hinge motion.

2

Prioritize the lengthened range

The hamstrings sit on the descending limb of length-tension, so lengthened-range work drives growth. Head-to-head, the seated leg curl (longest length → mid-range) crushes the lying curl (mid → shortened) for growth. Build around the seated curl and a locked-knee hinge; the lying curl is a bit less favored but still has its place.

3

Manage volume — they fatigue and damage more

High voluntary activation means you recruit the largest, most damage-prone type II fibers, and lengthened-range movements are the most fatiguing kind. That combination means the hamstrings can be easy to overtrain and may recover a bit slower. Budget the fatigue — don’t just pile on sets.

4

Execution beats programming

One set of seated leg curls twice a week, done well, beats an optimized program done poorly. Don’t get lost in programming varieties — how you do the movements is more important than which ones you pick.

“Squats and leg presses build your hamstrings.”

False — the two-joint problem shuts them down, and studies show virtually no hamstring growth from squatting (quads and glutes grow instead). If you feel the back of your legs on fire during a leg press or squat, you’re feeling your adductors, which do contribute — not your hamstrings.

The Movements

3 picks

Signature Spotlight — Stability, Not Strength

The game changer

The Seat Belt Hack

Seated hamstring curl setup showing a seat belt securing the pelvis to the machine
Stability changes the rep. The belt anchors the pelvis so the thigh pad cannot pull you out of the seat near full contraction.

On the seated curl, the thigh pad’s line of force changes through the rep. At the top it pushes down into your leg — good. But at the bottom, the pad’s force tries to pull you out of your seat, and your hips slide out. That’s the real limiter. Oftentimes we’re not limited by how much force our hamstrings can produce — we’re limited by stability.

The fix: loop a seat belt around the top of your pelvis and attach it at roughly a 45° angle to the back of the machine. Now you can’t get pulled out of the seat, which lets you fully contract the hamstrings at the bottom. Only attach it to a welded piece of metal that holds strong — never a plastic piece that can break, and set it so it won’t slip or damage the machine. I keep one in my gym bag — if it didn’t make a huge difference, I wouldn’t carry a seat belt around in there.

The other stability hack — jam the thigh padCrank the thigh pad down as hard as you can onto your thighs. It gives you a counterforce to push into at the start of the rep, maximizing hamstring output and stability — just don’t do it if it makes you hyperextend your knees.

Nailing the Hinge — Technique

The hip hinge (my favorite is the stiff-legged deadlift) is the harder movement to self-manage — you can’t see your own back — so the execution rules matter even more.

Remove the wrong limiter, then shove the hips back

Use your straps — for most people the forearms and grip give out first, and straps put the hamstrings back in charge. Use your dang straps. All the motion comes from the hips: think hips back, and as soon as the hips stop traveling back, come back up — going lower would only be spinal flexion, which the hamstrings don’t do anyway and which is a safety risk. Keep the knees locked the whole way, stance relatively narrow at about hip width, and brace hard: abs tight, lats flexed, no shrugging the shoulder blades around. Lock this whole upper body in stone and just think about shoving the hips back.

Set the safeties, and film — don’t crane your neck

Find your bottom range — where the bar sits when the hips are all the way back and the spine hasn’t rounded — and set the rack or Smith safeties to that height as a target. You can even initiate each rep from that bottom position instead of pulling off the floor. And take a video and review your form after — do NOT turn your head to watch in the mirror; rotating the spine at the head feeds down the spine and compromises your stability.

Programming Blueprint

Scale it to how far you want to go. The one-movement minimalist does the seated curl well. The optimal minimalist adds a hinge so you train both knee flexion and hip extension across the week. Full optimization brings in all three patterns. One tip, my two cents and not a hard rule: put hip extension on one day and the seated curl on the other, so you cover the full contractile range each day; slot the lying curl onto whichever day (or both). You can do one set of seated leg curls twice a week, and if you do them well you’ll get way better results than trying to optimize your program and not doing them correctly.

1
Seated Ham CurlThe minimalist’s one movement — long length, all four heads, maximum stability. Do this well.
2
Add a Hip HingeStiff-legged deadlift or 45° back extension — now you train hip extension too. Optimal minimalist.
3
Add the Lying CurlThe third pattern, biasing the heads differently. Do it first if paired — it’s less fatiguing.

Want your training built for you?

This playbook is the map. Coaching is turn-by-turn — your leverages, your stability, your volume, dialed in so execution never lets you down.

Apply for 1:1 Coaching →
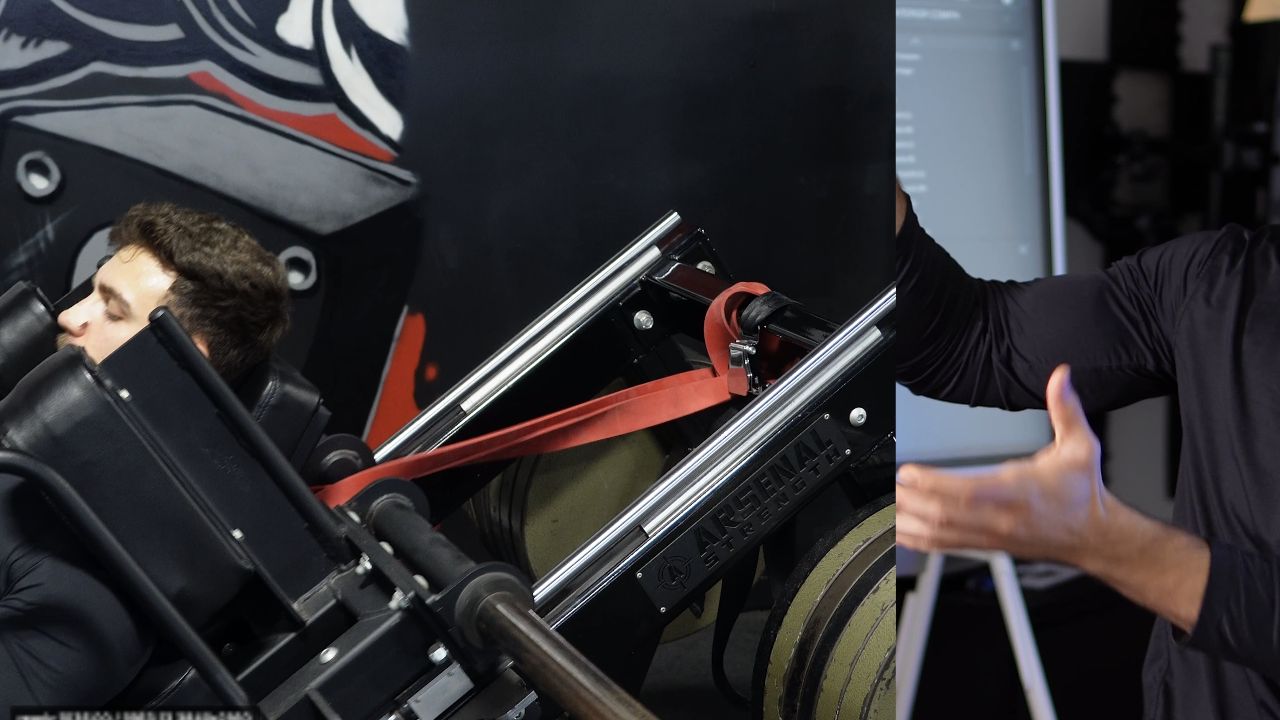
Body-Part Playbook · Glutes

The Glutes Playbook

The glutes are one of the most obsessed-over muscle groups in the human body — and, for how important they are, one of the most poorly understood by both the fitness community and the scientific community. A 2025 paper literally rewrote their anatomy. Understand the muscle first, then the Core Four movements and the execution cues that make or break them do the rest.

💡
Read this first: The execution cues below are advanced tips nobody online is talking about — the sauciest part of the whole thing. Don’t skip the anatomy to get to the movements. I’m giving away the keys to the kingdom here.

The Anatomy

Every muscle does the same fundamental thing: it attaches on one bone, attaches on another, and pulls those two bones closer together — or resists them moving apart. For the glutes, the two bones are the pelvis and the femur (hip bone and thigh bone). One end of the glute max originates all along the pelvis; the other end inserts down by the femur.

Historically, that insertion was thought to attach largely onto the IT band — the tissue running down the leg with a knee-stabilizing role. The 2025 study overturned that: 75% of glute max fibers attach directly to the femur. That single fact lets us narrow the entire training conversation down to four hip functions: extension, abduction, adduction, and rotation — not the knee.

Gluteus Maximus
BEAST · MOST GROWTH
A massive beast of a muscle with by far the most growth potential of the three. Divides into upper and lower regions — your main training focus.
Gluteus Medius
SIDE BOOTY · STABILIZER
The “side booty” muscle on the side of the hip. Abducts when you stand tall — and works overtime stabilizing the pelvis in single-leg work.
Gluteus Minimus
DEEP ADD-ON
Runs deep under the medius. Treat it as an add-on to the medius — it doesn’t have much growth potential of its own.
Posterior anatomy view showing the gluteus maximus and underlying hip structures
The glute max spans the pelvis and femur. Its wide, fan-like architecture lets different regions contribute differently as hip position changes.

The glute max is a regionally complex muscle with divergent architecture — a broad spread of origins and insertions — so which fibers work depends on where your hip is. Some regions can abduct the thigh while others adduct it. The same overall muscle being able to pull in opposite directions is quite weird.

Standing straight up (anatomical position) — the glute max is largely a hip extensor. Hip extension can look like two things: driving your leg behind your body, or — if slightly hinged — pushing your hips forward to bring the torso upright. Both are hip extension. It also assists external rotation of the thigh, but it’s a poor abductor here.

Move into hip flexion — and the fibers reorient. The upper glute max fibers gain a lot of leverage to abduct, which is exactly why a seated hip abduction done leaning forward becomes a big upper-glute-max exercise. The glute medius does the opposite: it’s a strong abductor standing tall but loses leverage the more hip-flexed you get — the mirror image of the glute max’s abduction function.

The medius’ real job — stabilizing the pelvis, not just abducting the thigh. During anything on one leg — a split squat, a lunge — a force tries to tip your pelvis to one side, and the medius holds it level. This is no token “stabilizer” role: biomechanical analyses show it can have to produce forces of 2 to 3 times your body weight just during unweighted single-leg exercise. If we train all the different functions of the glutes, we can be pretty certain we’ll get good all-around development.

Posterolateral anatomy view with the gluteus medius exposed on the outer pelvis
The side-hip fan. The in-progress anatomy render shows the medius running from the outer ilium toward the greater trochanter.
Biomechanics diagram showing the gluteus medius countering the external force that tips the pelvis during single-leg support
Pelvic stability is a force problem. The glute medius has to create enough internal torque to oppose the much longer external moment arm acting on the pelvis.

Global Form Principles

1

Stability is a growth lever

Generally speaking, the more stable a movement pattern is, the more motor unit recruitment — the more muscle activation — you can pull out of the target muscle. When you’re not fighting to balance the load, that output goes straight into the glutes. This is exactly why two of the Core Four live on the Smith machine: not to make it easy, but to make it stable.

2

Train every function

Regional targeting is possible, sort of probably. But everything here is built on first-principle biomechanics and some activation data, not long-term growth outcomes: we’re one study deep in that field. There seem to be regional differences in activation, but we can’t say with stone-cold certainty that “this grows this.” So the safe bet is completeness — hit extension, abduction, adduction, and rotation, and good all-around growth follows.

3

Contracted before lengthened

Order matters. Put the contracted (shortened-range) movement before the lengthened-range one in a session. The lengthened-range movement is more fatiguing — likely due to the influx of calcium ions through stretch-activated ion channels. Go stretch-first and your performance suffers on both; flip the order and both movements come out relatively better.

“The glute max is just one big slab of muscle that does hip extension.”

It’s a regionally complex muscle with divergent architecture. Depending on where your hip is, different regions do very different things — some can even abduct while others adduct.

“You should go ass to grass on a hip thrust.”

You do not. Keep the ROM fairly shallow. Go too low and your spine starts extending and your pelvis tilts forward, which pulls demand off the glutes. The important part is shoving your hips all the way through to lockout.

The Movements

4 picks

These four were chosen very carefully on biomechanical grounds. Three of them most directly challenge hip extension — they differ in where the movement is hardest (the resistance profile) and which non-glute muscles assist. Two are contracted / shortened-range (hip thrust + abduction), two are lengthened-range (RDL + Bulgarian split squat). If you expanded to a “Fantastic Five,” the add-on would be a glute kickback variation — but the Core Four are the first four that should make it into any glute program.

Signature Spotlight — The 2025 Anatomy Rewrite

The paper that changed everything

75% Attaches To The Femur

Study schematic comparing a convergent muscle with the gluteus maximus and its divergent architecture
Why the glute max behaves differently by region. Its fibers do not converge toward one simple line of pull; they spread across multiple attachment paths.

For decades, the glute max was thought to insert largely onto the IT band — the tissue that runs down the leg and helps stabilize the knee. If that were true, a big chunk of your glute training conversation would be tangled up with the knee. A paper done in just 2025 rewrote the anatomy of what we thought was true about this muscle: it found that 75% of glute max fibers attach directly to the femur.

It reframes how you train. If the muscle pulls the pelvis and femur together, then glute training collapses down to four clean hip functions: extension, abduction, adduction, and rotation — not the IT band, not the knee. It also confirms why the glute max behaves so strangely — its broad, divergent origins and insertions let it do different jobs from different regions depending on your hip angle.

The honest caveatWe can sort of probably bias specific regions, and there seem to be real differences in regional activation — but we are one study deep on actual growth outcomes. This is built on first-principle biomechanics and activation data, not long-term hypertrophy data. So we don’t overclaim. We hedge with completeness: train all four functions, get good all-around glutes.

Programming Blueprint

Assuming all four movements are in your routine, split the work over two training days. Two picks are shortened-range and two are lengthened-range — so on day 1 choose one of each, and on day 2 choose one of each. Within any session, run the contracted movement before the lengthened one. Keep volume tight, and never slam glute workouts back to back — give them at least two rest days so they actually have time to recover and grow. Expanding to a Fantastic Five? Add a glute kickback.

1
Two Training DaysSplit all four movements across two days — one shortened-range and one lengthened-range pick on each.
2
Contracted → LengthenedHip thrust or abduction before the RDL or Bulgarian. Stretch work is more fatiguing (calcium-ion influx), so it goes second.
3
2 Sets Is The Sweet SpotNever above 3 working sets per exercise. Two is the sweet spot for most people — especially more advanced trainees.
4
≥ 2 Rest DaysAt least two rest days between glute sessions. Do not slam these workouts back to back.

Want massive glutes built for you?

This playbook is the map — the anatomy, the Core Four, and the cues that make them work. Coaching is turn-by-turn: your leverages, your schedule, your program, dialed in.

Apply for 1:1 Coaching →
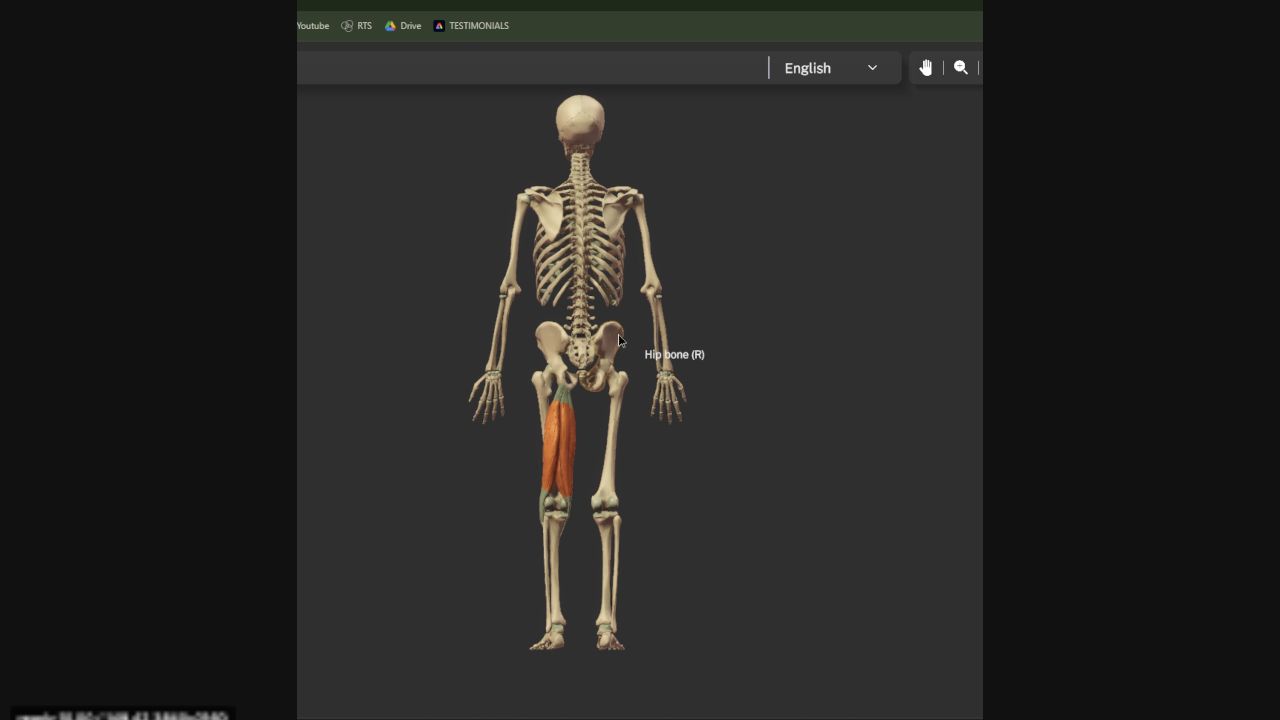
PROGRAMMING

The Training Blueprint

The science says low volumes work and fatigue kills your later sets. Here’s what that actually looks like in a training week — the sets, loads, rest, and rules that turn the theory into a plan you can run.

💡
The whole philosophy in five words: More is not better. Better is better. Manage fatigue and you get less volume with better outcomes.

Fatigue is the reason volume has diminishing returns — it erodes motor unit recruitment, so later sets carry fewer stimulating reps. A brutal second set after 30 seconds’ rest can land at only ~50–60% of the first set’s recruitment. That second set was brutal, difficult, and extremely painful, but it wasn’t necessarily effective. Manage fatigue and you get less volume with better outcomes.

1
5–10 hard setsPer muscle group, per week, taken close to failure — spread over 2–3 sessions (e.g. 3+3, or 5+5). A reasonable starting point, not a law.
2
~1 rep in reserveThe sweet spot for stimulus vs. fatigue. Get close every working set; don’t leave 5–6 reps in the tank. You needn’t hit true failure every time.
3
Favor heavier loadsI love the 6–10 rep range (5 is great too). Heavy fills the cup with recruitment; 15+ reps generate a lot of fatigue for the stimulus.
4
Rest 2–3 min+Let the cup drain so the next set reaches high recruitment. Big patterns like heavy back squats may need more. Avoid supersets, drop sets, and short rest.
5
Prioritize stable movementsMachines are generally most stable; well-drilled free weights are fine. Avoid the extreme (Bosu-ball work) that pre-fills the cup with instability junk.
6
Quality over quantityI’d much rather have one very high-effort solid set than three junk ones. Short on time? One hard working set per exercise captures the vast majority of the session’s growth.

I lean low-volume for three reasons. It preserves set quality: pile on 7 exercises × 5 sets and by the fourth you’re tapped out and your execution sucks. It makes adherence skyrocket, because shorter sessions mean people actually show up, and consistency is king. And it protects joints for the long haul: they only have so many articulations under load, so if you can get 80–90% of the benefit at much lower volume, do that. I want my clients in the gym for decades, not six months. More is not better. Better is better.

Want a program built on quality, not junk volume?

I’ll dial in your sets, loads, and proximity to failure so every session earns its keep — and your joints last decades, not months.

Apply for 1:1 Coaching →
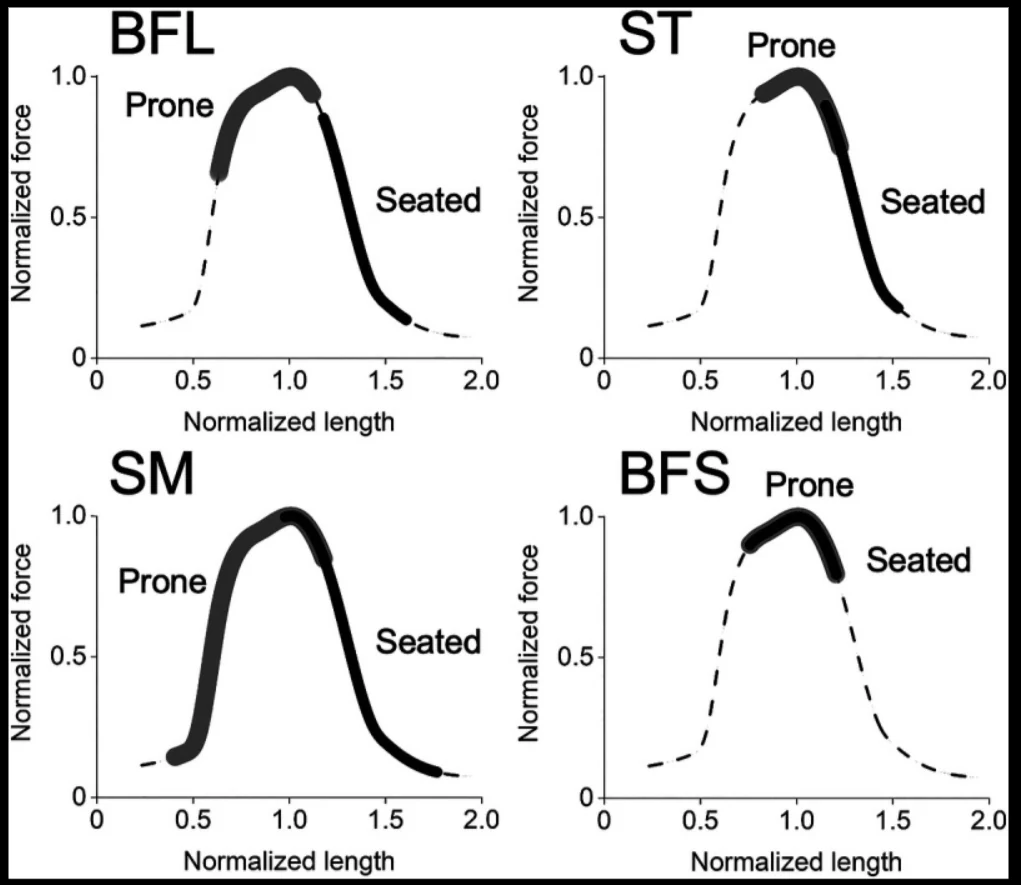
PROGRAMMING

Progressive Overload & Double Progression

You’ve heard progressive overload is the key driver of muscle growth. That’s backwards: it’s the indicator that growth has likely happened, not the cause of it. Here’s what it really is, and the double progression model that reliably makes it happen.

💡
The correction: Progressive overload is not the cause, it is the effect. The actual cause is mechanical tension near maximum effort — overload is just the cleanest proof it worked.

Indicator, Not Driver

the effect

You’ve likely heard that progressive overload is the key driver of muscle growth. It’s not really a driver at all. It’s an indicator that growth has likely occurred — not the cause, the effect. The actual cause is mechanical tension, specifically when operating near maximum levels of effort.

1

Exactly two levers

Progressive overload means getting stronger over time: you either add reps with the same weight or you add weight. 30 lb for 6 reps → 30 lb for 7 reps is progressive overload; 30 lb for 6 → 35 lb for 5 is too. Same form is the keyword. Adding sets/volume is not progressive overload. Changing tempo or form is not progressive overload — it’s no longer apples to apples.

2

Strength has ~6 sources

You can get stronger from a variety of adaptations — six that we know of — and muscle growth is only one. So getting stronger doesn’t guarantee you grew. But the logic runs one way: if progressive overload doesn’t happen over time, you can be fairly certain none of those adaptations did either — no growth.

3

It’s a stock chart, not a staircase

It’s not add 5 pounds every week. Zoom in and you see up-and-down wiggles from poor sleep, low calories, low carbs, stress, low motivation — life in general. Zoom out and the trend is going up and to the right over time. Judge success by the zoomed-out trend, not the day-to-day noise.

4

The grind zone is the point

Early gains are fast — muscle growth plus big coordination improvements, which level off after about 4–8 weeks for a simple stable exercise (longer for something complex like a barbell back squat). Then progress flattens and you fight for a rep or 5 lbs. This is the time to stick it out, and it’s the time most people jump ship. Ironically it’s exactly when small strength gains are the cleanest signal of real muscle growth, because the neural factors are used up.

Form gates everything

One rep is the fundamental unit of weight training: sets are collections of reps, workouts collections of sets. The biggest gym mistake is not performing reps correctly. Cleanly benching 135 then bouncing 185 off your chest isn’t 50 lbs of gains — it’s a different, worse exercise. Progressively overloading bad form leads to subpar results in muscle growth as well as a much larger injury risk. Treat form like tuning an instrument: it drifts, so you periodically lower the weight and re-tune.

“Progressive overload is the driver of muscle growth.”

It’s the indicator, not the cause. The cause is mechanical tension near maximum effort. Program-hoppers chase the rapid-gain phase of a new routine, bail at the grind zone, and under-grow — because they quit right when strength becomes the cleanest proof of growth.

The Double Progression Model

how to run it

Double progression is, in my opinion, the most reliable strategy for knowing when to increase the weight, how often to do it, and actually implementing progressive overload. You progress two variables — reps or weight — inside a fixed rep range at a fixed intensity.

1
Set the baseDefine a rep range and target intensity — e.g. 6–12 to failure. Good targets: 6–10, 6–12, or as low as 4–8. Ranges aren’t rigid.
2
Pick a weightChoose a load that lands failure inside the range. Guess 45s, hit failure at rep 8 — that’s in 6–12, so you’re good.
3
Add reps firstKeep the same weight week to week until you reach the top of the range (12 reps).
4
Then add weightAt the top, bump the load — dropping you to the low end. 45→50 is a little under a 10% increase, the reasonable jump; if 55s won’t give 6 reps, that’s too big.
5
Micro-load the gapsWhen the next cable stack (7.5→12.5 = ~66.67%) is too big, use the ~1.5 lb add-ons (→ ~9 lb) or hang a 2.5 lb plate on the pin (→ ~10 lb).
6
Keep a 4-rep floorForced to jump? Fine if you still get at least 4 reps. Below 4 still stimulates (3 reps = 3 stimulating reps) but 4 is the target floor. Trick: grind current weight to 14 reps to confirm you can hit ≥4 at the next load.
7
Track back-off sets aloneExpect fewer reps on set 2 (10 on set 1 → ~7–8 on set 2). Compare set 1 to last week’s set 1, set 2 to set 2. Two extra reps on set 2 is progress — even a fraction of a rep counts.
8
Failure on the last setDon’t take the first working set to failure — a set-1 failure rep drags down later sets. If only one set goes to failure, make it the last. Stay consistent week to week — that’s what matters most.

You just rinse and repeat over time until your muscles are so big that all of the men compliment you. Shocker. Run the whole thing for 12–16 weeks minimum; if you’re still progressing, stay on it — I’ve stuck with programs for the better part of a year.

Want your overload tracked and managed for you?

Double progression is how I know when to add weight and when to hold. Let’s put your progress on rails and keep it climbing.

Apply for 1:1 Coaching →
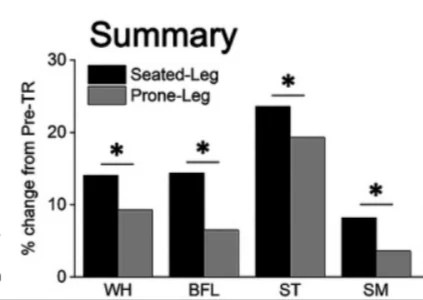
Programming Guide · The Free Program

The Free Hypertrophy Program

This is a real hypertrophy program I wrote for one of my training teams — the full plan, plus the reasoning behind every decision. There’s a plan here. You can screenshot it and leave now if you’d like, and follow it for as long as you want. But the real value is watching how the plan gets built. The best plan is something people can actually stick with.

💡
Read this first: Always start with who this is for and what their goals are — everything else follows. This block was written for young, healthy males without many joint issues, whose goal is to prioritize upper-body growth.

Start With Who — And Their Goals

Always start with who — and what their goals are. This plan was built for one of my training teams: mostly young, healthy males without many joint issues, whose goal is to prioritize upper-body growth. Legs still get trained — I won’t have any twig people in my training groups — but the torso is the priority for this block.

Physiology, mechanisms, research, optimality — none of it matters if people don’t actually stick to the plan. Programming for a group is a shotgun approach to get everybody to attend as much as possible. A perfect plan nobody follows is worthless. Adherence beats optimality.

“The best program is the most optimal one on paper.”

Optimality is not the top priority — adherence is. The best plan is the one people can stick with.

Why Monday / Tuesday / Thursday / Friday

Day selection is data-driven. Tracking adherence across roughly 30 people, one pattern makes attendance skyrocket: Monday, Tuesday, Thursday, Friday. For whatever reason, people like this best. It also happens to force a useful arrangement — two back-to-back days, a rest day, then two more back-to-back days.

Frequency is very important — the literature is clear on this. Hitting a body part only once per week can grow you, but it isn’t the most efficient use of your training. Split the volume across the week so you’re recovered in time to hit the muscle again. Training chest only on Mondays, like a lot of people do, is probably not the best way.

The 4-Day Split

Pull · Push · Lower · Upper

A Pull / Push / Lower / Upper arrangement hits most body parts twice per week and lets volume be spaced for recovery. Two back-to-back training days, a rest, then two more — no muscle gets hammered on consecutive days.

1
Monday — PullBack-priority. Chest-supported row, reverse pec deck, lat pulldown, DB alternating curl, single-arm preacher curl.
2
Tuesday — PushChest priority. Low-incline Smith press (2 sets), machine shoulder press, triceps extension. ~3 chest sets here.
3
Thursday — LowerLeg extension first, seated ham curl (2 sets), quad-biased leg press, barbell RDL / stiff-leg (2 sets).
4
Friday — UpperCarries the rest of the week’s chest, plus back/shoulder/arm volume. DB curl chosen here for speed.

Many First Sets — The Signature Idea

The contrarian take

Low volume per exercise, many more exercises

My general defaults usually run 4–5 exercises a day at 2–3 working sets each (mostly 2). This plan deliberately breaks that: 6–7 exercises per day, mostly 1 working set, with a handful given 2. Why? Because first sets are the most productive. Stimulus per set follows an exponential decay — set one is worth roughly a full unit of growth, and every set after that is far less effective.

So why not decrease the volume across the board, go extremely low volume per exercise, and drastically increase the number of exercises, to get a bunch of unique stimulus? That “more first sets” hypothesis gets balanced against frequency and total weekly volume allocation — it isn’t a license to add endless exercises.

Quality over quantityPrescribing fewer sets makes people crush the one set that much harder — we’re pushing it all the way to failure or one rep shy of it. When you emphasize quality of sets over quantity, you don’t need as much volume as you think.

How Much Volume

A great starting and ending point for most people training a muscle twice a week: about 5–10 (6–10) good, hard working sets per muscle group per week. Some can go higher; some get great results below that. In this plan, chest lands around 6 hard sets a week — roughly three on Tuesday plus two or three more on Friday.

Start low, add only if needed — there’s a really good argument to start on the low end of volume and only add more if you’re not progressing. The common mistake is to just throw sets at a wall and see what sticks. For reference: my own training runs no more than 6–8 hard working sets per muscle per week, and I’m still growing after training a long time.

1

Prioritize by choice, not by accident

Something always gets prioritized by default. Doing it consciously — through exercise order and volume — yields better results, especially for intermediate and advanced lifters. Even, spread-out stimulus works great for beginners, but you can progress faster by prioritizing certain body parts in blocks. This block’s priorities: chest and back, bringing the torso back into rotation after the delt-focused “Shoulder Shredder” block.

2

Exercises done earlier are more stimulating

Because fatigue accumulates through a session, the movements you do earlier are more stimulating; later ones are a bit less effective. So priority muscles go first, and a couple of the compound/priority movements get the 2-working-set treatment.

Leg-Day Ordering

Leg day runs against the common “squat first, then accessories” habit. Start with isolation / shortened-position work, then move to compound / lengthened-position work. Leg extension goes first, then a set of seated hamstring curl, then the leg press, then the RDL.

1

It warms up the knee joint

A set of leg extensions plus a set of hamstring curls preps the muscles pulling from both sides of the knee before you load it under a leg press.

2

It manages fatigue

Starting with the shortened-position exercise (leg extension), then moving to the lengthened-position one (leg press), has less impact on performance than the reverse. (Mechanistic hand-wave: stretch-activated ion channels, calcium accumulation — but go look at your own performance to confirm.)

Hamstrings go early and get 2 sets

It’s their only work of the day, and they aren’t involved in the leg press — so the extra stimulus won’t hurt press performance (just some CNS fatigue). Bumping them earlier makes those sets more stimulating.

Complementary Pairing — Avoiding Redundancy

Each priority muscle is trained with movements that hit different functions or positions, so no two exercises are just doing the same set twice.

Hamstrings
KNEE + HIP
Stiff-legged deadlift (hip) plus seated leg curl (knee) — covering both functions of a two-joint muscle.
Back
FULL RANGE
Chest-supported row (upper back + lats mid-to-short), lat pulldown (lats lengthened → short), reverse pec deck (pulling).
Biceps
TWO POSITIONS
Standing DB curl (overall, peak torque ~90°) plus single-arm preacher curl (lengthened range).

Phases, Reps & RIR

1

Weeks 1–2 — Acclimation

New exercises and a new order make you more susceptible to muscle damage and excessive soreness (related, but slightly different things). So the first couple of weeks lower the intensity and leave more reps in reserve — around 1–3 RIR — to let the body acclimate.

2

The work phase

Then ramp up into the main working phase. Most work sits in the 6–10 rep range — 4–8 is awesome too, and for super-advanced lifters I might use 5–8. RIR generally 2–3.

3

Optional intensification — last 3–4 weeks

Sometimes finish with an intensification phase: lower the rep range and force heavier weights.

What’s on the sheet

The full spreadsheet also includes tempos, rep ranges, alternatives (in case equipment isn’t available), a form video attached to every exercise, and session instructions.

⚠️
Heads up: The exact set/rep grid — every tempo, rep target, and per-exercise set count — was shown on-screen in the original video and only partially verbalized. The values captured above (2-set movements, chest ≈ 6 sets/week, 6–10 reps, 2–3 RIR, 6–7 exercises/day) are exactly what was stated. The full cell-by-cell grid is being finalized — no numbers here are invented to fill the gaps.

Practicality & The Long Game

Exercise selection favors machine-based, easy-access “jump on, jump off” movements that need little setup — so seven exercises can be finished in an hour or less. The first two exercises take about half the total time (more warmup and setup); the rest breeze by because you’re already warmed up.

Don’t jump ship too early — run a plan for at least a couple/few months. Early gains come fast, then level off — that’s normal strength adaptation, not failure. Just because you’re not making 20- or 30-pound jumps doesn’t mean it’s not effective; it’s actually a really good spot to be at. Jumping ship too quick is one of the biggest mistakes people make.

My own process: start with the science and mechanisms as guardrails (not hard rules), design the program, test it on myself for 12–16 weeks tracking progressive-overload data and body-part circumferences, then roll it out to the ~30-person teams (I’m my own guinea pig first, and they’re round two), and track results with analytics software. Switch programs every 2–4 months (3–4 is the sweet spot), longer if it’s working and priorities haven’t changed. This is a first draft — I’ll revisit and adjust order based on client feedback and measured progress.

Want a plan built for you?

This is the program I wrote for a team. Coaching is the version dialed to your body, your schedule, and your priorities — tested and tracked, not thrown at a wall.

Apply for 1:1 Coaching →
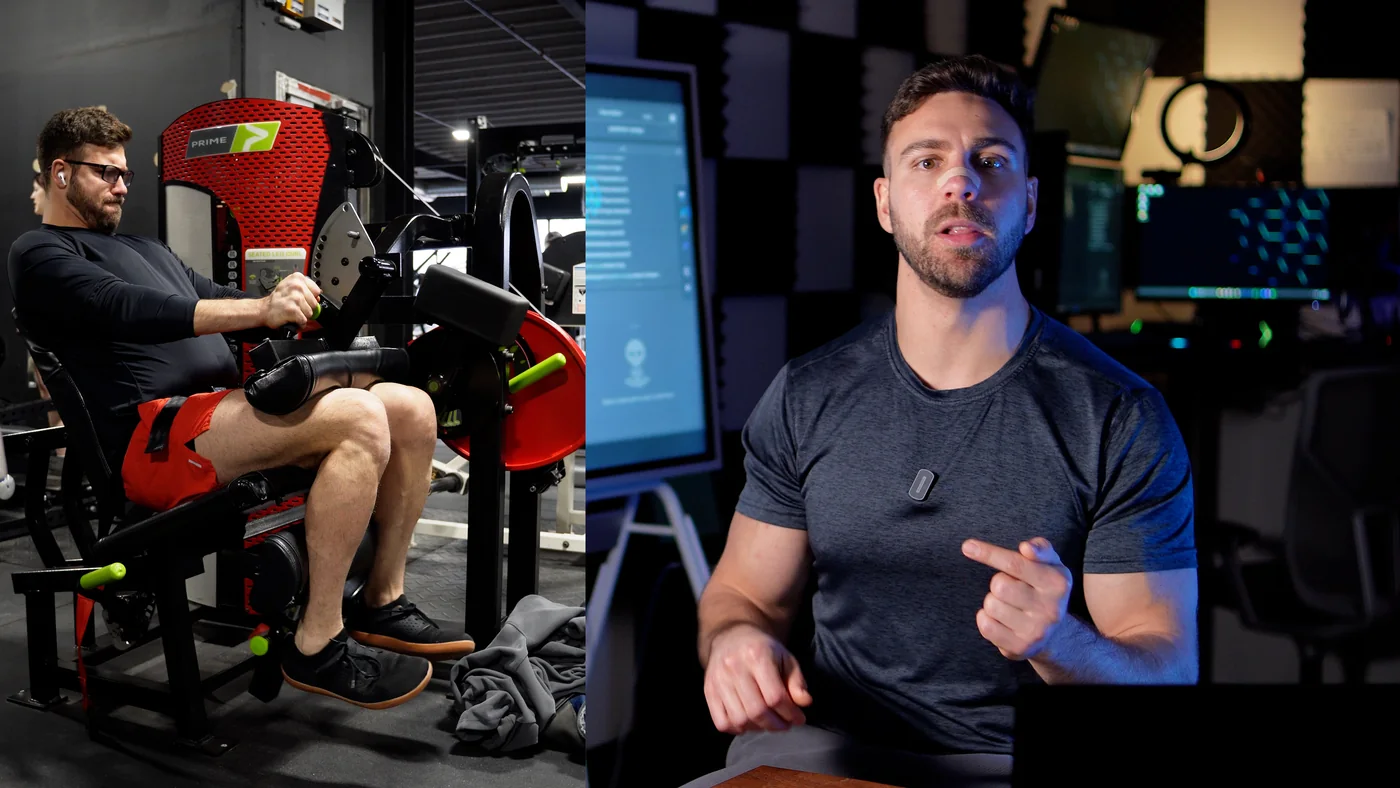
Programming Guide · Lagging Body Parts

Prioritizing Lagging Body Parts

Everybody has that one pesky muscle group that simply refuses to grow. For me it was my quads and chest — lagging far behind the rest of my physique, and it drove me insane. It wasn’t until I began programming intelligently that I brought them up fast, relative to all the time I’d spent bashing my head into a wall.

💡
The big reframe: A lagging muscle is partly genetics, but heavily about your training history and what you’ve been doing in the gym. Five tactical tips below to bring one up and build a complete physique.

Why Muscles Lag

Lagging body parts come down to genetics plus training history and gym behavior. The genetics you can’t change, but the behavior is where the leverage is. After figuring out my quad and my chest training, they became my favorite muscles to train, and you might find the very same.

The mechanism behind all of it — fatigue, defined in exercise science as a temporary and reversible reduction in exercise performance caused by a previous bout of exercise. You accrue more and more of it as a workout goes on, and it gets in the way of maximum performance and maximum motor-unit recruitment on your working sets. To maximally stimulate growth, you want maximum performance, and not all sets are created equal.

“All my sets contribute equally to growth.”

Not all sets are created equal. As you continue doing sets of the same exercise, the growth stimulus decays rapidly. The first fresh set is king. If your first hard set to failure yields 1 unit of growth, getting a second unit within the same session takes 5 more sets — or you could do one first set, wait a few days, and do another first set for a better outcome from less work.

Tip 1 — Exercise Order

On a five-exercise day, exercise #1 is far more effective at stimulating growth than #5 — accumulated fatigue lowers performance and motor-unit recruitment on the later sets. So the fix is simple: put lagging body parts earlier in the workout, when you’re fresh.

My own example — on a push day with chest, shoulders, quads, and triceps, my chest and quads lagged behind my shoulders and triceps. So I’d put the chest and quad work toward the beginning, and the shoulder and triceps work toward the end.

Tip 2 — Frequency & Volume

1

Spread ~6–10 hard sets across 2–3 sessions

Overall target for the muscle: about 6–10 hard working sets per week, spread over 2–3 sessions. Highly individualized — physiology, fiber-type proportion, exercise selection, how hard you train, and your coordination at the movements all shift the number.

2

Train it multiple times per week, not once

Because of fatigue (first set most stimulating; five extra sets to double it versus a fresh first set days later) and because the growth phase lasts a limited time — say ~48 hours — multiple sessions mean more total weekly growth time than “just dumping it all on Monday.” The sweet spot for most people is twice per week. Three times requires being very dialed about rest days.

3

Start low, go up

Split the volume as, say, 3 + 3 = 6 or 5 + 5 = 10 across two sessions. Quality beats quantity — start on the low end and let progressive overload guide you.

Tip 3 — Rest Days & Recovery

Muscle growth happens during recovery, after the gym — so how you space the days matters. Never train the same muscle twice per week on back-to-back days; spread them out. With twice per week, space them relatively evenly — e.g. Monday & Thursday or Tuesday & Friday. Give at least 48–72 hours between sessions for that muscle. More volume per day means more recovery time needed; less volume, less time.

“Back-to-back training days for a muscle are fine.”

No bueno. Never train the same muscle on consecutive days — part of why I recommend 2 days over 3.

Tip 4 — Avoid Exercise Redundancy

Redundancy = using multiple exercises that train the same exact function of the muscle — same range of motion and same resistance profile — which is effectively just doing more sets of the same exercise. Avoid it. Choose complementary exercises that challenge the muscle differently.

Chest — 5 sets
STRETCHED + SQUEEZED
Don’t do 3 flat machine press + 3 flat DB press (same ROM/profile). Pair a flat barbell bench (lengthened/stretched) with a fly (mid-to-shortened, squeezed position).
Quads — 4 sets
STRETCHED + SHORTENED
Don’t stack a quad leg press + quad Smith squat (both stretched). Use one squat/press pattern plus a leg extension (shortened position, and it trains the rectus femoris).
“Two similar movements means variety.”

If two exercises train the same function, ROM, and resistance profile, it’s redundant — effectively one exercise. Variety means challenging the muscle differently.

Tip 5 — Know The Muscle

The Art of War

Know your enemy

As Sun Tzu wrote in The Art of War: “If you know the enemy and you know yourself, you need not fear the result of 100 battles.” You can’t beat a lagging body part without understanding it and how to target it — its functions, how many joints it crosses, and how to execute exercises so resistance is delivered exactly where you want it.

Hamstrings — a common bodybuilder lagThe hamstrings cross two joints — the knee and the hip. For total growth you must train both functions: knee flexion (seated or lying leg curl) and hip extension (stiff-legged deadlift). Miss one and you leave growth on the table. And you still have to know how to perform each exercise so the resistance lands where you want it.

A strange kind of respect“In the moment when I truly understand my enemy well enough to defeat him, then in that very moment, I also love him.” Understand the lagging muscle deeply enough and it becomes your favorite to train.

The North Star

Let progressive overload be your North Star. Rested, properly warmed-up, intensely pushed sets mean you probably don’t need as much as you think. A lower-volume, high-quality, high-intensity approach beats throwing sets at the wall and trying to see what sticks. If you’re consistently getting stronger — adding weight or reps — keep the volume where it is and grind. Add more only if progress stalls.

The whole thing in five moves

1) Put lagging body parts toward the beginning of your workout. 2) Spread 6–10 hard working sets over 2–3 sessions (I recommend 2); start low, work up to 10 if needed, prioritize progressive overload. 3) Do not train the muscle on back-to-back days (no bueno). 4) Avoid exercise redundancy within a session. 5) Know the muscle, its functions, and how to train it effectively.

Ready to bring up a stubborn muscle?

Reordering, frequency, spacing, and non-redundant exercise selection are exactly what I build for clients — around your body and your lagging parts, tracked with progressive overload.

Apply for 1:1 Coaching →
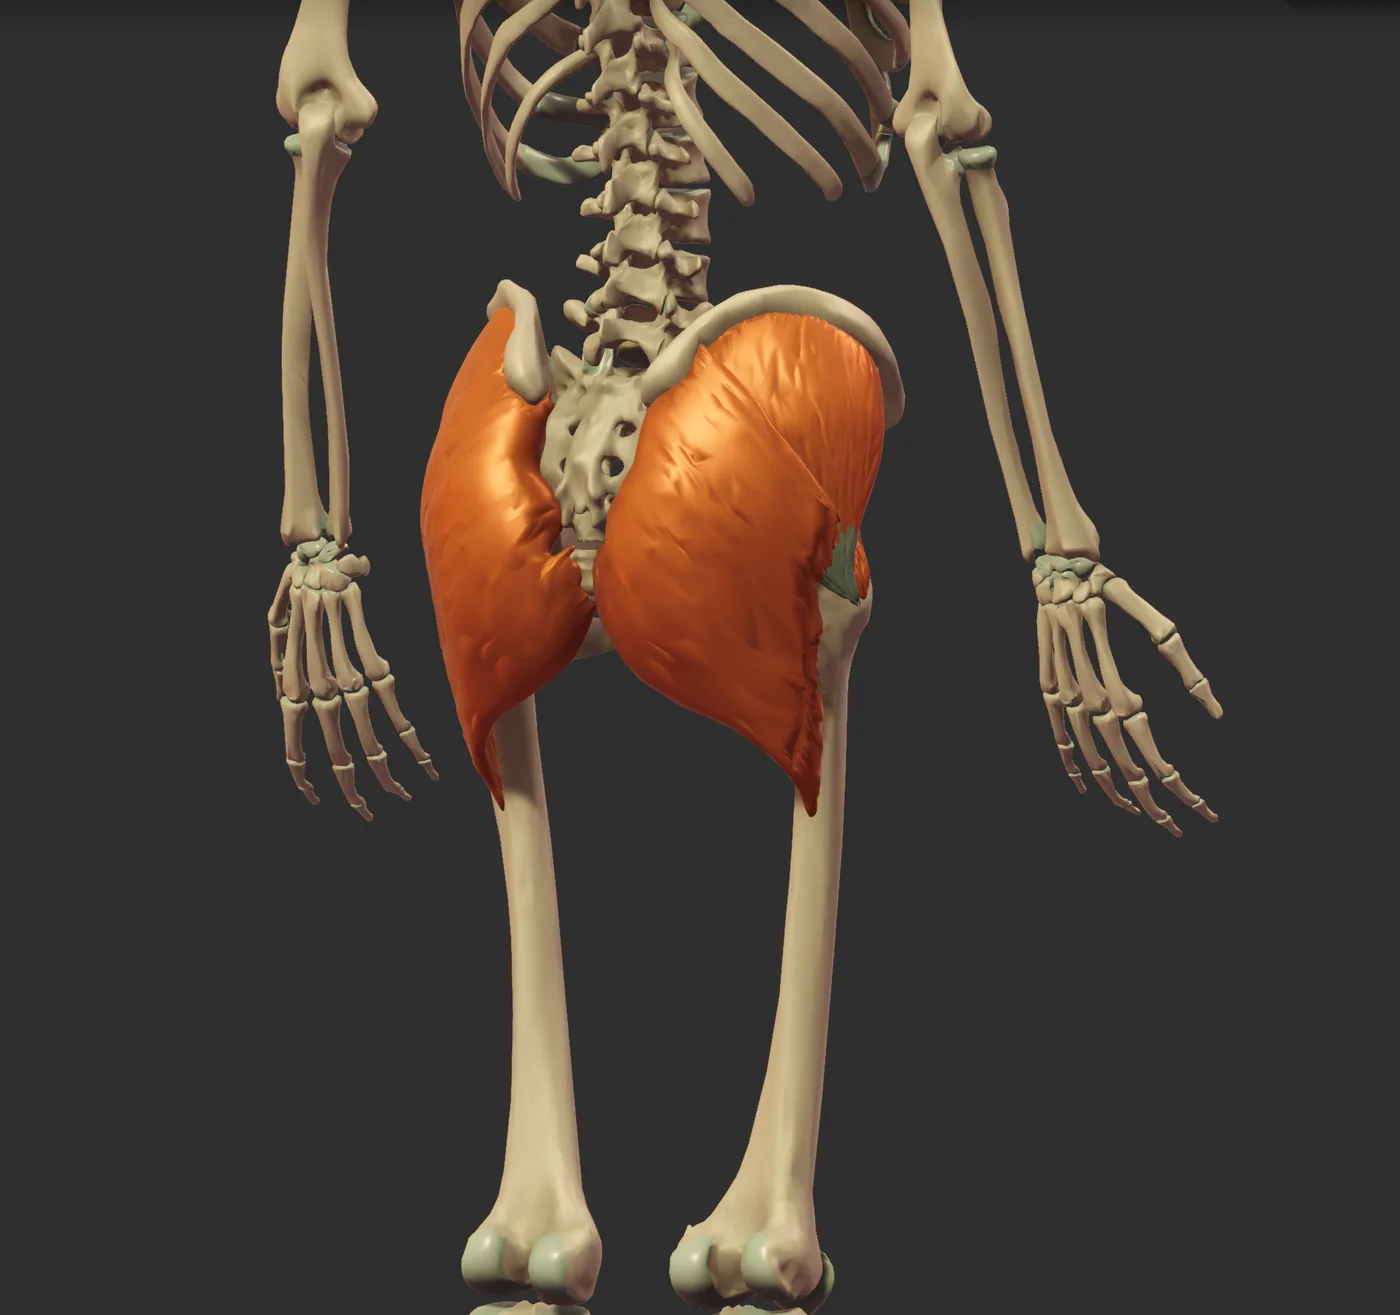
Science Guide · Volume & Training Age

Beginner vs Advanced

The common belief is that the more advanced you get, the more volume and sets you need to keep growing. I argue the exact opposite: the more advanced you are, the LESS volume you need. Two lines of evidence back it — common-sense “meathead wisdom,” and deep physiology and biochemistry. The heart of it: advanced lifters can only grow their hardest-to-reach fibers, so they have to train like a sniper.

💡
The name of the game: Maximize tension, minimize damage. Muscles are not “torn down and built back bigger” — structural damage is not good for growth. Mechanical tension is the only driver.

The Central Inversion

The more advanced you are as a lifter, the less volume you need in order to continue growing. It sounds backwards, so I’ll make the case two ways: one is common-sense meathead wisdom, and number two is deep physiology and biochemistry.

Beginners
LOW ACTIVATION
Very little muscle mass; uncoordinated and unskilled at movement patterns; a low degree of voluntary activation — they can’t turn on all their fibers even if they want to.
Advanced
HIGH ACTIVATION
Lots of muscle mass and force production; highly skilled and coordinated; a high degree of voluntary activation — they can turn on all their fibers if they want to.

Meathead wisdom — advanced trainees are more efficient at using, turning on, and targeting muscle fibers than beginners. So if they more efficiently produce large tension on the muscle, why on earth would they need more sets than someone still carrying all those handicaps? It makes no sense.

Two Fiber Types

~50 / 50 split

You have roughly a 50/50 split of type I and type II fibers (with some nuance). They behave very differently, and that difference is the whole story.

Type I
SMALL · OXIDATIVE
Much smaller; more oxidative; recover much quicker; largely used in day-to-day activities. Cap out at a relatively small maximum size.
Type II
BIG · FORCEFUL
Much bigger; produce far more force; reserved for strenuous activity; more susceptible to fatiguing mechanisms. Much larger growth capacity / maximum size.
1

Henneman’s size principle

The brain recruits motor units — bundles of muscle fibers — in order from smallest to largest, and only recruits as many as it needs for the task. Picking up a cup uses low recruitment, only small type I fibers. An 80 lb dumbbell demands high recruitment — all the type I plus as many type II as possible. The largest type II fibers are the last to be turned on.

2

Growth is fiber-specific

Individual fibers grow, which makes the whole muscle grow. For a fiber to grow significantly, it must be turned on / activated and participating in the movement. If it’s never turned on — or something blocks it from turning on — it won’t grow. That “something” is fatigue.

What Fatigue Actually Does

Fatigue is a temporary and reversible reduction in exercise performance caused by a previous bout of exercise. It’s an outcome — a measurable drop in performance — with many possible underlying mechanisms. What it fundamentally does: it prevents you from recruiting and turning on as many of your muscle fibers as you can. And it de-recruits from the top down — the fibers you lose access to under fatigue are the largest type II, the mirror image of recruitment order: largest turn off first.

A bench-press example — Set 1: 225 lb for 12 reps, barely getting the 12th at failure. Keep piling on sets and by set 6 you’re lucky to get 3 or 4 reps. Did your muscles shrink or atrophy between set 1 and set 6? No — fatiguing mechanisms are at play, and you fundamentally can’t access as many fibers to assist. The ones you lost are the largest type II.

“Fatigue is something you can feel.”

It’s likely not something you actually feel — it can be relatively silent, quietly robbing you of the extra motor-unit recruitment you need. It shows up as stalled load progression, slower/stalled strength, and stalled growth. This can be a silent killer.

Sniper vs Birdshot

The signature idea

Why the advanced lifter must be precise

Take that same fatigue and apply it to two lifters. Say you’re at ~60–70% motor-unit recruitment by set 6. For a beginner, sets 5 and 6 are still effective — they have many untapped, non-maxed-out fibers. Even at reduced recruitment, plenty of the fibers that are on still aren’t maxed for growth, so they experience tension and get a stimulus. Beginners are “birdshot” — they can get away with pretty much anything, and more volume is probably a good thing.

For the advanced lifter at that same 70% activation, the first 70% of fibers are on and under tension — but they’ve already maxed those out for growth. Their only remaining growth lives in the largest type II fibers — the last to switch on and the first to switch off. So they have to be precise, like a sniper. They must maximize the performance of their sets to actually reach and load those fibers.

The real cost is the NEXT workoutMore within-session volume worsens performance later in that session — not a big deal, since the type II fibers already got their stimulus early. The big problem is the following workouts: high volume triggers fatiguing mechanisms that last several days and cause structural damage to some fibers, preventing you from turning them on. If you can’t turn a fiber on, you can’t grow it — so subsequent sessions can’t maximally recruit, and growth stalls.

The Biochemistry

Why do the big type II fibers fatigue and get damaged so much more easily? It comes down to how they handle calcium ions.

1

Calcium-ion fatigue hits type II hardest

Calcium-ion-related fatigue impacts the big type II fibers far more than type I. The reason is mitochondrial density — type II fibers are more glycolytic and have less mitochondria for their size.

2

Mitochondria buffer calcium ions

Mitochondria can grab excess calcium ions — I know it’s not my job, but I’ll grab some. In type II fibers they get maxed out quickly, so calcium-ion accumulation happens much faster there than in type I.

Why type I recovers faster

That buffering difference is exactly why type I fibers recover much faster. Net result: the type II fibers are annoying and require a sniper round — hardest to turn on in the first place (last recruited) and easily damaged once you do turn them on.

How To Actually Train

1

Advanced — minimize volume, be a sniper

Manage fatigue and maximize the performance of your sets to reach and load the largest type II fibers — the only ones you can still grow. Don’t spam volume: it triggers days-long fatigue and structural damage that blunt the next session’s recruitment, and thus growth.

2

Beginners — be less precise

More volume is probably fine or even beneficial. You have abundant untapped, non-maxed fibers (birdshot), so fatigue management isn’t as critical — you get more from higher reps and simple practice at the movements.

3

Watch for silent fatigue

Don’t judge fatigue by feel. Judge it by stalled load progression and stalled muscle growth over time, and manage it proactively.

“Muscles are torn down and built back bigger.”

Structural damage is not a good thing for growth. Mechanical tension seems to be the only driver for it. So we want to maximize tension and minimize damage. That’s the name of the game.

Training like a sniper yet?

If you’re advanced, junk volume is quietly sabotaging your next workout. Coaching dials your volume, fatigue, and precision to where you actually are in your training age.

Apply for 1:1 Coaching →
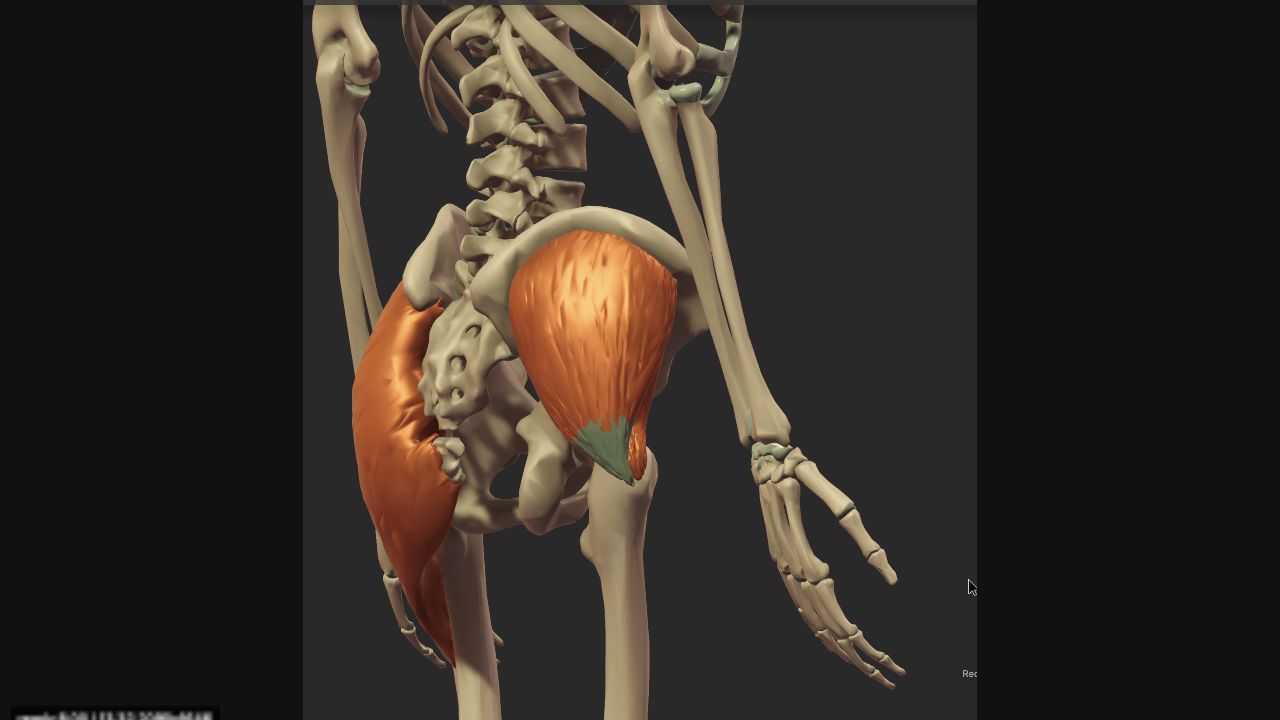
The Philosophy · How I Coach

The Manifesto

Two beliefs sit underneath everything I do. First: the science and programming — biomechanics, physiology, chemistry — are only half the equation at best. Behavior is the other half, and behavior is everything. Second: growth has exactly one driver — mechanical tension. Chasing fatigue, soreness, and sweat is chasing the wrong thing entirely.

💡
The master rule: Make it easy to make the right choice, and make it hard to make the wrong choice. Live by this and you’ll crush your fitness goals on autopilot.

Science Is Only Half The Equation

You can design the perfect theoretical plan for someone, but if they don’t follow it, it’s the worst plan for them. The technical side of fitness isn’t the most valuable skill — the most valuable skill is designing life systems so people make the right decisions automatically. Success in any goal comes down to consistently making the right decisions — everything you’ve ever achieved was a result of the decisions leading up to that point.

The Core Idea

The through-line of everything

Make the right choice easy

Make it easy to make the right choice and hard to make the wrong choice, and you’ll crush your fitness goals on autopilot. This one concept runs through everything. Every decision you make drains you — psychologists call it decision fatigue — and it doesn’t matter whether it’s big or small: choosing a shirt or a lunch pulls from the same mental energy pool as firing someone at work. That’s why Steve Jobs, Barack Obama, and Mark Zuckerberg wore the same outfit every day — one less decision, so they could spend that energy where it mattered.

Three currencies you pay decisions withDiscipline is cash in your wallet — finite; once it’s gone, it’s gone. Motivation is a bonus check — exciting when it shows up, but inconsistent, and after taxes it’s a lot less than you thought. Convenience and laziness are the jackpot — the trust fund that never runs out. The goal: fund most of your good decisions with convenience and laziness, so you’re not draining the wallet or waiting on the check.

Three ways to cut the cost of a decisionLimit the number of decisions you make per day; narrow the choices within each decision (Obama: blue suit or gray suit — that’s it); and make the decision ahead of time, before you’re fatigued. Then engineer the payoff: the more immediate and beneficial a good decision feels, the more you repeat it, and once the long-term results arrive they become a massive reinforcement of their own. You put in a dollar and got out a thousand.

Engineer Your Environment

You’re in the gym only about one hour, four to five times a week — all the other hours are spent making food decisions, which is why nutrition dominates. Architect your environment so good choices are the path of least resistance and bad choices carry friction.

1

Control your food environment at the store

Make one good decision at the grocery store — don’t buy the junk you’ll regret. If it’s not in the house, the wrong choice is much harder. At 11 p.m., digging around your pantry like a raccoon, you’ll only find fruit and a protein bar. You could drive to the store, but nine times out of ten you won’t, because you’re lazy. Use laziness to your advantage.

2

Learn to cook & meal prep

Cooking is one of the best investments you can make into your fitness — make macro-friendly versions of nearly any craving, so the right choice tastes good. Meal prep is the perfect example of limiting total decisions: spend discipline once to batch-cook, then pay in convenience and laziness over and over.

3

Add friction to the wrong choice

Delete the food-delivery apps and the account. Re-downloading, making a new account, entering payment, and choosing food is enough friction that you probably won’t do it — because you’re lazy, and that’s why you’re on the app in the first place.

4

Get social buy-in & a structured routine

Tell your household, friends, and coworkers — scream it from the rooftops. Public commitment ties your reputation to following through, and putting yourself on the hook is the best way to push yourself. Then lock in a structured routine, deciding the days, times, and exactly what you’ll do, so you just show up and mindlessly execute.

The Hot Take On Balance

Everyone preaches “everything in moderation,” and yes, you can fit nearly any food into a well-rounded diet. But if moderation isn’t your strong suit — you can’t stop at two Oreos — it may be better to eliminate a food entirely, at least for a period. There’s a time and a place for balance and moderation, and there’s also a time and a place for brute force.

Expand the time frame — people judge balance over a single day (good breakfast and lunch, so there’s time for a naughty dinner) or a week (six clean days, so cheat day seven). That’s short-sighted. Better: commit fully to a yearlong phase that’s unbalanced by most people’s standards. You’ll emerge after that year a different person, with lifelong systems. Then return to balance. It takes so much more effort to reach a fitness goal than to maintain it. It’s just like a plane taking off: all the energy goes into getting the bird off the ground, and once you’re cruising it takes far less to stay there.

Tension, Not Fatigue

The behavior half gets you to the gym. The science half decides whether that hour builds muscle — and here the most common trap is chasing the wrong signal. Barry’s Bootcamp, F45, Orange Theory: they’re objectively difficult, but difficulty isn’t the point. They’re the wrong tool for the job. You know what else is brutal? Trying to drill a hole with a screwdriver. Bad tool for the job.

There is one driver of muscle growth: mechanical tension, a pulling force on the muscle fiber. A fiber only experiences real tension when the brain turns it on (motor-unit recruitment). Maximal growth needs two things at once: very high recruitment and slow contraction velocities, which happens only when you’re close to failure. And fatigue is the enemy of exactly that: it lowers recruitment, so when you’re excessively fatigued you can’t turn on those muscle fibers no matter how hard you try.

“If a workout leaves me wiped out, sore, and drenched — it built muscle.”

The pump, the burn, being sore, being drenched in sweat — none of those are drivers for muscle growth or indicators that it’s occurring. It’s just mechanical tension driving muscle growth. Group classes are a fatigue generator: elevated heart rate for an hour, minimal rest, high-rep work, and cardio mixed with lifting mean you do your strength work nowhere near maximal capacity. Fatigue-chasing is chasing the wrong thing.

The Three Pillars

Even setting fatigue aside, effective growth needs three things these classes lack — and they double as the blueprint for what to do instead.

1
ConsistencySame movement patterns for months — skill acquisition, past the repeated-bout-effect damage, tracking progressive overload. Variety is marketed as fun, but muscle growth doesn’t care about fun or variety.
2
Intelligent Programming5–10 working sets per muscle per week over 2–3 sessions; each muscle 2×/week. In a class it’s just what’s on the board, so you’re pretty much playing roulette.
3
The Right ToolsLoads heavy enough and key machines — a leg extension is nearly essential for full quad growth (squats grow only 3 of the 4 heads). Class dumbbells often cap ~40 lb.

The do-instead protocol

Follow a program for months at a time. Work out 3–4×/week for ~1–1.5 hours. Hit each muscle twice per week at 5–10 sets total. Track progressive overload. Pick stable exercises where the target muscle is the limiter. Rest 2–3 minutes between working sets — Schoenfeld’s 2016 study (21 trained men, 1-min vs 3-min rest, 8 weeks) found the 3-minute group won on size and strength. And keep cardio separate from lifting.

Want the right choice made easy?

A good coach doesn’t just hand you a plan — they help build the systems, and point you at the highest-leverage right and wrong choices, so your limited decision-making power goes where it matters.

Apply for 1:1 Coaching →
Advanced Physiology

How Strength Is Actually Built

Before a single mechanism, you need the method for thinking about all of them: name the adaptation, find the stimulus that drives it, then work out how to maximize that stimulus. Run “getting stronger” through it and it turns out to be six distinct adaptations — three in the nervous system, three in the muscle — each with its own stimulus. Plus the four textbook mechanisms that sound important and aren’t.

💡
The deep end: This is the graduate-level physiology behind everything I teach. Dense on purpose — you don’t need it to get results, but it’s the machinery under the rules, and the process here is the reasoning tool the whole vault is built on. This module covers maximum strength only; speed and power are a separate story.

The Map

6 real + 4 minor

Maximum strength comes from six real adaptations — three central-nervous-system (CNS) adaptations that change the signal, and three peripheral adaptations that change the tissue itself. Everything else you see in textbooks is minor. Here’s the whole map before I open each one up.

↑ Coordination
CNS · MOVEMENT-SPECIFIC
A more efficient habitual motor program. Does not change joint torque — just makes the movement easier.
↓ Antagonist Coactivation
CNS · JOINT-SPECIFIC
Less antagonist braking at the joint. Unlike coordination, this does raise torque at the joint.
↑ Motor Unit Recruitment
CNS · MUSCLE-SPECIFIC
A bigger neural drive from the motor cortex switching on more (and higher-threshold) motor units.
↑ Hypertrophy
PERIPHERAL · TENSION
Adding myofibrils = adding cross-bridges = adding raw force-producing capacity.
↑ Tendon Stiffness
PERIPHERAL · COLLAGEN
Collagen restructures (not grows) so force transmits to the joint without interruptions.
↑ Lateral Force Transmission
PERIPHERAL · COSTAMERES
More costameres clip the sarcomeres into the sheath, so more of their force reaches the tendon.

After these six there are four more mechanisms you’ll find in textbooks and online that just aren’t important in the context of strength training. The point isn’t to memorize the six. It’s that each one gets its own adaptation → stimulus → implication pass, and the framework is what keeps them from blurring together.

The 3 CNS Adaptations

the signal
1

Coordination — the brain’s built-in efficiency search

Coordination is the habitual way of performing a movement (a.k.a. the motor program for it) and how efficient that program is.

Picture a deadlift from the side: keep the bar close to your body, and you can handle a lot of weight.

If you let it drift away from your body, you suddenly have to work much harder to get it moving, due to increased torque demand on the hip joint. So, in practice, you get “weaker.”

A more efficient movement pattern lets you lift more (get stronger!) without changing anything about the muscle itself.

The stimulus for improving coordination has to do with the brain’s effort sensor: when a rep feels easier than the habitual or “old” pattern, the brain updates the motor program to the easier path. So with more repetitions (practice), you eventually find easier and easier ways to do the movement, and the brain updates accordingly.

You can speed up this process by having a coach help with form, or filming your own form and reviewing it (and consciously making changes towards more efficient technique).

Coordination is movement-specific, and also load and speed specific. So

  1. Improvements in coordination apply to the exact movement you are practicing
  2. ...and also at the speeds/loads you’re practicing them at

Also, being very fatigued gets in the way of efficient motor patterns, so try keeping it to a minimum when learning new movements. Fatigued reps are worse than baseline and teach the sensor nothing.

2

Antagonist coactivation — dialing back the brakes

Coactivation is the degree of antagonist activation at a joint. Curl a bar: the biceps produce force and the triceps produce a little braking force in the opposite direction to stabilize the joint. That’s a safety feature — but if it’s overkill, dialing it back lets me lift heavier even though nothing changed inside the biceps muscle at all. Same stimulus as coordination: the brain notices it used slightly less coactivation and the joint didn’t blow apart, so it keeps that version — a constant trade-off between safety and performance.

3

Motor unit recruitment — a bigger central command

Motor unit recruitment is best thought of as a relative percentage of how many of your muscle fibers you can turn on. The more you turn on, the stronger you get. Interestingly, there’s a catch called the voluntary activation deficit: especially in beginners and untrained populations, no matter how hard they try they can’t reach full recruitment — nowhere near 100% activation. And it’s generally worse the bigger the muscle gets, with a couple of exceptions.

The stimulus looks to be reaching your own highest achievable level of recruitment. If you’re at 75% activation and you actually get there this session, next time you might reach 76 or 77 — by brushing up against your ceiling, you keep pushing that ceiling higher. One caveat: recruitment gains seem to show up only after a trainee has already made significant coordination improvements.

“Practice hard even when you’re fatigued — reps are reps.”

Fatigued, your coordination quality falls off a cliff — far more than most people realize. Every fatigued attempt is worse in efficiency terms than your non-fatigued baseline, so the effort sensor has nothing better to lock onto and learns nothing. Quality practice is unfatigued practice.

“Small muscles are basically fully recruited — the 2–5% deficit is trivial.”

Untrained-but-active young people (18–25) sit around 80–85% voluntary activation in the quads and glutes (about 60–70% in the elderly); biceps and triceps measure only about 2–5%. But that number lies. You measure the deficit by maxing out isometrically, then adding an electrical stimulus — and the extra force comes from fibers that have never been used before, thin little things with barely any myofibrils in them. If you hypertrophied those fibers and re-measured on a fair footing, biceps/triceps would show a 15–20% gap and quads/glutes potentially 40%. The deficit is bigger than it looks precisely because the fibers you’re switching on don’t have any contractile machinery yet — and those high-threshold fibers are the ones most primed to grow.

The 3 Peripheral Adaptations

the muscle

Now the tissue itself. These change what a given signal is actually able to do.

4

Hypertrophy (via myofibrillar addition or sarcomerogenesis)

Hypertrophy can be defined two ways: an increase in muscle-fiber cross-sectional area by adding myofibrils, or the addition of sarcomeres in series (sarcomerogenesis). Take the first one first. Each myofibril is a rope of actin and myosin capable of producing contractile force, so adding one adds new force-producing machinery. That’s why hypertrophy drives strength — you can’t add that machinery without adding strength. Sarcomerogenesis adds capacity too: it lengthens the myofibrils by adding sarcomeres in series, and those new sarcomeres can clip into the surrounding collagen sheath (the endomysium) via costameres and transmit their force sideways — raising the muscle’s overall force-producing capacity.

The stimulus for hypertrophy is mechanical tension — and in the case of strength training, a muscle fiber has to be active to experience significant mechanical tension. Read more on the main driver of muscle growth in How Muscle Actually Grows →.

5

Tendon stiffness

Counterintuitively, a stiffer tendon is better for strength output: the stiffer the tendon, the more efficiently muscle force is transmitted through it. A compliant, stretchy tendon “gives” at the start of a movement, so the muscle shortens faster than the joint angle would predict and ultimately produces less force. This seems to be a bigger player in concentric and isometric strength, and may not scale up to bouncy, stretch-shortening movements. It’s a change in the structure of the collagen inside the tendon.

The stimulus is tendon force, and since the tendon sits in series with the muscle, that force equals the weight on the bar. It seems to take moderate-to-heavy loads to maximize the stimulus. Stiffer tendons may also protect the muscle–tendon junction, where the injuries we call “muscle strains” almost always actually happen.

6

Lateral force transmission — the force goes sideways

Here’s a detail most textbooks skip. A sarcomere doesn’t hand its force straight down the line, sarcomere to sarcomere, all the way to the tendon. Most of it goes sideways. Each sarcomere is clipped into the collagen sheath around the fiber (the endomysium) by tiny anchors called costameres, and that sheath is what carries the force to the tendon. The more of those anchors you have, the more of the force your sarcomeres produce actually reaches the tendon — you get stronger relative to your size, more force out of the same amount of muscle (a rise in specific tension). There’s a small trade-off in top-end shortening speed, but for building strength that’s a good deal. Training seems to add these anchors, especially with hard eccentric work. What actually drives the change isn’t settled — the best guess is the same mechanical tension that drives growth — so I won’t pretend I can program for it directly. It’s part of why strength keeps climbing even when the muscle itself isn’t getting much bigger.

The Beastly Nature of Early Coordination Gains

The textbook story is that beginner strength gains are “neural first, hypertrophy later” — as if the nervous-system piece mainly means better motor unit recruitment. The better read is narrower: beginner strength gains are part force capacity, part task skill. If the test is the exact machine someone practiced, the skill piece gets counted as “strength.”

THE COORDINATION EVIDENCE

Coordination Gains: The Hard Numbers

THE STUDY DESIGNRutherford and Jones put 32 young healthy volunteers through one of three 12-week quadriceps training programs. Two groups trained dynamic leg extensions in different setups: one unilateral with back support and hand grips, one bilateral with no back support.

On the actual leg-extension machines, the weights people could lift rose by about 200%. If someone started by lifting 50 pounds, that means they finished around 150 pounds.

THE DYNAMOMETER TESTThey also separately tested maximum voluntary isometric force before and after training in a much more controlled setup: a dynamometer. Think of this as a leg-extension test that fixes and straps the person into position, removing most of the coordination demand — bracing, stabilizing, using the handles, finding the groove, and driving into the pad efficiently.

In that condition, strength only rose by 15–20%. That means most of the apparent strength gain on the trained machine came from coordination improvements, not increases in motor unit recruitment, hypertrophy, or the other adaptations that raise raw force capacity.

Similar findings show up in Augustsson et al. (1998) and Gentil et al. (2017).

“Beginner strength gains are neural first, hypertrophy later.”

Misleading. Hypertrophy can start right away, and “neural” doesn’t automatically mean recruitment. Early machine gains can be inflated by practice at the exact test. The cleaner takeaway: ask what was tested before treating a strength gain as new force capacity.

The Time Course in Beginners

Each adaptation arrives on its own clock — and knowing the clock changes how you read a beginner’s progress. Fast adaptations can mask slow ones; a complex lift can delay recruitment gains for weeks.

Coordination (stable machine)
2–4 WEEKS
On a stable machine, significant coordination improvements can happen in two to four weeks.
Coordination (complex lift)
6–8 WEEKS
A free-weight back squat can still be improving its coordination at six to eight weeks — which delays the recruitment gains behind it.
Coactivation Reduction
~2 YEARS
Grinds on in the background for a couple of years before plateauing — except on very unstable exercises, where it changes fast.
Hypertrophy
DAY ONE
Happens from the very first session in beginners, as long as untrained motor units exist — but it usually lags the neural adaptations, especially when coordination demand is high.

The 4 Non-Meaningful Adaptations

textbook filler

These four fill textbooks and social feeds. My gripe: people cite them because they don’t know the history of exercise science — they’re reading decades-old textbooks instead of recent reviews. Here’s why each is a dead end for maximum strength.

Motor unit synchronization (CNS)

The old question, ~15–20 years ago: do motor units fire in perfect sync — a sharp mountain-like spike on a force–time graph rather than a shallow hill — and can we train that? The answer is no: motor units are already fully synchronized; the apparent lack of sync was just an artifact of the old measurement methods. There was never a problem to fix. Now it's mostly off the table.

Rate coding, for slow/heavy movements (CNS)

Rate coding = how many times per second the activation signal is fired. It’s a massively important mechanism — for speed. But a heavy-strength program doesn’t change it, and a fast-movement program changes it only in the fast movement you actually test — go back to the slow lift and it hasn’t budged. You basically can’t change rate coding in slow movements; it’s already maxed out for most people, most of the time, in most muscle groups.

Myofibrillar vs. sarcoplasmic hypertrophy (muscle)

Probably not a distinct trainable target. The split seems driven by training status, not training variables: short-term trainees skew slightly sarcoplasmic, very long-term trainees slightly myofibrillar — it doesn’t really look like an adaptation in its own right, just part and parcel of how hypertrophy works. Sarcoplasmic growth means adding space, liquid, and enzymes between the contractile machinery (myofibrils).

Hyperplasia (muscle)

It does happen in humans — developmental fiber counts rise through childhood then plateau, and right-handers carry more fibers in the right arm — but it’s minimal: labs taking many muscle-growth measurements over roughly two months of training have never once documented it. It’s not a separate adaptation: hyperplasia isn’t a separate thing from hypertrophy — it’s identical, just a fiber splitting once hypertrophy pushes it to its size ceiling. That ceiling is set by the size principle of striated muscle: a fiber’s cross-sectional area (energy demand, πr²) outgrows its perimeter (oxygen supply, 2πr), so more-oxidative fibers have to stay smaller. Mice have extraordinarily oxidative fibers → they hit the cap fast → they grow via hyperplasia; humans sit between mouse and elephant. So “ignore mouse studies because they hyperplasia and we don’t” is wrong twice over: humans do it too, and the physiology is identical — only the oxidative parameters differ. You can’t train for it directly. It likely shows up in anabolic steroid users, pushing fibers to the splitting point. However, this is unconfirmed by research and just a hunch.

The Research

Peer-reviewed sources for the concepts above — supporting research, not necessarily the exact studies behind each concept above:

Want this turned into strength?

Six adaptations, six stimuli — and a program that feeds the ones you want while never starving them. That’s what real coaching looks like.

Apply for 1:1 Coaching →
Advanced Physiology

Length-Tension & Stretch-Mediated Hypertrophy

Growing a muscle longer is a completely different event from growing it thicker — driven by a different force, sensed by a different structure, and triggered at a different place. The force is passive tension, the structure is titin, and the trigger is one specific length inside a single sarcomere.

💡
The deep end: This is the graduate-level physiology behind everything I teach. Dense on purpose — you don't need it to get results, but it's the machinery under the rules. Every number, threshold and study here is real. Read it twice.

The Terminology Trap

read first

Before the mechanism — the word “passive” gets used two completely different ways, often in the same paragraph, and it breaks people. You have to keep the two meanings apart in your head.

1

“Passive” as an activation status

A “passive static stretch” means the muscle fibers are not switched on. This is the everyday meaning — passive vs. active as in relaxed vs. contracting.

2

“Passive” as a type of force

This distinguishes active tension — force from actin-myosin cross-bridges — from passive tension, the elastic, deformation-based force produced when you stretch structures inside the fiber. This is about the job the tension is doing, not whether the muscle is on.

The trap: you can have passive mechanical tension inside a fully activated muscle fiber. The two meanings collide, and that collision is the whole reason this topic confuses everyone. Exercise science has a genuinely horrible terminology problem — we use these words in all kinds of sloppy ways, nobody is going to fix it now, and we're stuck with it. So when this trips you up, understand the fault is the vocabulary, not you.

Titin: The Source of Passive Tension

Titin is the molecule responsible for producing most of the passive tension inside a non-activated fiber. I take this from one of the most famous experiments in the field: suspend a muscle fiber in an apparatus to hold it tight, then strip out its components one at a time and watch when the tension changes. Pull out the endomysium and collagen — the sheath around the fiber — and tension barely changes, which surprises almost everyone. Remove titin from the middle and the fiber disintegrates instantly, which tells you titin was holding the whole thing together. (You can dig up studies giving the endomysium a role in certain situations, but the majority of passive tension comes from titin.)

Titin runs in three segments. The technical names are opaque, so here's how I picture it — a rope tied to a stiff elastic band by a connector:

IG domains
COMPLIANCE SEGMENT
A coil of rope, not a spring. When you pull it, it just unravels and produces almost no force.
N2A
THE BRIDGE PIECE
Just a connection — the link between the rope and the elastic band. Nothing more.
PEVK
STIFF SEGMENT
The stiff elastic band. This is what actually resists stretch and produces force once it's the only thing left to give.

This structure explains the shape of the passive length-tension curve. Put a relaxed person's limb in a dynamometer and wind it into maximum range of motion until they squeak at the edge of discomfort. The machine plots joint torque against joint angle: torque sits at roughly zero for most of the range, then jumps up sharply at end-range. That's not muscle activation — the subject is fully relaxed with no stretch reflex. It's purely the passive tissue stretch, called passive resistive torque. Stretch an isolated single fiber and measure force vs. length and you get the exact same graph shape — the length-tension relationship matches the joint-angle-torque relationship. Why that shape? Pull the rope-plus-band assembly: first the compliance segment unravels (flat, near-zero force), then once it hits its maximum length only the stiff segment can stretch further — and force kicks upward. The model reproduces the real curve exactly, which is how I know we're dealing with the right structure.

What Activation Does — The Curve Shift

the key insight

The instant you activate the fiber, the bridge piece locks onto the nearest actin. That's the move that makes everything click. Now the rope is out of the picture — the only way left to stretch the fiber is to pull the stiff segment directly. So the entire curve shifts: the upward kick in passive force that used to appear only at end-range now happens at a much shorter muscle length.

This is why the overall length-tension relationship is really two curves amalgamated — an active one and a passive one — and why an isometric contraction and an eccentric contraction don't share the same shape. Textbooks rarely draw it; they just say it's different. You can see it live in a dynamometer: wind the arm back, tell the subject to resist at some point, and the passive-force kick appears immediately from that point onward — far earlier in the range than the end-ROM you'd need if the fiber were relaxed.

And that is why strength training produces passive tension — and a passive-tension adaptation — even though gym exercises never get anywhere near maximum range of motion. Sit relaxed on a bench with your knee at 90° and there's no passive tension in your lower-body muscles. Do a squat at that exact same joint angle and passive tension is present — purely because the fibers are activated, which latched titin onto actin and dragged the whole curve over. That paradox clicking into place was one of the moments that genuinely reframed how I think about training.

Active vs. Passive Force: The Arithmetic

How much force does passive tension actually add? String a single fiber in an apparatus, stimulate it electrically, record its isometric force. Then — while it's still activated — stretch it. Force jumps upward dramatically, because you've stacked passive (eccentric) tension on top of the active cross-bridge tension. The ratio of eccentric to isometric force tells you how much extra passive force exists relative to the active force. In human single fibers that ratio is ~1.8–1.9 — meaning the passive titin-based force is almost identical to the active actin-myosin force. Call it a 1:1 ratio. It's fairly stable across fibers because every myofibril carries actins, myosins and titins together.

Now apply that 1:1 ratio to a real set. Take the last, maximal rep of an 8RM biceps curl. In a small, trained person the biceps can reach very close to 100% motor-unit recruitment (call it 98–99%). The moment you start lowering the weight, perceived effort tanks — and a big drop in effort signals a big drop in recruitment. Here's the arithmetic: if 100% activation on the way up used only active tension, then on the way down — where you have double the fiber force available (active + roughly-equal passive) — you only need 50% activation to control the same weight. Recruitment falls from 100% → 50% across the transition. EMG backs this up: concentric phases show roughly double the activation of eccentric phases at the same load.

“The eccentric phase does more than the concentric.”

It's mathematically, physiologically and biologically impossible. Even immediately after concentric failure, the eccentric drops to ~50% activation versus ~100% on the concentric — half the recruitment at the same weight. The only way to make an eccentric train higher-threshold fibers would be to physically rig it to be about twice as hard as the concentric. Lowering slowly with a normal load is not the growth secret people think it is.

Stretch-Mediated Hypertrophy = Sarcomerogenesis

THE BIG IDEA

Passive Tension Builds a Longer Muscle, Not a Thicker One

“Stretch-mediated hypertrophy” and sarcomerogenesis — adding sarcomeres in series — are the same thing to me. Passive tension produces sarcomerogenesis and doesn't seem to produce anything else, so I equate the two cleanly. In humans it shows up as an increase in fascicle length (a fascicle is a bundle of muscle fibers). This is a whole second axis of growth: cross-bridge tension thickens a muscle by adding myofibrils in parallel (cross-sectional area); passive tension lengthens it by adding sarcomeres in series.

SARCOMERE LENGTH IS THE ONLY TRIGGERThe stimulus isn't muscle length and it isn't even fiber length — it is sarcomere length past a threshold. I take this from distraction (limb-lengthening) surgery studies: a cage with pins holds two saw-cut bone faces a fraction of a millimeter apart, and tiny braces-style screws lengthen the limb by fractions of a millimeter at a time. As you turn the screws, the sarcomeres just move to a longer length — and nothing happens. Stretch further, still nothing. Only once sarcomere length crosses a threshold does the adaptation fire and a sarcomere gets added. But adding one makes everything shorten back, dropping the sarcomere below threshold — so it stops. A self-limiting ratchet. Turn the screws for ~6 weeks and a muscle can become ~1.5× longer; stop turning and the adaptation stops dead. Titin, sitting inside every sarcomere, is what produces the threshold force.

THE MOUSE THAT PROVED THE MOLECULETake a genetic model: shorten titin's stiff segment by 25%. A shorter elastic band means higher passive force at the same joint angle. Let modified mice and same-age controls just live in their enclosures for 6 weeks — that's the entire experiment. The modified mice grew bigger muscles, and the growth came from sarcomerogenesis (you weigh the excised muscle straight off the scale). More passive force → more sarcomeres in series.

“Stretch and passive tension build muscle cross-section (myofibrils in parallel).”

Immobilization studies settle it. Cast a limb in a stretched position for about a week and you get muscle mass loss and sarcomerogenesis at the same time — the fiber is shrinking (losing myofibrils in parallel) while simultaneously adding sarcomeres in series. If passive tension added cross-sectional area, it would offset the mass loss. It doesn't. So the two stimuli are 100% separate, no contamination: actomyosin cross-bridge tension → myofibrils in parallel (thickness); passive/titin tension → sarcomeres in series (length). People tend to cover their eyes and pretend they didn't hear it, but the data is clean.

Where it shows up, and when it stops — in humans, sarcomerogenesis reads out as fascicle-length increase, and it appears after (a) eccentric training, (b) strength training in stretched positions, and (c) static stretching. Despite all the complaints you'll read online, human distraction case studies measured sarcomerogenesis directly decades ago, and modern eccentric-training studies show fascicle-length increases that correspond closely to it — length increases really are a good readout. In a fixed-range-of-motion strength program the gain runs for about 3, 4 or 5 months (maybe a bit longer) and then plateaus: as sarcomeres are added in series, the passive tension at each joint angle keeps dropping, until the standardized ROM simply can't generate enough tension to trigger any more (~3–6 months). Static stretching is the exception — as long as flexibility keeps improving you keep reaching longer muscle lengths to compensate, so it could in principle continue almost indefinitely, into full Jean-Claude Van Damme territory. Nobody has run a stretch study long enough to confirm that.

A sanity check — I lean on a sense-check heuristic: does the adaptation you're triggering actually help you cope with the stimulus you just experienced? A stretch stimulus → more sarcomeres in series → yes, that helps you reach longer, more flexible positions. Adding myofibrils in parallel would do nothing for flexibility. I don't treat it as a perfect way to make predictions — it's a very good way to check that a hypothesis actually makes sense.

Why Some Muscles Grow Long and Some Don't

3 factors

Muscles differ enormously in how susceptible they are to stretch-mediated hypertrophy, because in some muscles the sarcomeres stretch a lot for a given joint movement and in others they barely stretch at all. Three architectural factors decide it:

Sarcomeres in Series
HOW MANY ALREADY
A muscle that already has many sarcomeres in series won't stretch each one much — the stretch is shared out across all of them.
Pennation Angle
FIBER ORIENTATION
A large pennation angle means only the horizontal component of the diagonal fiber does the stretching — far less sarcomere stretch for the same muscle stretch.
Moment Arm
LEVERAGE AT JOINT
A large moment arm makes the muscle travel a long distance over the joint's range (big fiber excursion); a small one means the fiber barely moves.

The biceps vs. triceps contrast makes it concrete. The biceps brachii has a big moment arm and fusiform fibers; going from contracted to fully straight moves an enormous distance, so its sarcomeres stretch across roughly double the excursion of the triceps for the same joint movement — it's highly susceptible. The triceps brachii is the archetype of a resistant muscle: it's wrapped around the bone with a small moment arm, has many sarcomeres in series, and barely moves — its operating sarcomere length stays tiny throughout the range, so there's almost no stretch to trigger anything. (On pennation: a fusiform muscle's angle can technically be ~zero, but in reality it bulges out away from the bone, so the fiber curves and tilts and stops behaving like a perfectly straight line — the effect is smaller than in a truly pennate muscle, but it exists.) And a gripe I keep coming back to applies throughout: muscles are non-uniform, so where you take the measurement changes the number completely — a single-point muscle measurement often tells you nothing at all.

Length-Tension Curves Move to Match the Job

The active length-tension relationship has named regions — the plateau (all myosin heads lined up with actin, maximal tension), the ascending limb (sarcomere shortens, myosins drop off one end toward zero force), and the descending limb (sarcomere lengthens, myosins drop off the other end). The word “limbs” has nothing to do with arms and legs — they're just names for points on the graph. On the descending (long) side, passive titin tension compensates so total force never falls to zero; on the short side there's no such compensation, which is why you get active insufficiency at the contracted end.

A muscle adds or subtracts sarcomeres in series so its plateau lines up with the joint angle where it's most often activated — visible as a shift in the angle of peak torque. The glutes are most active in extended hip, so their plateau sits right there and sarcomeres are shed until it sits perfectly where you want it. The gastrocnemius is really only activated in its most stretched position, giving it a huge long ascending limb and the ability to reach active insufficiency when contracted. The triceps — the sole elbow extensor, active across the whole range — has architecture weird enough that it sits on the plateau for essentially the entire range of motion.

Two consequences worth carrying into the gym. First, vastus medialis vs. lateralis: normally quads grow by their size (lateralis is biggest, so it grows most), but the medialis has a longer descending limb, so in stretched positions it soaks up more passive tension and the pattern reverses — stretch-position quad work biases growth toward the medialis. Second, a curve that shifts toward longer lengths can hide strength gains at short angles. In a landmark old study untrained people trained the leg press and their leg-press strength rose ~40–50% — but their knee-extension strength at a 30° knee angle didn't increase at all. Later modeling showed the angle of peak torque had shifted toward longer muscle lengths; as the curve tilted and moved up, strength at the short 30° angle stayed put. The shift negated the gain at that specific angle.

Maximal-Effort Eccentrics

Athletes doing maximal-effort eccentrics — Nordic curls, for instance — post enormous strength gains in the trained exercise. In a dynamometer you see crazy gains in maximal eccentric strength and much smaller gains in isometric and concentric modes: a contraction-mode-specific strength gain bigger than just about anything else in sports science. And almost all of it is neural — improved coordination and improved motor-unit recruitment, not new muscle.

That should be impossible: central motor command is generated in the brain and isn't specific to what you do locally, so how can recruitment gains be mode-specific? The resolution is that, at the start, the coordination demand of the eccentric is astronomically higher than its concentric equivalent. Two lines of evidence: on fMRI, a concentric contraction shows just a couple of bright spots while the eccentric lights the brain up like a Christmas tree; and at matched sub-maximal activation, effort should be identical if coordination demand were equal — but the eccentric feels far harder. That high coordination demand drives high effort perception, which suppresses recruitment in the eccentric mode — an extra voluntary activation deficit on top of the concentric one. Training then fixes the coordination demand and simultaneously closes the recruitment deficit. So it was never a gain in central motor command — it's one coordination improvement producing two effects.

Because both adaptations are exercise-specific, the impressive gains are not transferable to sport — which flips the usual programming logic on its head:

1
Skip the 4–6 week blockA short eccentric block is pointless — the gains are exercise-specific and won't carry to your sport.
2
Smallest dose, left inBetter: a much longer block, or a tiny amount of eccentric work parked in the program essentially year-round.
3
Avoid detrainingEccentric/sarcomerogenesis adaptations are lost faster than anything else — 6 weeks of gains reversed by just 2 weeks of normal activity. Don't let them lapse.

Teams historically used block-based eccentric programming for no real reason — the move I favor is the smallest possible dose kept in continuously. One more payoff: once recruitment is high enough to actually train the faster-twitch fibers, eccentrics reduce muscle-strain injury risk through three adaptations — sarcomerogenesis (fibers can be stretched to a longer length before hitting trouble), more lateral force transmission (extra costameres), and more titin (the molecules proliferate, adding passive force, so you aren't pulled to dangerous lengths as easily). For scale on the stakes: rodent muscle tears at roughly 150–200% of resting length, and stripping lateral force transmission makes it tear much shorter.

The Research

Peer-reviewed sources for the concepts above (via PubMed) — supporting research, not necessarily the exact studies referenced above:

Note: this is an animal, eccentric-biased (downhill-running) model of serial-sarcomere addition — a supporting demonstration that eccentric loading drives sarcomerogenesis, not the exact human study behind the concepts above.

Want this turned into a program?

Knowing that sarcomere length is the trigger is one thing — building stretch positions, eccentric dosing and fatigue management into your actual training is another. I'll do it for you.

Apply for 1:1 Coaching →
Advanced Physiology

Fatigue: Inside the Workout

Fatigue isn’t one thing and it isn’t a feeling — it’s an objective, measurable drop in performance caused by a previous bout of exercise. Once I map the seven steps of a movement for you, every fatigue mechanism stops being mysterious: each one is just an interference at a specific link in the chain, and almost all of them bottleneck through a single master variable — calcium.

💡
The deep end: this is the graduate-level physiology behind everything I teach. Dense on purpose. You don’t need any of it to get results — but if you want to know why the rules work, this is the machinery underneath them.

First, What “Fatigue” Actually Is

The definition is load-bearing — I treat fatigue as the objective external measurement: you do a bout of work, and I measure a reduction in your exercise performance as a result. That reduction is the fatigue. This isn’t pedantry to me. Fatigue mechanisms are the internal processes; measured fatigue is the external result — and the two can come apart completely.

A potentiation effect can hide a mechanism entirely. You do set one, then someone walks into the gym and fires you up — set two recruits more motor units, cancels the local fatigue, and my stopwatch reads zero fatigue even though recruitment is genuinely higher (with its own adaptive consequences). Run it the other way and you get the opposite: motor-unit recruitment drops, but a local potentiation effect bumps up muscle-fibre force, and again you land at zero measured fatigue — this time hiding real local muscular fatigue underneath. Identical “zero fatigue,” two totally different adaptation outputs. So everything below is about mechanisms, always tied back to that external measurement. The way I think about it: all fatigue is ever doing is causing problems or interferences with your normal way of doing a movement.

The 7-Step Movement Model

3 in the brain · 4 in the muscle

My scaffold here is horribly oversimplified, but it does a great job. A movement is three steps in the central nervous system followed by four phases inside the muscle. Learn the seven and every fatigue mechanism gets an address — it’s simply a disruption at one of these steps. Where the classic movement chain becomes a fatigue chain, I run each mechanism through the same three questions from my adaptation framework: what is the mechanism, which adaptation’s stimulus does it hit (and how), and how do I exacerbate or ameliorate it.

1
Pull the program off the shelfThe brain retrieves a stored motor program / coordination pattern it has run hundreds of times before.
2
Create the Central Motor CommandAn intensity modifier of that program — it decides how much effort and how many fibres per muscle region. It has to be told where to go by the planning part of the brain.
3
Fire down the motor neuronsThe command travels down the motor neurons to recruit the relevant muscle fibres.
4
Membrane & T-tubuleThe electrical signal runs along the cell membrane, then down the transverse (T) tubule to an electrochemical junction.
5
The triad converts the signalThe junction turns electrical into chemical — a voltage sensor on one side, a calcium store on the other, minor triadic proteins in the middle — dumping calcium ions into the cytoplasm.
6
Calcium transmits through the cytoplasmThe chemical signal (calcium) flows across the cytoplasm toward the contractile machinery.
7
Actin detects calcium → cross-bridgeActin senses calcium and opens a binding site, myosin binds, the cross-bridge cycle runs → force and movement.

A precision note I insist on: the literature’s term “excitation–contraction coupling” is imprecise. We’re not coupling excitation with a contraction — we’re coupling it with a chemical signal at an electrochemical junction. Contraction is two steps further down the chain (calcium transmission through the cytoplasm, then the cross-bridge cycle itself). Exercise science is genuinely bad at terminology, and this is a perfect example of it.

The One Idea That Ties It All Together

Calcium Is the Master Variable

Every time an electrical signal reaches the muscle, calcium is dumped into the cytoplasm to trigger the pull — and the system that pumps it back out is deliberately leaky. A little calcium is always left behind. That leftover calcium is what drives the whole local-fatigue story; if removal were efficient, this mechanism wouldn’t exist. And it isn’t a bug: your heart muscle doesn’t have this problem, which is the tell — it was installed on purpose, as a protective circuit breaker.

When calcium piles up, it triggers a protease group called calpains, which chew the nearest, most vulnerable proteins — the minor triadic proteins holding the signal junction together. Those snap, the junction pops apart like pulling a plug out of a socket, and electrical signals now arrive and leave with nothing happening on the chemical side. That fibre gets no further stimulus for the rest of the workout — its privileges have been withdrawn. This is likely one reason the dose-response of hypertrophy to volume is curvilinear, not linear.

Two buckets, one gatewayLocal fatigue splits into two opposite camps, both governed by that same calcium accumulation. Calcium-related mechanisms stop the calcium signal from ever reaching actin — no cross-bridge, no tension, no growth. In rudimentary terms, calcium-related is bad. Metabolite-related mechanisms don’t stop cross-bridges at all; they freeze the cycle in place, preserving tension while crashing velocity — bad for speed, but genuinely helpful for hypertrophy. Control calcium and you control the whole thing. In roughly 80% of the cases you’ll ever meet, this two-bucket helicopter view is enough.

The Three CNS Fatigue Mechanisms

only one is global

“Central nervous system fatigue” is shorthand for three different things. When someone throws that phrase around, I make them clarify which they mean — because only one of the three is truly global; the other two are specific to the exact exercise and muscles being used.

1

Coordination / efficiency reduction — specific

Fatigue reduces movement efficiency because the brain reaches for a stored motor program and applies it even when the muscles are fried. The brain can’t differentiate between fatigued and non-fatigued motor programs — there is only the motor program. I model it as a squat with a fixed 60% quadriceps / 40% hip-extensor activation split: as the quads fatigue faster, the fixed ratio keeps over-driving the hips and under-driving the quads, and the set turns into a squat morning. The brain works on activations, not forces — it can’t see forces — and it only responds to positive feedback, never negative, so it just re-applies the very program causing the problem. Practical upshot: you cannot improve a coordination pattern while fatigued. Largely irrelevant in bodybuilding — except for true beginners with very low physical literacy.

2

Supraspinal fatigue — the only global one

“Supraspinal” means in the brain. This is Central Motor Command running into the maximum tolerable perception of effort. My trigger rule: any source of pain or discomfort that is NOT the sensation of innervation feeds RPE into the brain and produces this mechanism — cardiovascular breathlessness, muscle burning, and a lactate-driven inflammatory path: lactate accumulation stimulates interleukins (myokine inflammatory mediators) inside the muscle, which get renamed cytokines in the bloodstream, are detected by the brain at the circumventricular organs of the blood–brain barrier, and produce tiredness and RPE. It hits two adaptations differently: motor-unit recruitment is binary — miss maximum recruitment and that adaptation simply doesn’t happen at all — while hypertrophy is graded, dinged but not cancelled. This is the one mechanism that carries across the whole body: get out of breath on pulldowns and it follows you into pressing. Cardiovascular status is probably the biggest set-to-set contributor — I’ll have you run a heart-rate monitor in your strength sessions. Cardio recovery is roughly 15 minutes tops in strength training (versus 2–4 hours in a cardio workout).

3

Spinal motor-neuron desensitization — specific, hypertrophy-only

Send signals down the motor neurons repeatedly and they start resisting — less signal gets transmitted, so the brain has to compensate by cranking up central command. It’s duration-driven — the longer you spend activating the fibres, the more of it you get — and it resets between reps: create it, it drops, next rep creates it, it drops. So isometrics — no break between contractions — build it dramatically, while dynamic reps reset it every rep. Because it’s not a brain-level phenomenon, it does not affect the ability to increase motor-unit recruitment — it only impacts hypertrophy. It’s muscle-specific (a biceps→triceps superset has no crossover; the one exception is contralateral training, and that’s on a single study, so I don’t overstate it). Longer-duration set styles — high reps, pre-exhaust, giant sets, rest-pause, drop sets — develop it most; pauses with the muscle still contracted accelerate it, while taking your hands off (an intra-set rest) reduces it.

“Train the movement while fatigued to toughen it up.”

Makes no sense. The brain can’t tell fatigued from non-fatigued programs, so it reverts to the stored one and you just lose efficiency. In the motor-learning study I lean on, a group that practised a throwing skill improved a week later — but a parallel group that pre-fatigued the muscles first came back worse than the original, having learned parameters that were only useful in a fatigued state. Pre-fatiguing a skill makes you worse, not tougher.

The Calcium Circuit Breaker, In Detail

There are three local calcium-related sites — the cell membrane, the electrochemical junction, and the cytoplasm — and three calcium-driven damage mechanisms that live among them. All of them do the same thing: stop the calcium signal, kill the cross-bridge, end the tension, end the growth for that fibre.

1

Excitation–contraction coupling failure — the circuit breaker

Leftover cytoplasmic calcium wakes calpains → calpains snap the minor triadic proteins → the junction pops apart → signals arrive with nothing happening downstream. It’s a damage mechanism: once the proteins break, that fibre has to be repaired later and cannot be repaired for the next set — hit it in set one and that fibre is out for the whole workout. Mitochondria buffer it by sequestering calcium, which explains three things: (a) the less-oxidative, faster-twitch fibres get cooked first because they have less buffering; (b) huge individual variation — someone fast-twitch-dominant is absolutely cooked for the rest of the day after a short intense bout, while a slow-twitch-dominant lifter can repeat it all day; and (c) a non-linear collapse across the set — essentially zero mechanism while the mitochondria have room, then in the last couple of reps it goes stratospheric as they run out of space. They’re not giving up — there’s just no more room — and that’s what produces the sudden speed drop at the end of a hard set. On a moderate 10RM, leaving about 2 reps in reserve dodges most of it.

2

Cell-membrane damage via ROS → phospholipids

The mitochondrial clean-up is itself a damage source. Removing calcium generates reactive oxygen species (ROS) → ROS signals for phospholipids → phospholipids attack the cell membrane → a damaged membrane can’t transmit action potentials, so signals never reach the junction. Now you’re right back at the first stage of muscle-fibre operations — same net result as the circuit breaker, and also a damage mechanism. It’s secondary and slower-building (it depends on the mitochondria pulling calcium out); my ballpark is that it probably only shows up after 3–5 sets of strength training to failure, and the only clean data we have is from eccentric work.

3

Actin desensitization — minor and protective

When calcium accumulation gets very large and fast, actin desensitizes itself and stops responding to it, halting cross-bridge formation. Realistically this only happens right after the junction has already failed and the mitochondria have given up removing calcium — so the fibre is cooked anyway. I read it in vivo as a momentary protective anti-tetanus adjustment (dump a lot of calcium fast and you need actin to stop responding, or you’d get tetanus), and it resets quickly. It’s a real mechanism — I just don’t think it matters much.

Five levers drive the circuit breaker — three on any set (proximity to failure, rep range, volume) plus two that only appear under stretch. Stretching a fibre opens stretch-activated ion channels — their own channel system, running from the cytoplasm to the membrane parallel to the T-tubules — letting extracellular calcium in on top of the store-operated pool. The stretch-side levers are stretch position (resistance profile or range of motion) and eccentric intensity. Static stretch alone starts reducing mechanical tension after about 45–60 seconds; eccentric contractions pile stretch-channel calcium on top of everything else, so the mechanism develops far faster than in a concentric.

Two applications fall straight out of this. First, eccentric hypertrophy plateaus fast — after roughly 3 sets of maximum-effort eccentrics the volume dose-response flattens; don’t over-volume them. Second, exercise order: put stretch-position exercises later, not earlier. Do a stretchy lat pulldown before a row and you’ve switched off a whole bunch of muscle fibres the row wanted; the reverse order avoids the problem. As for when the breaker trips within a set — this is my honest ballpark, not backed by direct data — it’s the last rep on a heavy 5RM (short set, less time for calcium to build), the last ~3 reps on a light 15RM, and you see far more of it in low-force isometrics than high-force ones.

“The circuit breaker is a design flaw — muscle failing on you.”

The opposite. Your heart muscle doesn’t have it, which proves it isn’t an error or a failing — it’s put there on purpose as a protective circuit breaker. It’s the fibre’s last-ditch move: okay, fine, whatever — pull the plug out of the socket. Once it fires it’s the last straw, and that fibre’s privileges are withdrawn for the rest of the session. That’s protection, not failure.

Metabolites: Why Light Loads Grow

the friendly fatigue

Metabolite relativity is two players — phosphates and acidosis — both working by building up on one side of a concentration gradient. Neither stops a cross-bridge; they freeze the cycle in place, preserving tension while dramatically slowing shortening speed. That’s a disaster for athletic speed but perfectly fine — even useful — for a bodybuilder.

1

Phosphates — you are not “out of ATP”

ATP splits into ADP + phosphate, and phosphate builds up on one side of the equation. Too much of it and the reversible reaction pushes back the other way, so you can’t use the ATP you have. You’ve got a stack of ATP — you just can’t touch it. Myosin needs energy to move from unbound to bound, to run the power stroke, and to detach, and now it gets stuck in any of those states. Some heads are stuck on, still pulling; another is pulling the fibre — so myofibrils shear against each other with no net movement. From a tension standpoint the fibre is locked in place: it behaves like an isometric contraction.

2

Acidosis — hydrogen ions that hang on

Hydrogen ions stick myosin to actin: the head rolls on, reaches its position, is about to release, and acidosis hangs on to it, then it pops off and repeats. The effect is paradoxical — acidosis increases fibre force relative to what you’d expect while dramatically slowing velocity. Think cold-weather grip: drop the temperature and your hands move slowly, but your grip force barely changes. Different mechanism (cold slows the ATP energy reaction, not acidosis), same outcome — force preserved, velocity crushed.

The Occlusion Threshold

~30% of 1RM Is Where Growth Begins

Metabolites become the whole ballgame here. With a very light load — below 30% of 1RM — whole-muscle force isn’t enough to squeeze the veins shut, so on every contraction blood squirts out of the muscle into the bloodstream and takes its metabolites with it. With a normal load the veins close immediately and the blood — and metabolites — stay trapped. The reps-to-failure curve shows a clear inflection point exactly at that threshold: a load of 35% (light) accumulates metabolites; below 30% doesn’t.

And that maps straight onto growth. Very light loads produce basically no hypertrophy at all; light loads do grow muscle; and strapping blood-flow-restriction cuffs onto a very light load makes it immediately start behaving like a light load and start producing hypertrophy. Why? Metabolites let a fibre keep producing tension at the end of the set — they preserve force and slow velocity instead of letting force collapse. Lose them, and fibre force gets dragged to almost nothing by the calcium mechanisms before any end-of-set tension can register — no tension, no growth. To me the very-light-vs-light-vs-BFR picture is an absolutely perfect description of how the stimulating model works and how mechanical tension at fibre level triggers muscle growth.

“Acidosis is what causes the burn.”

On its own, it doesn’t. Metabolite receptors need multiple metabolites present at once to register accumulation and trigger the sensation — inject hydrogen ions alone, or phosphates alone, or ADP alone, and nothing fires. “Metabolite” is really an umbrella term; for actual mechanisms only hydrogen ions and phosphates are the well-described key players. And as long as metabolites don’t cross into that pain/metaboreceptor → supraspinal-fatigue territory, a bodybuilder should stay pretty chill about them — they’re the thing letting lighter loads grow muscle.

The Muscle Pump, Explained

The pump is osmotic, not just pooling — squeezing the muscle shuts the veins, so during the concentric nothing leaves; on the relaxation phase the channels open and blood plus metabolites exit (which is exactly why metabolite fatigue clears fast). But while blood is trapped and acidosis builds, it creates an osmotic gradient that pulls water out of the blood, across the cell membrane, and into the fibres to equalize. The fibres swell — and now the liquid has to be re-extracted from inside the cells, which takes time.

That’s the tell that a pump is more than blood pooling: if it were only blood sitting in arteries and capillaries, it would squirt out the instant you relaxed and be gone. Instead, water is inside the fibres and has to be drawn back out — so the pump persists for about 15 minutes before it’s completely gone. (Vascularization, by the way, is a pull process, not a push one: capillarization tracks fibre hypertrophy almost perfectly — the fibre determines what happens to it externally, not the reverse. You can’t grow capillaries to feed growth.)

“Fatigue means you’re running out of ATP — that’s the problem.”

No. You’ve got a stack of ATP; you simply can’t use it because too many phosphates have piled up on one side of the equation. Fatigue here is a signaling and gradient problem, not an empty-tank problem — the myosin gets stuck, not starved.

The Research

Peer-reviewed sources for the concepts above (via PubMed) — supporting research, not necessarily the exact studies referenced above:

Want the machinery turned into your program?

Knowing how calcium, metabolites and the circuit breaker really work is one thing — building a week that respects your fibre type, your recovery, and your goals is another. That’s what coaching is for.

Apply for 1:1 Coaching →
Advanced Physiology

Fatigue: After the Workout

You rack the last set and the interesting part is just getting started. The soreness, the strength you’ve lost for the next few days, the damage that shows up two days later, the fog in your head — it looks like a scattered mess of separate problems. It isn’t. Every one of them bottlenecks through a single upstream event: how much calcium piled up inside your fibers during the workout. Control that one thing and you control the entire aftermath.

💡
The deep end: this is the graduate-level physiology behind everything I teach. Dense on purpose — you don’t need any of it to grow, but it’s the machinery under the recovery rules.

One Trigger, Five Consequences

everything funnels through calcium

There are exactly five fatigue mechanisms that can follow you out of the gym. Two are carried straight over from the workout itself; three are born after you finish. What makes the whole thing tractable — and this is the part most people never put together — is that all five trace back to one source.

EC-Coupling Failure
CARRIED OVER · CALCIUM
The electrochemical (triadic) junction gets damaged during the set. It takes an ever-larger electrical signal to release the same calcium — and some fibers are simply switched off for good.
Cell-Membrane Damage
CARRIED OVER · CALCIUM
A damaged membrane needs a much bigger signal to guarantee the same excitation–contraction coupling. Both of these two definitively stick around after the workout.
Protease Damage
BORN AFTER · CALPAIN
Calcium stays high for a couple of hours post-workout, waking calpain — a protease that keeps chewing the myofibrils long after you’ve left the gym. This is the real muscle damage.
Inflammation
BORN AFTER · SECONDARY
Neutrophils and then macrophages arrive to clear the damaged structures — creating a second wave of damage and a second dip in force.
Supraspinal Fatigue
BORN AFTER · CNS
Interleukins from the repair process reach the brain and read out as tiredness — for as long as the damage is being repaired.

There’s also a conditional sixth I’ll flag: coordination-related fatigue, which only shows up if you then go and perform a specific exercise using those same muscle groups. A revealing special case: if you train a totally different muscle group later, the only mechanism still reaching you is the supraspinal (CNS) one, because it’s the only one that circulates through the bloodstream.

The One Idea That Collapses The Whole Model

Everything Bottlenecks Through Calcium

Whatever calcium accumulation you generated during the workout is what determines all five post-workout mechanisms. Calcium accumulation is the single upstream driver — and calcium accumulation is itself set by just five training variables: volume, proximity to failure, rep range, resistance profile, and the intensity of the eccentric phase. Control the trigger and you’ve controlled the entire aftermath. Once I understood this, the whole model got a lot simpler.

Consequence #1 — Exercise type is irrelevant to fatigue typeBecause everything funnels through one node, every single type of exercise that exists — or ever will exist — always produces exactly the same post-workout mechanisms. You cannot have one lift producing one flavor of fatigue and another lift producing a different flavor. Only the amount differs. There is no special “CNS-frying” movement with its own private brand of fatigue. I don’t buy it, and the physiology doesn’t allow it.

Consequence #2 — The same five levers govern all of itChange any of the five variables and you change the amount of post-workout fatigue too. Which leads me to a simple decision rule: mitigate what you need, eliminate what you don’t. Max-effort eccentrics buy injury-prevention adaptations you can’t get any other way, so you mitigate the extra fatigue they cause. Light loads buy you nothing — so you don’t mitigate them, you cut them out entirely.

A note on measurement — those three calcium mechanisms (desensitization, membrane damage, junction damage) get read in vivo as a group through a single proxy: low-frequency fatigue. A lot of people assume it’s measuring EC-coupling failure specifically. I don’t think that’s valid — it flags the calcium family as a whole, not one individual member of it. From a practical standpoint it doesn’t matter, because every calcium-related mechanism does the same job: it stops cross-bridge formation and drops mechanical tension. Whether you’ve got all three running or just one, the outcome is identical. It only becomes a problem if you try to stimulate hypertrophy before it recovers.

Muscle Damage Is Biochemical, Not Torn

four bodies of evidence

For decades the story was that eccentric “tearing forces” physically rip the myofibrils apart. I think that’s wrong, and here’s the competing model I run with: damage is biochemical — a continuation of the same calcium cascade, where calpain keeps degrading the myofibrils (and the intermediate-filament system, and the sarcomeric discs — big structures, really) after the workout is over. Four separate bodies of literature settle it for me.

1

Concentric-only workouts still cause damage

Do a concentric-only session, biopsy it, pull the fibers under an electron microscope — and you see myofibrillar damage. But tearing forces require eccentric contractions. So tearing can’t be the whole story. (Tearing defenders reply that eccentrics cause far more damage, and the excess is the tearing. My camp replies that the excess is just extra calcium coming in through stretch-activated ion channels during the eccentric — no tearing needed. The two sides mostly talk past each other.)

2

The slam dunk: 10× more damage at 2–3 days

Eccentric-only workouts under electron microscopy show plenty of damage — but there’s far less damage immediately post-workout than at 2–3 days later. In humans the immediate damage is only about 10% of what you see at 2–3 days — roughly 10× less. That means the majority of myofibrillar damage happens after the bout has finished. A mechanical tearing force cannot possibly be responsible for damage that appears days after you stopped moving. For me that ends the discussion — it’s not really an argument anymore.

3

Electrically stimulated contractions track calcium, not force

Take an electrically stimulated isometric contraction at long muscle length and run it for different durations — 2, 5, 10, 15 minutes (animal set-and-forget models). Electrical stimulation gives you no protection from the fatigue mechanisms, so calcium just rises and rises with duration. Meanwhile force drops and drops — after about 5–10 minutes it’s basically crawling along the x-axis at essentially zero. If tearing were the cause, any contraction past 5 minutes would have to produce identical damage (no force means no tearing). Instead you get an almost perfect relationship between duration and post-workout fatigue, tracking calcium accumulation exactly. Biochemical.

4

The secondary damage effect (the roller-coaster)

Recovery doesn’t follow the classic single dip-and-rebound curve — it’s a roller-coaster: a faster initial recovery, then a second drop. Humans usually miss it because we only measure immediately post-workout and again at 24 hours; animal studies sampling at 0, 4, 8, 12, 16, 20, 24 hours reveal the dip clearly. That second drop is the inflammatory clean-up — and it’s the most useful piece of the whole picture.

“Muscle damage is caused by tearing forces.”

It’s calpain and inflammation — a biochemical process — not mechanical ripping. Concentric-only work still damages fibers, and the majority of eccentric damage shows up 2–3 days later, not during the lift (~10× more at 2–3 days than immediately post). Honestly, it’s frustrating: the data on this is about as clear as data gets, and an entire industry is still running around insisting muscle damage comes from tearing forces.

The Second Wave: Inflammation & the Brain

The clean-up crew — once calcium has stayed high for a couple of hours and calpain has done its work, the protease phase hands off to inflammation. First the proteases nibble away at the edges of the fibrils, making them slightly less functional. Then neutrophils arrive and signal for macrophages — I picture them like Pac-Man, coming in and attacking anything that’s been damaged. The macrophages remove the damaged myofibrils wholesale, which sharply cuts the fiber’s force-producing capacity. That’s the timing of the second dip.

This is also why anti-inflammatories are a double-edged sword. Ice or a pharmaceutical can stop the secondary damage and speed strength recovery — but in a training context the likely cost is blunted hypertrophy: you leave damaged myofibrils in place, and they don’t get stimulated as effectively in subsequent workouts. Faster recovery, less growth. That’s the trade I want people to understand before they reach for the ice.

Where the tiredness comes from — repairing muscle damage produces interleukins inside the muscle, some of them identical to the ones lactate produces during the workout. They leak into the bloodstream, get renamed cytokines, circulate, and the brain detects them as feelings of tiredness — supraspinal CNS fatigue. The key part: they stay there as long as the damage is being repaired, so the CNS fatigue matches the function loss almost perfectly. A workout needing 2–3 days to recover gives you 2–3 days of CNS fatigue; one needing 10 days gives you 9–10 days of it.

Fatigue Accumulates — Until You Can’t Grow

Two literatures look like they contradict each other on whether fatigue stacks from workout to workout. Reconciling them is one of my favorite examples, because it tells you exactly why high-volume blocks stop working.

1

The old studies said fatigue does NOT accumulate

1980s–90s work in untrained people, using a single maximum-effort eccentric workout at moderate-to-high volume — huge fatigue, over 50% strength loss. One group just recovered over ~2 weeks; a second group did another workout 3–4 days in. Both recovery curves returned to baseline at the same time. The second workout added no extra damage.

2

The new studies show perfect accumulation

A recent study had people do 4 sets of knee extensions with a moderate load to failure, every day for a week. Each such workout causes roughly 48–72 hours of fatigue. After the week, strength returned to baseline in about 13 days — which, if you do the arithmetic, is nearly just adding all those recovery periods together. Essentially perfect accumulation.

Why they differ — and it’s pure physiology

In the old eccentric studies, the first workout drove strength down into the slow-twitch fiber range. The only fibers available for the second workout were the very oxidative slow-twitch ones — which don’t get damaged. They simply couldn’t switch on the fibers that would accumulate damage, so none accrued. In normal strength training you can switch those fibers on, so it stacks. Very straightforward once you know what’s happening under the hood.

The overreaching plateau — keep piling on volume and fatigue drives strength down to about a 50% loss and then just holds there. At that floor, the only fibers still producing any stimulus are the ~20% slow-twitch fibers plus the low-threshold motor-unit fibers at the halfway point. This is non-functional overreaching: a high-volume block where you make no gains in the outcome you’re actually chasing, because the fibers you want to grow can’t be switched on or loaded. You get maybe 1–2 weeks of accumulating fatigue while still stimulating some growth — after that, nothing is getting into the fibers you care about.

This is exactly why I’ve been so vocal against a meta-analysis claiming strength plateaus at high volumes while hypertrophy keeps rising. I think it’s impossible: you can’t invoke cumulative fatigue to explain the strength plateau and then turn around and claim hypertrophy climbs in that same cumulative-fatigue state. If fatigue is huge enough to suppress strength, you can’t trigger the hypertrophy adaptation there either. The likely explanation for the “extra hypertrophy” is muscle swelling — two facts nobody disputes: more damaging exercise causes more swelling, and we can’t tell swelling apart from hypertrophy.

Recovery rules of thumb (moderate loads to failure, well-supported by data): you recover from 3 sets in ~48 hours and 5 sets in ~72 hours; beyond that you’re into once-a-week territory and it stops mattering much. Change any variable — all eccentric, all 1-RIR, all heavier — and the number of studies drops to one or two: I know the direction, but I can’t give you the magnitude. Individuals also vary enormously: someone with high voluntary activation and ~80% fast-twitch gets knocked sideways by every workout, while someone with low activation and ~80% slow-twitch can walk through anything you throw at them and come out the other side barely noticing.

Glycogen: A Signaling Story, Not an Energy Crisis

Glycogen has no fatigue mechanism of its own. What it does is turbocharge two mechanisms you already have — and understanding why kills one of the most persistent myths in the field.

“You fatigue because you run out of energy — ATP depletes.”

Dead. In 1950s cycling-ergometer studies, fatigue rose while blood glucose and muscle glycogen both fell — three lines moving together — and that gave birth to the “energy crisis hypothesis.” Then animal studies found ATP does not deplete, no matter your starting glycogen. The result was so surprising they re-ran it after fasting the rodents 24 hours first, just to be certain the animals weren’t sneaking in some hidden fuel along the way. Same answer. Fatigue is a signaling process built to avoid running out of energy — it never actually lets you hit empty.

The real mechanism — the brain can detect rapid drops in glucose, in muscle glycogen, or even in carbohydrate still sitting in the digestive system, and it manufactures a sensation of fatigue and tiredness in response. My favorite proof is carbohydrate mouth-rinsing: feel wrecked, swill glucose around your mouth and spit it out, and almost instantly the brain registers that more fuel is on the way — dialing back the tiredness and giving you access to a few more higher-threshold motor units. Nothing was absorbed. It’s signaling, not fuel.

1

It turbocharges supraspinal (CNS) fatigue

A big chunk of the glycogen effect is simply the brain reading a rapid fuel drop and generating more tiredness — accelerating the supraspinal mechanism you least want.

2

It accelerates EC-coupling failure

This is a very new area — maybe only 7 or 8 years old and still debated. Some argue local glycogen stores near the EC-coupling junction run low and it stops working (an energy-crisis-flavored claim). I reject that: drop the energy crisis hypothesis — it’s got to be a signaling process here. Fatigue mechanisms exist to avoid running out of energy; they wouldn’t fall straight into it. It happens precisely because you’re trying to avoid running out of energy, not because you’re actually empty.

Both of these are mechanisms we really don’t want, so walking into a workout glycogen-depleted is probably a bad idea.

Replenishment meets damage — textbooks say glycogen refills within 24–36 hours after aerobic exercise if you eat sensibly — almost certainly true, but not with muscle damage. You can’t get glucose across the cell membrane of a damaged fiber. After eccentric workouts, damaged fibers can still show glycogen depletion 12 days later. That creates a vicious loop in overreaching: you can’t replenish glycogen in already-damaged fibers, every new workout damages more fibers, and large chunks of muscle end up unable to refill — which then turbocharges both supraspinal fatigue and EC-coupling failure, worsening the overreaching.

Applied — The Bodybuilder Peak Week

Save The Pump For The Stage

Bodybuilders want to super-compensate glycogen to look as full as possible on stage. But if they do excessively damaging exercise in the final week or two, they make it much harder to drive glycogen into exactly the muscles they’re trying to fill. That’s why the traditional approach of switching to lighter loads in the last week probably isn’t a great idea — light, novel, high-rep work is damaging.

Here’s how I’d run it instead: keep the normal strength-training routine in the final week, possibly reduce volume slightly to avoid damage and swelling that could distort the look, and save the pump work for right before you walk on stage — when the swelling is an asset, not a liability. Do not do extra-damaging work in that final week.

Q&A — What Creatine Actually Does

A question I get constantly: if the popular explanation for creatine leans on the debunked energy-crisis idea, what’s the real mechanism? Here’s how I understand it — with the honest caveat that nutrition isn’t my primary lane, so weigh it accordingly:

1

It delays metabolite fatigue — that’s all

Energy supply and metabolic fatigue are two sides of one equation: however you produce energy, you generate metabolite fatigue factors on the other side. With creatine phosphate in the system you make ATP a slightly different way for roughly the first 10–20 seconds before switching to the standard carbohydrate pathways. That lets you delay the onset of acidosis (and, depending who you ask, maybe the phosphate systems too — though I’m not convinced of that part). Net effect: an extra rep or two on your moderate-load sets. Think of a sprinter on creatine — the point at which they start slowing down just moves a couple of meters further into the sprint.

2

Why it probably doesn’t help hypertrophy

On a moderate-load set, that extra rep gets added at the beginning of the set — so it’s just another non-stimulating rep, not a stimulating one near failure. Creatine doesn’t appear to affect 1RM, but it does affect ~10RM/20RM. So here’s my decision rule: if you can find data showing creatine improves something equivalent to a ~90% 1RM / ~5RM, then it would be adding stimulating reps and I’d expect a hypertrophy benefit. Absent that — no improvement in max strength, no extra stimulating reps, so no reason to expect long-term hypertrophy from it. Find that data and you’ll have your answer; from everything I’ve seen so far, it doesn’t actually move hypertrophy.

The Research

Peer-reviewed sources for the concepts above (via PubMed) — supporting research, not necessarily the exact studies I reference above:

Want this turned into a recoverable program?

Knowing that all fatigue funnels through calcium is one thing — building a week that respects your damage, your fiber type, and your recovery math is another. That’s what my coaching is for.

Apply for 1:1 Coaching →
Advanced Physiology

Exercise Selection & Neuromechanical Matching

Most people pick exercises off vibes and gym tradition. I pick them off a chain: name the adaptation, name its stimulus, then ask which features of an exercise change the size of that stimulus. Everything below is that one question, run all the way to its logical end.

💡
The deep end: this is the graduate-level physiology behind how I choose movements. Dense on purpose — you don’t need it to get results, but it’s the machinery underneath every rule I coach.

The Method: Start With the Adaptation

My approach to exercise selection never changes. I don’t start with the exercise. I start with the adaptation I’m chasing. Once I know the adaptation, I already know its stimulus — that work is done. So the only real question left is the third one: do any features of an exercise change how big that stimulus is? Answer that, and you’ve answered exercise selection.

1

Name the adaptation

Write down exactly what you’re trying to grow or improve — more recruitment, more hypertrophy in a specific region, more fatigue resistance. Be specific. A vague goal gives you a vague exercise.

2

State its stimulus

Every adaptation has a known stimulus. You already learned these. Recruitment needs a high central motor command reaching the muscle; hypertrophy needs tension on activated fibres in the trained range. Just recall it.

3

Ask which features modify the size of that stimulus

Now list the features of an exercise that make that stimulus bigger or smaller. That’s the whole audit. You can run it on every adaptation you know. I’m going to run it on the two most useful ones: turning recruitment up, and steering where hypertrophy actually lands.

Turning Recruitment Up

3 levers

The adaptation — expand the amount of motor-unit recruitment you can generate, i.e. the number of motor units you can actually get access to. The stimulus — you have to hit a genuinely high level of recruitment in that muscle, in the exercise itself. A big central motor command has to reach it. Recruitment climbs in an orderly way — smallest motor units first, largest last, the size principle running underneath everything — and the CNS steers that command toward the units best placed to do the job. So the audit question becomes: what features of an exercise change the size of the command arriving at the target muscle?

I picture central motor command like a single spotlight of fixed brightness. Flood it across a whole stage — a big compound movement with a lot of muscle involved — and no single spot is bright. Narrow the beam onto one performer — a small, isolated movement — and that spot is blazing. That’s the entire game with recruitment. Three features move that beam:

Coordination Demand
SPEND LESS ATTENTION
A complex pattern eats mental effort. Attention spent grooving the movement is attention you can’t spend driving the target muscle hard.
Stability Demand
GET MORE STABLE
An unstable surface or an unstable implement both raise the stability tax and drop the command you can send. Rank any pattern most-stable to least-stable.
Muscle Mass Involved
USE LESS OF IT
The more muscle mass a lift recruits, the lower the recruitment per muscle. Less mass in the movement means more command per muscle.

The muscle-mass lever is the strongest and the most counter-intuitive, so hold onto it. Line up a single movement pattern by how much mass it involves and you get a clean spectrum, largest to smallest: squats → leg presses → two-leg knee extensions → single-leg knee extensions. Recruitment per quad is highest at the far right, on the least impressive-looking exercise in the list.

The cleanest proof this is real is the bilateral force deficit: each limb recruits more when it works on its own than when both limbs work together. Split the effort across two legs and neither leg gets the full beam. So whenever the goal is to maximise recruitment for this adaptation, the advice is almost the opposite of what a gym would tell you — keep coordination low, keep stability high, and dramatically reduce the amount of muscle mass in the exercise. A single-leg knee extension can out-recruit a squat, per muscle.

The speculative fourth lever: posture

Unproven, but worth knowing. Below heart level, blood doesn’t try to drain out of a contracting muscle and perfusion pressure holds steady. Raise the limb above the heart and blood tries to leave, which would drop muscle perfusion pressure — so the body compensates by raising arterial blood pressure, driven by a jump in sympathetic activity. That sympathetic surge could nudge recruitment up through motivation. The honest gap: nobody has ever measured voluntary activation in that position. You’d only need to rotate a testing rig about 90° to put the quads above the heart, and it still hasn’t been done. I don’t hang my hat on it — I just want you to know the research gap is real.

Where Hypertrophy Actually Happens: Two Rules

Recruitment tells you how much. Two physiological rules tell you where. Get these two straight and you stop guessing which exercise builds which muscle.

A

Neuromechanical matching

The CNS matches the central motor command to the motor units whose fibres have the best leverage for the movement, then organises them into a coordination pattern. It’s an efficiency principle — best leverage means least effort for the torque required. Think of how you instinctively grab a door at the edge farthest from the hinges: you don’t decide to, your body just reaches for the point of most leverage and least work. That’s matching. It’s also exactly how good bodybuilders already reason — the mover with leverage for the movement is the one that grows.

B

The two-joint-muscle problem

When a muscle would act as an antagonist at one joint at the same time as it would act as an agonist at another, the CNS drops that two-joint muscle out entirely and leans on single-joint muscles instead. It won’t hire a worker who’d undo the very job it’s paying for. There’s no official name for this — antagonist inhibition is one label. And there’s a strict trigger: it only fires if the muscle has leverage at both joints. Leverage at one joint only, and there’s no conflict to resolve.

Priority — Rule B outranks Rule A, but it runs on Rule A. Matching supplies the leverage information; the two-joint rule uses that information to decide whether a bi-articular muscle gets switched on or benched.

The Rule That Rewrites Your Program

Why the “obvious” compound lift often trains the wrong muscle

Take the long head of the triceps. It crosses the elbow as an extensor and the shoulder as an extensor — a two-joint muscle. In a bench press you’re flexing the shoulder (driving the arm forward) while extending the elbow. If the CNS switched the long head on, its shoulder-extension pull would fight the shoulder flexion you’re pressing with — that’s flooring the gas and the brake at the same time. So it drops the long head out and lets the single-joint medial and lateral heads do the pressing. The hypertrophy literature closes the case: pressing produces no growth of the long head. To grow it, you have to give it a job where it only has leverage at one joint — a cable push-down, where it’s a pure elbow extensor and the conflict never arises.

The Lower-Body VersionThe same thing happens under a squat. The hamstrings and rectus femoris are two-joint muscles that would be antagonist somewhere in a combined hip-and-knee extension, so they get benched — which is why squats and leg presses grow no rectus femoris, no hamstring, and no gastrocnemius. Those muscles are switched off, not merely “worked lightly.” If you want them, you train them where they only have leverage at one joint.

The study that proves it — In the early 2000s a study sat people in a dynamometer and measured their maximal hip-extension torque and maximal knee-extension torque (strength here just means joint torque, which is leverage × muscle force). Then it set a target of 50% of maximum torque and recorded muscle activation three ways: an isolated 50%-max hip extension, an isolated 50%-max knee extension, and a simultaneous contraction doing both at 50% at once — mechanically almost identical to the two isolated efforts added together.

If neuromechanical matching were the whole story, stacking the two isolated activation maps should reproduce the simultaneous one exactly. It didn’t — the maps came out completely different. In the combined contraction the two-joint muscles dropped out: hamstring activation fell away, rectus femoris fell away, while single-joint quadriceps activation climbed. The adductor magnus wasn’t measured, but glute activation didn’t move at all — so the extra hip-extension torque had to be produced by something, and the only candidate left is the adductor magnus stepping in. Modelling work on the squat reached the same verdict from the other direction: at the loads we actually squat, the hamstrings can’t be meaningfully recruited — if they fired hard they’d bend the knee back under you and you’d never stand the weight up.

“The hamstrings don’t work in the squat because they’re contracting isometrically.”

Isometric would mean the muscle is producing more force, not less — that’s the opposite of “not contributing.” The hamstrings aren’t isometric in the squat, they’re switched off by the two-joint problem. The muscle is literally not being driven.

“A muscle in a stretched, worse-leverage position gets activated more.”

This is incoherent. If worse leverage meant more activation, you’d have to claim the anterior deltoid works hardest exactly where its leverage is worst. One rule has to apply the same way every single time: the CNS drives the best-leveraged fibres, never the worst.

“Neuromechanical matching switches off at maximal effort.”

This quietly assumes you can flood every muscle in the body to the maximum all at once. You can’t — central command is finite and has to be allocated. Efficiency applies at maximal effort exactly as it does at submaximal effort. There’s no mechanism that would make matching shut off just because you’re trying hard.

The Five Exercise Features

3 universal + 2 for two-joint muscles

So what actually decides which muscle has the best leverage in a given position? Five features. Three apply to every muscle; two extra apply only when you’re dealing with a two-joint muscle. Learn them as dials — and know that they stack.

1
Range of Motion / Resistance ProfileWhere the hardest point of the exercise falls. ROM and resistance profile are the same lever — they set which position the muscle has to work hardest in. (Universal.)
2
Plane of MotionFrontal vs sagittal vs transverse. Different muscles win the leverage contest in different planes — the shoulder is the classic case. (Universal.)
3
Proximal / Distal Joint PositionsGrip and the joint angles up and down the chain. Supinated vs pronated forearm, for one, shifts the work between muscles. (Universal.)
4
Which Joint You TrainFor a two-joint muscle, training it at one joint vs the other changes the outcome — hamstrings at the hip build a different region than hamstrings at the knee. (Two-joint only.)
5
Length Set by the Other JointThe far joint’s position sets the muscle’s length, and length sets its leverage. Move the joint you’re not training and you change everything. (Two-joint only.)

Stacking is the whole point — you combine features to pin a stimulus onto one muscle. Two of my own worked examples:

Localising the middle deltoid

Stack plane of motion (train it as frontal-plane abduction) with resistance profile (load it so the hardest point sits in the lower half). The middle deltoid only has good leverage in the frontal plane up to about horizontal; go higher and the anterior deltoid inherits the work. So a lateral raise loaded to bite hardest in the bottom half, in the frontal plane, is two features stacked onto the middle delt.

Localising the gastrocnemius

Stack a two-joint feature — length set by the other joint (keep the knee straight/extended) — with resistance profile (fail in the stretched, lower portion of the raise). The gastrocnemius has its best leverage most stretched: extended knee plus a dorsiflexed ankle. Bend the knee and the gastroc goes slack and the soleus takes over. Keep the knee straight and load the bottom, and you’ve stacked two dials onto the gastroc specifically.

Why EMG Amplitude Lies

You can’t talk exercise selection without EMG, because it’s the number everyone waves around. EMG measures the electrical noise at the muscle’s surface. People read a bigger EMG number as “more activation” and therefore “more growth.” It is neither.

The finding that should end that habit: when resistance exercise is taken to task failure, muscle-fibre activation is the same regardless of the load or how fast you move. Light and heavy, slow and fast — all reach the same fibre activation at failure. So EMG-amplitude differences between those conditions aren’t reporting activation, and they’re certainly not reporting growth.

Where the “EMG is invalid” noise came from — people used the tool for a job it was never built for: comparing different states of fatigue. Take a light-load set to failure and a heavy-load set to failure. Both hit failure, but they arrive with very different amounts of fatigue in the muscle, and fatigue changes the signal on the membrane. Different EMG, identical full activation — the amplitude gap is a fatigue artefact, nothing to do with the growth stimulus. Reaching failure in two situations does not mean the two involved equal fatigue.

Where EMG is genuinely useful — in a minimally fatigued muscle, to compare the relative involvement of different muscles in a given exercise. That’s real value — but only if you control two things.

1

Normalisation (the big one)

Amplitude gets expressed relative to a maximum contraction (MVC), and that reference has to be taken in the position that truly maxes the muscle out — best leverage, other muscles eliminated. Get the reference position right for one muscle and wrong for another and you’ll wildly overstate the one with the bad reference. It happens constantly: a study nails the reference position for the hamstrings but botches it for the glutes, then reports a movement as a fantastic “glute” exercise — when the glute number only looks huge because its reference was garbage. And note: in a dynamic movement EMG can read higher than the isometric MVC, because the brain up-regulates rate coding to keep the signal firing through the movement. Numbers over 100% don’t mean superhuman activation.

2

Electrode placement

Surface studies almost always follow the SENIAM guidelines, which carry a famous typo: the upper-trapezius landmark is listed as C7 instead of C6 — so anyone following it is actually recording the middle trapezius and calling it the upper trap. And the default glute placement puts the electrodes on the upper glute, which quietly skews every glute conclusion that’s ever been drawn from it.

Bottom line — EMG amplitude is a comparison tool for relative involvement in a fresh muscle. It is not a growth meter, and it is never a fibre-activation meter. Treat it that way and it’s useful; treat it as a scoreboard for “which exercise activates more” and it’ll lie to you every time.

“Higher EMG means more muscle activation and more growth.”

To task failure, fibre activation is identical across loads and tempos. EMG amplitude tracks fatigue state and measurement artefacts — normalisation and electrode placement — not the growth stimulus. It compares relative involvement in a fresh muscle; that’s all.

The Research

Peer-reviewed sources for the concepts above (via PubMed) — supporting research, not necessarily the exact studies referenced above:

Want your training built off mechanics, not vibes?

This is exactly how I choose every exercise in a client’s program — adaptation, stimulus, features, stacked to land the stimulus where you want it. Let’s build yours.

Apply for 1:1 Coaching →
Advanced Physiology

The Hypertrophy Hypotheses

Ask the internet what makes a muscle grow and you’ll get three answers dressed up as one: mechanical tension, muscle damage, and metabolic stress. Almost everyone treats them as three ingredients in the same recipe. I don’t. When you trace where each idea actually came from and then try to break it on purpose, two of the three fall apart in front of you — and you’re left with a single driver doing all the work. This is the story of how that happened.

💡
The deep end: this is the graduate-level physiology behind everything I teach. Dense on purpose — you don’t need any of it to grow, but it’s the machinery under the rules.

Three Stories About Growth

only one survives

Around 2011–2012 the field settled into a tidy three-part model: hypertrophy is driven by mechanical tension, muscle damage, and metabolic stress working together. It’s clean, it’s easy to teach, and it’s on the first slide of basically every course. My problem with it is simple — it treats three ideas with wildly different track records as if they were equals. So before I tell you which one I run with, let me lay out all three exactly as the field presents them.

Mechanical Tension
THE SURVIVOR
Force sensed inside the fiber tells it to grow. The catch: most people mean whole-muscle force, and the real signal is single-fiber force. Read it that way and it explains everything.
Muscle Damage
DEAD · BIOCHEMICAL
The idea that fibers get torn and rebuilt bigger. It produces damage markers that look like growth but aren’t — and it can be knocked over in about five minutes once you set out to break it.
Metabolic Stress
DEAD · FOUR MECHANISMS
Lactate, reactive oxygen species, hypoxia, muscle swelling. An umbrella of candidate stimuli, each one interesting on paper and each one that fails the moment you press on it.

Two of these three are ghosts. They keep getting cited, they keep showing up on the slide, but the mechanism underneath them is gone. My job here is to show you the autopsy on both — and why the one that’s left standing was very nearly lost by accident.

Where The Three Stories Came From

history matters

You can’t evaluate these ideas without knowing how each one was born, because in every case the birth explains the flaw. Start at the single-fiber level. Hypertrophy, at its root, is the addition of myofibrils — the contractile strands make up about 90% of the fiber. You add myofibrils two ways: an existing one splits into two smaller strands that then get topped up with fresh actin and myosin, or a brand-new one is built from scratch (de novo myofibrillogenesis). For roughly 40–50 years splitting was assumed to be the only route, and I still think it’s the more likely one — the de novo evidence is recent and I’m watching where it lands.

1

Mechanical tension — saved by a lucky misread

The tension idea traces back to old animal experiments where a muscle was loaded in a lengthened, stretched position and grew. The people running those studies concluded tension caused the growth — and they were right, but for a shaky reason. They quietly discounted muscle activation in their analysis, which was wrong. Lucky for them: had they taken activation seriously, the field might have built a “muscle activation” hypothesis instead and buried mechanical tension for decades. They drew the correct conclusion from a flawed analysis. There’s also a wrinkle nobody checked — those loaded-stretch studies almost certainly produced sarcomerogenesis (adding sarcomeres in series, longitudinal growth), not true radial hypertrophy. Nobody verified which one it was.

2

Muscle damage — born from a coincidence

This one comes out of early-1970s animal strength-training work. Scientists loaded muscle and saw two things happen at the same time: markers of damage, and myofibril splitting. Two events, same window, so the natural story wrote itself — damage is the permissive event that lets myofibrils split, and splitting is how you grow. Correlation got promoted to cause. That single coincidence is the entire foundation the damage hypothesis was built on.

3

Two models built on top

The mainstream version is the three-part model I opened with — tension, damage, metabolic stress — and it only holds together if you read “mechanical tension” as whole-muscle force. The model I actually use reads tension differently: growth is driven by single-fiber force in the fibers that are switched on and working near their limit. That’s the distinction that quietly decides everything downstream. Regional-hypertrophy work is my anchor here — when you map growth to the local tensions inside different parts of a muscle, hypertrophy behaves like a single-fiber phenomenon, and every sensor that detects the growth signal lives inside the fiber. Not the muscle as a whole. The fiber.

The Autopsy On Muscle Damage

it dies in five minutes

There are actually two different damage hypotheses running around, both traced to that same 1970s coincidence, and it’s worth separating them. The public-domain version is the gym-poster line: muscles get broken down and built back bigger. That’s the original claim, and it fell over almost immediately because, mechanically, it just doesn’t work. The scientists’ version is quieter and more defensible: damage isn’t what causes growth, but it might be a possible stimulus for it. That softer version is the one that got folded into the three-part model. Both go back to the same origin; they just backpedaled to different distances.

The field made its real mistake in method: when people wanted to defend the damage idea, they went looking for justifications — reasons it might be true — instead of trying to invalidate it. That’s backwards. And the justifications they found were thin. There were four:

1

Eccentrics grow more than concentrics

Max-effort eccentric training looked like it out-grew concentric training, and eccentrics cause more damage, so — damage. Except the meta-analyses don’t really show that gap anymore, and where a gap exists, passive/stretch tension explains it cleanly. No damage required. Dropped.

2

Stretched positions grow more than shortened ones

Same logic — training in a lengthened position causes more damage, so damage must be the driver. Same problem — we now have a perfectly good alternative in passive tension that explains the stretch advantage without invoking damage at all. Dropped.

3

Inflammation looks like a stimulus

Kill post-workout inflammation with ice or anti-inflammatory drugs and fatigue clears faster; do it repeatedly across a program and hypertrophy suffers. Their read: inflammation is a growth stimulus. My read: you may simply need to finish the repair process before a fiber can be enlarged in a later session. Still cited today, but it doesn’t force their conclusion.

4

Satellite cells

Damaging workouts activate far more satellite cells than gentle ones. True — but here’s the number that ends it: satellite cells spend about 95% of their effort on muscle-damage repair and only about 5% contributing to hypertrophy. That’s a tiny sliver of what they do. And the reason damaging work activates them is mechanistic and boring: calcium accumulation triggers satellite-cell activation, the same way it triggers fiber-type shifts. Calcium is the body’s advance-warning signal — provision the repair crew before the damage even lands. It’s not a hypertrophy stamp of approval. I wouldn’t hang a theory on it.

Now flip it around — stop justifying and start trying to break it. This is where it dies. Go to the contusion and laceration models — animal work where you deliberately bruise or cut a muscle. You produce enormous damage. And you get mTOR signaling and elevated myofibrillar protein synthesis rates — all the biochemical fingerprints that look exactly like the run-up to hypertrophy. But you get zero muscle growth. None. The markers show up and the muscle doesn’t get bigger. Damage markers are not hypertrophy; they’re a similar type of process that turns out to be genuinely distinct.

Why? Because the pathway is identical to exercise, and that’s the whole point. In a workout, calcium enters the fiber through the sarcoplasmic reticulum or through stretch-activated channels. In a contusion or laceration, you breach the cell membrane and calcium pours in through the hole. From that moment on, everything downstream is the same cascade — same calcium, same signaling, same markers. There is no difference after the calcium is in. Which tells you the decisive thing: muscle damage is a biochemical process, not a mechanical one. It isn’t tearing forces ripping fibers apart. It’s calcium chemistry. And if bruising a muscle produces every damage marker with no growth, then damage markers can’t be your evidence for growth. The hypothesis is done.

“Muscles get torn down by training and rebuilt bigger.”

No. Bruise or cut a muscle and you produce mTOR signaling and elevated myofibrillar protein synthesis — the exact markers people point to as “growth” — with no hypertrophy whatsoever, because the damage cascade is calcium chemistry identical to exercise, not mechanical tearing. Damage markers ≠ growth. What makes this so hard to dislodge is that “broken down and built back bigger” was never installed in anyone’s head by reasoning — it was absorbed as a feeling from the culture. When I show people the data, a lot of them literally can’t see it. It doesn’t compute, because the belief underneath is emotional, not logical.

Where it stands now — the strongest nail in the coffin came from tracking damage and growth across a whole program: at the start of a program damage is high and hypertrophy is low; by the end hypertrophy is high and damage is low. They move in opposite directions. That put a lid on it for a while. Two pillars — eccentrics and stretched positions — have been quietly dropped because passive tension explains them. Two — inflammation and satellite cells — still get cited. And I’ll make a prediction: someone new to the field will resurrect “damage causes growth” in five to ten years, because this idea behaves like a weed. You pull it up, and a season later it’s pushing back through the same crack. Every field does this — a new cohort would rather re-run the old experiment than sit down and read what the existing data already says.

The Autopsy On Metabolic Stress

four mechanisms, four failures

Metabolic stress deserves more respect than damage, and I’ll tell you exactly why. Its birth, in 1991–1992, is the honest exception in this whole field. Two studies did something nobody had done before and — as far as I can tell — nobody has really done since: they explicitly stated a hypertrophy model, then tested it. The model they started with was the whole-muscle version of mechanical tension — the idea that the force–time integral of the muscle during training should predict how much it grows. That’s the same model being floated as fresh today. These people had it thirty years ago and actually put it on the stand.

1

Study one — the isometric test

Within-subject design: one limb trained one way, the other limb the other way, with identical force–time integrals — two minutes of contractions per session at 70% of maximum force in both. The only difference was structure: one limb did short ~2-second contractions with rest, the other did 30-second contractions and piled up far more fatigue. This is, almost to the letter, the “proximity to failure at matched force–time integral” test people say they want to run today. Result: the high-fatigue limb grew, the low-fatigue limb didn’t. That invalidates the force–time-integral model outright — matched integral, different growth. They pinned the extra growth on the metabolite accumulation in the fatiguing contractions, and metabolic stress was born.

2

Study two — concentric vs. eccentric

Follow-up, within-subject again, same sets and reps, one limb concentric and one eccentric. The eccentric limb used about 35–40% extra weight. If whole-muscle tension were the driver, eccentric should have out-grown concentric by roughly 30–40%. Instead the growth was basically equal — so concentric was doing “something extra.” They measured more metabolite accumulation on the concentric side and, again, chalked it up to metabolic stress.

Then it got messy — a pile of unrelated ideas got swept under the metabolic-stress umbrella after the fact, and none of them hold. A single early-2000s study suggested light loads grow slightly more slow-twitch fiber and heavy loads slightly more fast-twitch — later work found no such difference, so it was just an unlucky one-off observation. Sarcoplasmic hypertrophy was floated as load-dependent, then shown not to differ between heavy and light. The bodybuilder anecdote — that lifters started using lighter loads and shorter rest to chase the “pump” — ignores that humans lifted heavy objects to get bigger since the ancient Greeks; the light-load, short-rest style only appeared after anabolic steroids arrived in the 1960s–70s. Don’t assume the modern crowd out-thought the Greeks. And the worst one — the blood-flow-restriction claim that metabolites directly increase motor-unit recruitment. Recruitment is under voluntary control. You cannot dial it up with a chemical; the idea creates circular nonsense, and yet it sailed through peer review.

Under all that clutter there are only four mechanisms actually worth testing — the ones with a real proposed mechanism. Here’s each one on the table.

1

Lactate

The most-studied of the four, and really just the old hormone hypothesis from a decade or two ago dusted off and re-released. Almost all of it lives in test tubes and rodents, and the most recent rodent data points fairly firmly the other way: inject lactate straight into muscle, or run a training block of lactate injections, and you get no growth markers and no growth. The one human study is worse — they gave an IV lactate infusion during a squat workout and measured protein synthesis. It’s fatally broken by the lactate shuttle: lactate made by a working fiber gets exported to a lactate-consuming fiber, and any lactate you put in the bloodstream travels away from the squatting muscle, not into it. The squat is pumping lactate out; your infusion can’t get in. And the tell-tale: measure muscle lactate (not blood) after very different efforts — a bodybuilding session, cycling sprints, a 400 m run all land on the same muscle-lactate numbers. If lactate drove bodybuilding growth, sprint cycling should build you a physique. It doesn’t.

2

Reactive oxygen species (ROS)

Your mitochondria generate ROS as a byproduct when they’re pulling excess calcium out of the cytoplasm during a hard set. The field likes it because the ROS produced in a workout correlates with post-workout mTOR signaling. But look at what that correlation actually is: mTOR is used for damage repair, and ROS is just a good gauge of how much calcium you accumulated. So the ROS–mTOR link is a calcium/damage relationship wearing a costume. It’s the muscle-damage problem again — and the same people can’t see it, because seeing it means admitting damage is biochemical.

3

Hypoxia

The strangest one, because nobody can quite say where the idea came from. And it collapses on a definition. Systemic hypoxia — altitude, low whole-body oxygen — actually suppresses growth: cerebral oxygenation drops, perception of effort rises, motor-unit recruitment falls, and people lose muscle mass at altitude. So we must mean local muscular hypoxia, probably imported from BFR thinking. The killer: hypoxia and metabolite accumulation move in opposite directions. Take sets to failure at 5RM, 10RM, 15RM, 20RM. Metabolites rise as reps go up. Oxygenation also rises as reps go up — the deepest deoxygenation is at the heavy 5RM, not the light 20RM. Why? Because vascular occlusion drives hypoxia, not metabolites: a heavy load clamps the vessels shut in both phases so no blood moves and the muscle deoxygenates to almost nothing; lighter loads drop below the occlusion threshold, blood flows, and oxygenation is preserved. So hypoxia can’t be a metabolic stress mechanism — it runs backward from the metabolites. If someone tells you hypoxia is a metabolic stress mechanism, you can smile and move on.

4

Muscle swelling

The least-studied and the one people are most excited about. The mechanism: blood pools in the muscle behind an occlusion, acidosis inside the fibers creates an osmotic gradient, water gets pulled into the fibers and they swell ~15–20% in diameter. The proposed growth logic is that swelling raises internal pressure, which raises the force the fiber makes — technically routing it back into a mechanical tension argument. Two tests, both unkind. A vasodilator study pushed more blood into the muscle during light-load training and found no difference in protein synthesis. And the clean one — take isolated fibers, drop them in solution and they swell that same 15–20% on their own; block it with an anti-osmotic agent and they don’t. Stimulate a swollen fiber against an unswollen one and the swollen fiber produces about 2–3% less force, not more. That’s the wrong direction for the entire hypothesis.

The BFR knockout — the cleanest long-term evidence against both hypoxia and swelling comes from blood-flow-restriction studies that trained sets to failure at different cuff pressures. Crank the cuff and you fail sooner with more hypoxia; ease it and you fail later with less. Long-term result: the actual occlusion pressure of the cuff has zero effect on hypertrophy. Absolutely zero. As long as your load is at least ~30% of 1RM — enough to occlude the vessels in the concentric phase anyway — you get the normal stimulating-rep result and the added hypoxia buys you nothing. That’s the test failing in the field, not just the tube.

And the study everyone quotes — the long-term ones showing that people who accumulate more metabolites, or whose muscles swell more, after their first workout are the same people who grow most. Sounds like proof. It isn’t. It’s a fast-twitch-fiber study in disguise: people with more fast-twitch fibers accumulate more lactate, swell more, and grow more. The fiber type causes all three. It’s a correlation between different people, not evidence that swelling or metabolites cause anything. Stated out loud it lands like a card trick — say the sentence, everyone goes “wow” — but there’s nothing in the hand.

“The pump and the burn — metabolic stress — build muscle.”

All four candidate mechanisms fail on inspection. Lactate: rodent data runs the opposite way and the one human study is broken by the lactate shuttle. ROS: it’s a calcium/damage-repair artifact, not a growth signal. Hypoxia: it moves opposite to metabolites, and BFR cuff pressure has zero effect on growth above ~30% 1RM. Swelling: swollen fibers make ~2–3% less force, and the vasodilator study was null. The “metabolites correlate with growth” studies are really fast-twitch-proportion studies. Interesting umbrella, empty underneath.

The One Driver Left Standing

Growth Is Pulled, Not Delivered

Strip away the two ghosts and here’s what I’m left with, and what I actually build programs on: hypertrophy is signaled by mechanical tension — single-fiber force — and everything after that is a pull process. If a fiber needs a material to grow, it will demand it, reach out and pull it in. What you cannot do is force growth by delivering more stuff — more substrate, more satellite cells, more blood — and expecting the fiber to use it. If nothing in the fiber is demanding it, it sits there unused.

The way I picture it — a just-in-time factoryA modern factory doesn’t stockpile parts. When an order comes down the line, the station pulls exactly the components it needs from the warehouse, right then. Back up a truck and dump extra parts at the loading dock and nothing happens — no order, no pull, no product. The mechanical-tension signal is the order. Damage, metabolites, swelling, satellite cells — those are trucks at the dock. Without the order they build nothing. This is exactly why you can’t out-supplement or out-pump a missing stimulus, and why every path to real growth runs back through tension.

Why the survivor almost didn’t surviveRemember, mechanical tension was very nearly lost — saved only because the people who ran those loaded-stretch studies drew the right conclusion from a wrong analysis. The idea outlived its own shaky birth. Damage and metabolic stress got the cleaner-sounding origins and the better marketing, and they’re the ones that turned out hollow. That’s the lesson I keep coming back to: don’t judge a hypothesis by how good it sounds on a slide. Try to break it. The one that won’t break is the one you build on.

The Research

Peer-reviewed sources for the concepts above (via PubMed) — supporting research, not necessarily the exact studies I reference above:

Want your training built on the one driver that survives?

Chasing the pump and the burn is chasing ghosts. Building every set around single-fiber tension is what actually moves the needle — and that’s exactly what my coaching is for.

Apply for 1:1 Coaching →
Advanced Physiology

The Principles & Psychology of Training

Every mechanism in this vault has to hang on something. For me, that something is two organizing principles — specificity and individuality — plus two things almost nobody programs deliberately: the non-linear way volume actually pays off, and the psychology that decides how much muscle you recruit in the first place. This is where the physiology stops being trivia and turns into a plan.

💡
The deep end: this is the graduate-level physiology behind everything I teach. Dense on purpose — you don’t need it to get results, but it’s the machinery under the rules, and this guide is where all the earlier mechanisms finally get organized into decisions.

The Two Principles Everything Hangs On

the frame

Two hooks, not new physics — to be honest, specificity and individuality don’t add a single new mechanism to anything I’ve already taught. They’re not more physiology. Think of them as the two coat-hooks I hang every mechanism on — the rep ranges, the rest periods, the proximity to failure, the fatigue math, all of it. Specificity decides what you’re training for; individuality decides how it has to be shaped for the person in front of you. Drop everything you’ve learned into those two, and you have a program.

1

Specificity — how you train to reach a specific goal

Different types of exercise drive different adaptations, and different adaptations are useful for different goals. So specificity is the question: what adaptation does this goal actually need? For an athlete, answering it is genuinely hard. For a bodybuilder, it’s almost insultingly simple — and I’ll show you why below.

2

Individuality — how you shape that training for one human

Two people chasing the identical adaptation still need different programs, because their leverages, their fatigability, their tolerances and their preferences all differ. Individuality is the tailoring pass that comes after specificity has told you the target.

Specificity: Athlete vs. Bodybuilder

Reasoning backwards from the finish line — at the top level of sport, specificity is a long chain you work backwards. Take a rower chasing a faster 2k. You don’t start in the gym — you start at the finish line. Analyze what actually separates the quick crews and it comes down to average power output per stroke. Now you have a defined ability to build. Break that down biomechanically and the engine is the leg drive — hip and knee extension producing the power. Power itself sits on the force–velocity relationship — it’s strength and speed together. Only now, after travelling all the way from the racecourse down to a specific power generator, do you build the strength-training exercises that target it. It’s an incredibly complex process, but at the highest level of sport it’s exactly what we should be doing.

Bodybuilding specificity is the opposite of complex. There’s really only one question: which muscle do you want to grow? Divide the body into regions and segments, then attack it segment by segment. The one genuine specificity decision you make is generic vs. specialization — do you train everything, or do you prioritize a few areas and put the rest on maintenance? A female physique goal is a classic specialization case: you’re not chasing every muscle, you’re building certain body parts and resting others on maintenance. Once that call is made, the rest is mechanical — I already know which exercises target which muscles. Everything left over is just rest period, rep range and proximity to failure, and I set those from the hypertrophy and fatigue material I’ve already built.

HOW I SPECIALIZE

The Answer Isn’t “Add More Sets”

The internet’s standard fix for a lagging body part is to bolt on more sets. I don’t think that’s the ideal way — especially not for an advanced lifter, where the whole game is quality over quantity. My specialization protocol is two moves. First, I prioritize that exercise at the very start of the session, when you’re fresh and can generate the most command. Second, I switch it to a single-joint, single-limb movement wherever possible — certainly single-limb, and single-joint if the exercise allows it — so all the stimulus lands on the target instead of leaking across a chain of muscles. That’s the only specialization I engage in. More focus, not more volume.

Individuality: The Tailoring Pass, in Order

5 dials

Once specificity has named the target, I tailor the program to the person — and I do it in a strict order of importance. These are the five dials, from the one I turn first to the one I barely touch.

1

Leverages / mechanical matching

The first thing I tailor, every time. I won’t hand a hip-dominant lifter a squat pattern to build their quads — they’ll just recruit the hips for everything and the quads never get the message. Instead I give them something like a hack squat that takes the hip joint largely out of the equation. Same logic across pressing, pulling, all of it: match the movement to the leverages so the intended muscle is actually the one working.

2

Rest periods / fatigability

Everyone recovers between sets at their own rate. There’s no point making a fully-recovered person sit and wait three minutes, and no point pushing someone into a set who isn’t ready at three. Three minutes is the number everyone repeats, but repeated doesn’t make it right. The biggest driver of that between-set feeling is superspinal / central fatigue, and its largest component is cardiovascular sensation — which you can track on a heart-rate monitor. Once a lifter learns they feel genuinely ready again at, say, 90–100 bpm, that number becomes their rest cue; some monitors will even ping you when you drop back into range.

3

Stretch tolerance

Less important. If I’m adding static stretching, tolerance varies enormously — some people benefit hugely, others just grit their teeth and suffer for a poor return. It’s rarely a good use of someone’s time, energy or motivation to force it on them.

4

Sarcomerogenesis history

Sarcomerogenesis is probably fairly limited to begin with, so a lifter’s history of stretch-position work slightly affects how much more they can gain from it — a small possible tweak. Honestly, I rarely act on it, because I program stretch-position exercises almost entirely on the basis of mechanical matching, not stretch-mediated hypertrophy.

5

Exercise hatred / motivation

This one bridges straight into psychology. If a client genuinely hates an exercise, that’s a strong reason to swap it for something that does the same job — because motivation sets the ceiling on how much command you can produce. Under the effort model, demotivation drags your maximum tolerable perception of effort — and therefore your motor-unit recruitment — down to silly levels. Motivation raises it. A hated exercise is a self-inflicted recruitment cap.

The Volume Dose-Response Is Non-Linear

Every set is not worth the same — the first proper dose-response profile for training volume came out of a Schoenfeld meta-analysis back around 2018, and there’s been more analysis since. The profiles differ in detail, but they share the one feature that matters: they are non-linear. You do not get the same stimulus from every set in a workout. Set one is worth a lot; by set five or six, the return has shrunk hard. That’s not a mystery — it’s exactly what you’d expect, because fatigue builds across the workout, leaving less and less capacity to generate a real stimulus set to set. On top of the diminishing returns, the work of Stuart Phillips points to a plateau somewhere between 6 and 8 sets in a single workout for a muscle — beyond that, you’re not stimulating meaningful extra growth in that muscle that session.

“More sets always means more growth.”

Two things kill that idea. First, diminishing returns — each set from one up to the plateau is worth less than the one before it. Second, a hard ceiling: roughly 6–8 sets per muscle per workout, after which the extra sets are just fatigue with no growth attached. Volume is a curve that flattens, not a line that keeps climbing.

The right per-session volume isn’t “as much as you can survive.” It’s the amount that still lets you train that muscle multiple times a week — because weekly volume, spread across recoverable sessions, is what actually accumulates. And that turns the whole question into recoverability math. For moderate loads taken to or near failure, the recovery figures are roughly 3 sets → 48 hours and 5 sets → 72 hours. Run those forward into a week and the caps write themselves.

6–8
The Per-Workout CeilingPlateau in sets for a single muscle in one session. Past this, no meaningful extra growth is stimulated that day — you’re just adding fatigue.
3→48h
Recoverability of 3 SetsThree hard sets of a moderate-load, near-failure movement need about 48 hours before you can productively hit that muscle again.
5→72h
Recoverability of 5 SetsFive hard sets push the recovery window out to roughly 72 hours — so the bigger the session, the rarer the frequency.
3×/wk
Weekly Cap: Train 3×Hitting a muscle three times a week limits you to about 1–3 sets per session on the 48-hour clock.
2×/wk
Weekly Cap: Train 2×An upper/lower-style twice-a-week frequency opens the door to roughly 1–5 sets per session.

Where the numbers bend — those figures come from studies using failure, moderate loads and stretch-position exercises — the most damaging combination there is. Move toward lower-damage work and the math loosens. A set of hip thrusts at a 5RM with a rep left in reserve is not the same beast as the squats tested at an 8–10RM in the literature — so a person doing the former might genuinely get away with 5 sets three times a week. There isn’t much of a trick to get around the underlying limit; the only real lever is chiselling away the variables that cause excess damage. As a ballpark for the volume dose-response, though, the 3 and the 5 are probably pretty good numbers to build around.

What about a cap on total sets across the whole session, all muscles combined? This is one of the most common questions I get, and I’ll be straight: I have no data for it — there’s genuinely nothing to show you. From personal experience I land somewhere around 10–12 sets per session, but I sit at the very fast-twitch end of the spectrum, so I wouldn’t hand that number to someone with an endurance background and expect it to hold. Treat it as my anecdote, not a rule.

One thing the recoverability math does settle for me: it keeps pulling me toward full-body training over upper/lower splits. On an upper/lower you almost can’t max out the per-muscle volumes without leaving a problem for the following day — the frequencies just don’t line up. Full body every other day, or four-times-a-week full body, gets powerful precisely because the movement frequency is so high. That’s where I keep coming back to.

Potentiation: Priming Recruitment

Fatigue, run in reverse — potentiation is a temporary increase in exercise performance caused by a previous bout of exercise. That last part is the whole discriminator: it has to be exercise that caused it. If a training partner cheering you on lifts your performance, that’s real, but it isn’t potentiation, because exercise didn’t do it. Inside a workout, potentiation splits into two mechanisms that got tangled together for years.

1

PAP — Post-Activation Potentiation

A very well-studied myosin–actin effect: activate a fibre and the myosin head tilts closer to the actin, so it binds from a more advantageous position. The result is a lift across the entire force–velocity profile — everywhere you measure, force goes up — plus a bump in repetition strength. That very likely raises the dosage of mechanical tension, which means more hypertrophy stimulus, which makes it worth doing. It’s the easiest thing in the world to trigger: activate the fibre for more than a second or two and you’ve got it. In a bodybuilding set-up, either do a single rep near your working load just before the work set, or drop the weight and do one high-velocity rep with real intent. It lasts about 5 minutes, so for normal rest periods you set it once and forget it. My 90%-practical version: on the last warm-up set, one solid rep close to working weight, maybe two, then call it.

2

PAPE — Post-Activation Performance Enhancement

Before about 2018–2019, everyone assumed PAP explained everything. But PAP is gone by 5 minutes — so a potentiation effect that lasts 8 to 13 minutes can’t be PAP. That forced a new name: PAPE. Because it’s new, nobody’s done the mechanistic work, so nobody knows what causes it. The one solid clue: the effect is still present even when motor-unit output is suppressed by the CNS at the supraspinal level — which tells me fairly confidently that PAPE is not a motor phenomenon. That’s about all anyone can honestly say right now.

The Two Motivation Pathways

they stack

Motivation isn’t a soft add-on — it physically changes the stimulus. Under the effort model, anything that raises your maximum tolerable perception of effort raises the central motor command you can generate, which raises motor-unit recruitment. And that pays twice: bigger hypertrophy signal now, plus a higher recruitment ceiling for next session too. There are two separate routes into that effect, and the good news is they add together.

1

External — borrowed emotional context

Music in the background, people in the room, a competitive training partner, someone shouting you through the last rep, doing a lift you love. I call these externally motivating because they come in through a channel you can’t really switch off — we’re social animals, so a person roaring next to you is almost impossible to tune out, and music is hard to emotionally mute. The emotional context is just there, and it drags your tolerable effort up with it.

2

Internal — meaning you manufacture yourself

This one’s newer — the research has really only built over the last five or six years — and there’s no emotional context at all. Put someone doing maximal-effort jump squats in front of a screen showing nothing but their bar speed, and their velocity climbs. Nobody’s cheering; they’re looking at raw numbers and quietly deciding those numbers matter. It’s a private, internal thing: they set their own target off neutral data and chase it. This is exactly what a logbook does for a bodybuilder — beat last week’s numbers and you’ve rebuilt the internal pathway from scratch. Logbooking is inherently motivating because it hands you a purpose instead of just going through the motions.

And they’re additive — stand next to that bar-speed screen and start calling out the numbers — someone sees 1.19, 1.18, 1.17 and you push them for a round 1.2 — and they hit it. That’s the internal pathway (their own reading of the numbers) plus the external pathway (your voice) stacking into a total higher than either produces alone. They’re two genuinely separate things that sum. For a lifter that means the best case is simple: keep the logbook and have someone in your corner pushing you past last week.

Focus of Attention: The Overrated Lever

I’ll flag this upfront: focus of attention is nowhere near as useful as motivation. I mostly cover it to clean up internet misconceptions. Two options for where you point your conscious mind during a set:

External focus — conscious mind on the output: moving the bar from A to B, while the subconscious runs the actual movement.

Internal focus — conscious mind on the way your body is moving. The mind–muscle connection is a subclass of internal focus, not the whole of it — telling a powerlifter “keep your elbows tucked” is an internal cue but it isn’t a mind–muscle connection. Mind–muscle is just a more extreme form of internal focus, where you deliberately squeeze the target.

External focus produces three physiological effects — and the third is the one that gets S&C coaches shouting at me:

1

Coordination improves instantly

Conscious mind on the output means the subconscious is told to make the movement as efficient as possible. Performance jumps immediately — more reps, bigger 1RM, further throw, higher jump — and you also lay down a bigger stimulus to improve coordination after the workout. Coordination beats everything else for improving the specific performance you’re doing.

2

Antagonist coactivation drops

The same external cue lowers the braking from the opposing muscle — performance up now, and a stimulus to reduce coactivation going forward. It rides shotgun with coordination and behaves the same way.

Recruitment in the target muscle goes DOWN

The sting: external focus disperses central command across a wider part of the body rather than concentrating it on the target muscle. So you get no recruitment-improvement stimulus, less hypertrophy in the muscle you care about, and neither benefit carried forward. Great for a bigger lift number; bad for building a specific muscle.

Flip all three for internal focus: worse coordination, higher antagonist coactivation, worse performance — but more recruitment concentrated in the target muscle. Add a mind–muscle connection and you create an agonist–antagonist squeeze that layers two different motor commands: “do the movement” gives one recruitment order, “squeeze the muscle” gives another, and the combination lights up a different set of motor units — which may even drive different regional hypertrophy than an external focus would. That’s the one genuinely interesting thing internal focus offers. But it comes with a catch almost nobody sees.

THE KEY INSIGHT

Logbooks and Internal Focus Cannot Coexist

Say you train a muscle with a mind–muscle connection. Coordination drops, coactivation rises, performance falls — and last week you got 7 reps with a 10RM. This week you want 8. The instant that target enters your head, your subconscious reads it as “make the movement happen by any means necessary,” and your brain automatically flips into external-focus mode to go get the rep. You’ll probably hit the 8 — but you’ve just left the internal-focus state you were trying to hold, and lost its benefit for that set.

That’s the whole problem. Logbook progression and internal focus are mutually incompatible — the moment your brain believes it has to hit a number, it moves you out of internal focus. You can have the number-chasing progression or you can have the internal focus. You can’t have both; one always wins.

“Mind–muscle connection is the secret to growth; external focus is the athlete’s tool.”

Both camps are looking in the wrong place. S&C coaches burn huge effort on external focus, bodybuilders burn huge effort on mind–muscle connection, and neither lever moves the needle much. The corner of the fitness industry everyone likes to chuckle at — the people who just cheer clients on — are quietly the ones doing it right, because motivation, not focus of attention, is the bit that actually maximizes gains.

The Practical Playbook

how it cashes out

Strip all of it down and here’s how these principles cash out on the gym floor.

1
Name the target, then tailorRun specificity first (which muscle / generic vs. specialization), then the five individuality dials in order — leverages before anything else.
2
Specialize by focus, not volumePrioritize the lift first in the session and make it single-limb, single-joint. Quality over quantity, especially for advanced lifters.
3
Respect the volume curveTreat 6–8 sets as the per-workout ceiling and spread weekly volume across recoverable sessions — roughly 1–3 sets 3×/week or 1–5 sets 2×/week.
4
Prime with PAPOne solid rep near working weight on the last warm-up set. Cheap, easy, lasts ~5 minutes — long enough for a normal work set.
5
Stack both motivationsKeep a logbook (internal) and put someone in your corner pushing you past last week (external). They add together for more recruitment now and a higher ceiling next time.
6
Pick your focus, don’t split itFor a bodybuilder chasing a number, ride external focus and the logbook. If you truly want a mind–muscle squeeze for a region, accept you can’t also chase a rep target that session.

The Research

Peer-reviewed sources for the concepts above (via PubMed) — supporting research, not necessarily the exact studies I reference above:

Want these principles built into your program?

Knowing the volume curve and the motivation pathways is one thing — turning them into your weekly sessions, sets and cues is where the results live. Let me tailor it to your leverages and your goals.

Apply for 1:1 Coaching →
Advanced Physiology

Frequency & the Repeated-Bout Effect

Most people argue about frequency as if it were a lifestyle preference — three days a week, a bro split, whatever fits the calendar. But the muscle fiber doesn’t read your calendar. It runs on a clock, and that clock is brutally short: the window in which a workout is actually being turned into growth lasts only about 24 hours. Understand that one number and everything downstream — how often to train, how fast you lose gains, why more frequent almost always wins — falls out of it automatically.

💡
The deep end: this is the graduate-level physiology behind everything I teach. Dense on purpose — you don’t need any of it to grow, but it’s the machinery under the frequency rules.

The Template: Every Adaptation Has Three Parts

stimulus · dissipation · fatigue

Before I can talk frequency for any adaptation — neural, hypertrophy, tendon, whatever — I build it out of the same three moving parts. Get these three right and you can model literally any adaptation you can name. Frequency is just the question of how these three pieces overlap in time.

1

The stimulus period

This is the stretch of time after you deliver the stimulus during which the body is actively processing it and turning it into an adaptation. A simple thing to process gets a short stimulus period; a complicated thing to process gets a long one. The critical rule: while you’re processing one stimulus, you can’t process another. Deliver a second one on top and it does nothing — the machinery is already busy. That’s stimulus interference, and it’s the entire reason frequency is a question at all.

2

The dissipation period

The part people hate: when you are not in a stimulus period building the adaptation, you are losing it. There is no neutral idle. Two things define this phase — the rate you lose at and the shape of the loss curve. And this model doesn’t threaten anyone: if you genuinely believe loss is slow, fine, draw a slow curve. If you insist atrophy doesn’t even start for four weeks, fine, draw a curve that stays flat for four weeks (I think that’s ridiculous — it would require the fiber to run some kind of timer — but the model still holds; only the shape of your curve changes).

3

The fatigue curve

Fatigue runs alongside the other two, but it is completely and utterly divorced from them. This is where most bodybuilders go wrong. You can be fatigued for two full weeks after an unaccustomed eccentric session while the actual adaptation from that session finished processing on day one. And the reverse: a workout can leave you with almost no fatigue and still have delivered a full stimulus period. Feeling recovered tells you nothing about whether you’re still holding the adaptation.

“If I’m in a recovery period, I can’t be losing muscle.”

This is probably the most popular bit of bodybuilding folklore there is, and it’s false. Dissipation has nothing to do with the presence of fatigue or the recovery of that fatigue — they’re two separate curves. You can be sitting there feeling beat up and rebuilding, and still be quietly shedding the size you built at the start of the week. Fatigue recovery and adaptation retention are unrelated.

The Single Most Important Number In This Whole Guide

The Hypertrophy Stimulus Lasts About 24 Hours

When I plug hypertrophy into the template, the stimulus period comes out shockingly short. I’m very confident that almost no hypertrophy is being processed in the second 24 hours. The signal probably tails off back toward baseline, hitting it somewhere around the 36-to-48-hour mark. Everything happening after that first day is just damage repair — and that interpretation matches the contours of the studies perfectly.

What that means for frequencyIf I’m already back near baseline on the second day, then the machinery is free — I can process a new stimulus. Maybe not at 100% of the capacity I’d have if I waited another full day, but pretty close. Followed to its conclusion, that means you could effectively train a muscle every single day, provided fatigue doesn’t get in the way. Some athletes already train back-to-back and it’s not a problem. Whether baseline lands at 40 or 48 hours honestly doesn’t matter much.

The “one set lasts 28 hours” stat is measuring the wrong thingYou’ll hear that a single set only elevates protein synthesis for about 28 hours, because you stop seeing a significant elevation on the second day. People read that as the length of the stimulus period. It isn’t. It’s telling you that one set doesn’t produce any damage that lasts into the following day. The stimulus period is far shorter than most people realize — that 28-hour number is a damage story wearing a stimulus costume.

A word on tendons — tendons get stiffer and bigger, and their collagen synthesis rate tracks muscle protein synthesis fairly closely, lasting roughly 48 to 72 hours. So there’s probably no meaningful difference between tendon and muscle adaptation timescales — we just have far fewer studies to say much more. Sarcomere genesis is the same story: we know a static stretch triggers it, but nobody has run a single stretching workout and watched the clock, so I can’t give you its exact stimulus duration. I’d bet it’s very similar.

Atrophy Is The Default State

the dial always drifts back to zero

A muscle fiber isn’t a balloon that stays inflated until something pops it. It’s more like a dial spring-loaded to return to zero — the moment your hand comes off it, it starts drifting back down on its own. Atrophy isn’t something being done to you. It’s just what happens in the absence of a stimulus. Growth and shrinkage are the same process pointed in opposite directions: deliver a stimulus and the dial climbs; stop, and it falls back to default. That’s it.

The cleanest proof comes from immobilization studies — the ones everybody wants to throw out because they seem too extreme to apply to training. Physiologically they aren’t different from de-training at all; the only difference is that a greater number of fibers are involved. The objection people raise is that immobilized muscle shows elevated inflammation, and they insist that inflammation is actively catabolic — a wrecking crew that moves in and guts the fiber from the inside. So test it: biopsy the immobilized muscle and measure both synthesis (MPS) and breakdown (MPB).

If atrophy is just absence of stimulus

You’d expect protein synthesis to collapse and breakdown to barely move.

If inflammation is a wrecking crew

You’d expect breakdown to spike sky-high while synthesis stays roughly normal.

What actually happens — synthesis rates tank down to nothing, and breakdown rates actually slightly reduce. There is no wrecking crew. There is no argument that inflammation is actively catabolic. You atrophy for exactly one reason: you stopped supplying a hypertrophy stimulus. I think people reject this simply because it doesn’t sound nice — a previously unrecruited fiber sits there thin, with almost no contractile protein, and only starts building when you finally switch it on. Stop switching it on and it goes right back to that thin default. That’s the whole story.

“Immobilization is a different beast — inflammation eats the muscle.”

Nope. MPS tanks and MPB slightly falls. Immobilization is just the whole-muscle version of ordinary de-training, running about twice as fast because every fiber is offline instead of half of them. Same coin, more surface area.

How Fast You Actually Lose It

1–2 weeks, not 3–4

If atrophy is the default, the real programming question is: how fast does the dial fall? Three separate lines of data answer it, and they all point the same direction — much faster than the internet believes.

1

De-training: one to two weeks, not three to four

Before 2017 the consensus was that two weeks off was enough for significant size loss — a 1993 study in powerlifters already showed measurable type II fiber shrinkage after two weeks of de-training. Then 2017 became the threshold year: the first study showing atrophy inside a single week (a Nordic hamstring curl program, where fascicle lengths dropped within one week off). A recent replication ran six weeks of training for a roughly 25% fascicle-length increase, then lost about 12% in a single de-training week — half the gain, gone in a week. And a biceps study (five weeks of curls) confirmed muscle thickness dropping after just one week off. I honestly don’t know where the “3-to-4-weeks” number came from — probably a couple of studies that only took their first measurement at 3-4 weeks, and people grabbed the number. The 1993 data already killed it.

2

Immobilization: 48 to 72 hours (about twice as fast)

Full immobilization produces significant atrophy in 48 to 72 hours versus about a week for ordinary de-training — a clean factor of two. The reason is simple math: your activities of daily living keep roughly 30-40% of the muscle active, protecting about half the fibers during a normal training break. Immobilize the limb and all the fibers go offline, so you atrophy at roughly twice the whole-muscle rate. Bang-on the number you’d predict.

3

Sarcomere genesis reverses about twice as fast as hypertrophy

Train one leg concentric-only (which drives pennation angle, a clean proxy for pure hypertrophy) and the other eccentric-only (which drives fascicle length, the proxy for sarcomere genesis), then stop. Pennation angle sticks around; fascicle length tanks to nothing very fast. Put numbers on it: fascicle length is gone in about two weeks, where I’d expect hypertrophy to take more like four. Sarcomere genesis probably displays at twice the speed of hypertrophy — which is genuinely annoying, because it’s the stretch-position work that’s hardest to recover from in the first place.

The curve isn’t a straight line — and the shape has a nasty implication. The more of something you have, the easier it is to shed a big chunk of it fast. So the fastest rate of loss happens immediately at the end of the stimulus period. The instant your ~48-hour window closes and you drop into dissipation, that exact moment is when you’re bleeding muscle mass fastest. Recovery isn’t a grace period; it’s the steepest part of the slide.

Tendons play by their own rules — and they’re biphasic. Coming off training into normal daily activity, tendon stiffness takes about twice as long as muscle mass to drift back — if muscle takes a month, the tendon takes two; it really drags its feet. But going the other way, from activity into immobilization, tendon stiffness evaporates at twice the speed of muscle. Practically: a holiday or a training break, don’t give the tendon a second thought. But an injury that immobilizes a limb for two weeks — now I’m worried about the tendon, because two weeks is plenty for a massive stiffness change. Do not let someone charge straight back into something explosive on day one, especially a strong person, because the tendon injury risk is real.

So what do you actually do with stretch-position exercises? Because sarcomere genesis reverses so fast, you can’t space them out — you still need them about twice a week, same as everything else. You just take the recovery edge off with heavier loads and a rep or two in reserve rather than grinding them to failure.

“De-training atrophy takes 3–4 weeks to kick in.”

Two weeks is plenty — one week for fascicle length. The 3-to-4-week figure is almost certainly an artifact of when the measurements happened to be taken, not a real biological delay. Plan your time off accordingly.

Why Frequency Beats Volume

only the workout exists to the fiber

Now stitch it together. The stimulus lasts ~24 hours. Atrophy is the default and it’s fast. Put those two facts side by side and frequency stops being a preference — it becomes the highest-leverage variable you’ve got. The proof is in the maintenance data: a couple of studies show that just 3-4 sets once a week is enough to hold your size exactly where a higher-frequency program left it. Sit with that. If a single weekly session maintains size, then you must be losing size at the back end of every week and clawing it back at the start of the next. Maintenance isn’t a special signal — it’s a break-even between building and bleeding.

You cannot argue this is some “maintenance stimulus” that tells the fiber to hold steady all week — that would require the fiber to know no further workout is coming. It doesn’t know anything. The same number of sets spread across multiple workouts grows muscle robustly; the same sets crammed into one workout merely maintains. The difference is entirely frequency.

“You need enough weekly volume — 3 sets once a week isn’t enough.”

There is no such thing as weekly volume as far as the muscle fiber is concerned. There is only the volume of a workout — that’s the only thing that exists. “Weekly volume” is an accounting trick we invented; the fiber never sees the week, only the session in front of it, followed by days of loss.

Then why do modern meta-analyses say frequency doesn’t matter? Because the last decade of studies pushed volumes so high that everyone walks out of every session with enormous muscle swelling — and we can’t tell swelling apart from real hypertrophy. Drown the signal in enough water weight and the frequency effect vanishes from the data. But look at the lower-volume work and it’s obvious: three sets three times a week blows nine sets once a week out of the water. An early meta-analysis (around 2016) found exactly that — higher frequency won — before the flood of high-volume studies buried it.

The dose-response curves seal it. Two big meta-analyses disagree on how steep the volume curve is — one is shallow, needing about 6 sets to double the response from a single set; the other is much steeper, doubling in about 3 sets (I think that one’s a touch aggressive, probably muscle swelling pulling the top end up). But here’s what matters: both curves are non-linear and both bend over. The first set of the week is worth far more than the sixth. And frequency is nothing but a machine for buying you more “first sets” of the week — more trips up the steep part of the curve, fewer wasted reps up top where the curve has already flattened.

Programming It: The Blueprint

frequency first, volume by recoverability

So the logic runs: set your frequency as high as recovery allows, then let volume-per-session fall out of your recoverability. Here are the numbers I actually build from — all drawn from moderate-load-to-failure, stretch-position data, so treat them as the demanding end of the range. Heavier loads with reps in reserve in a contracted position let you recover faster and would push these lines up, but there’s no data to draw that exact line, so I stay conservative.

1
3 sets → every 48 hoursThree sets is the ceiling you can recover from on a 48-hour cycle — i.e. training that muscle 3×/week, every other day. This is my default for most people.
2
4–5 sets → every 72 hoursBump to four or five sets and you need 72 hours — twice a week. More per session, fewer sessions.
3
10–12 sets → once a weekYou can technically hold once-a-week volume this high, but supraspinal fatigue on the other days would be bonkers, and past about 8 sets in a single workout you’re adding only damage, no extra growth. The back end is mostly wasted.
4
Full body, twice a week, same workoutThe simplest structure that respects all of the above for the average lifter. Hit everything, recover, repeat.
5
A-B-A-B-A-B for varietyAlternate two entirely different full-body workouts across your sessions. Every function still gets trained about twice a week — frequently enough to beat atrophy — while giving you full exercise coverage and variety. Good for advanced lifters and variety-cravers.

The maintenance math inside A-B-A-B — think of each body part as a bucket with the drain left open. Every set pours stimulus in; every day of dissipation drains some out. Call one set one unit of stimulus. By the time two days of dissipation have passed, you’re down to about 0.67 of a unit — you’re still owed a day’s worth of loss. Run the accounting across the week and it comes out clean: inside an A-B-A-B rotation, one set per body part holds it at perfect maintenance, and two sets produces actual progress. If a region only gets trained once a week, you need three sets just to break even. Frequency is what makes one or two sets enough — spread the pours out and you never let the bucket drain far.

Why I don’t bother periodizing loads — all loads do fundamentally the same thing; they just hand you different amounts of fatigue. So I keep good exercises in the program instead of rotating them out to reinsert three months later — either an exercise is a good idea or it’s a bad one. Varying things for the sake of variety doesn’t make physiological sense. And “resistance-profile matching” is really just variety by another name: a matched profile loads more tissue and reaches higher up that non-linear curve per workout, exactly the way three sets of three different exercises beats three sets of one at high volume. Same principle, wearing a different hat.

The Repeated-Bout Effect

why workout two hurts so much less

Everyone has lived this: the first workout of a new movement wrecks you for days, and by the second or third session the same work barely registers. That’s the repeated-bout effect — post-workout fatigue and damage dropping off hard across successive sessions. And it’s a great worked example of how I reason about physiology, because the mechanisms that should explain it don’t add up to the curve we actually see. The gap is the whole story.

Since post-workout fatigue is a clean proxy for how much calcium piled up inside the fiber, I can build the repeated-bout effect out of anything that reduces calcium-related fatigue. There are four candidates:

Sarcomere Genesis
NEURAL-ADJACENT · STRETCH CHANNELS
Adding sarcomeres in series cuts passive tension, so less calcium floods in through the stretch-activated channels. Fast at first, tapering; done within about 2–3 months.
Fiber-Type Shift
METABOLIC · MITOCHONDRIA
A drift toward more oxidative fibers adds mitochondria that mop calcium up once it’s inside — it doesn’t block the inflow, it handles the aftermath. Mostly done within a couple of months.
EC-Coupling Toughening
CELLULAR · FRONT-LOADED
The proteins that fail during excitation-contraction coupling get damaged, then regrow stronger and harder to damage. Very pronounced in the first couple of workouts, small after that.
Tendon Stiffness
THE ANOMALY · SEE BELOW
The weird one. Over a full program tendons stiffen — but in the workout 1→2 window they do the exact opposite, and that reversal explains everything.

Here’s the mismatch — add up the first three mechanisms and they predict a smooth taper: a big drop from workout 1 to 2, then a gradual glide down to basically zero over about 2-3 months. But the real data is nothing like smooth. It’s a cliff: massive from workout 1 to 2, small from 2 to 3, tiny from 3 to 4, and essentially gone after that. Way steeper than the mechanisms can account for. That mismatch is the clue that something else is doing the heavy lifting up front.

The Strangest Finding I Know Of In All Of This

The Tendon Pre-Pays The Entire Bill In Two Sessions

Over a normal 3-month strength program, tendons get stiffer — workouts 1 through 12, stiffness climbs, exactly as you’d expect. But zoom into the workout 1→2 window, where the giant repeated-bout drop actually lives, and the tendon does the opposite: it briefly increases in compliance. It gets softer before it gets stiffer. When I first ran into this it stopped me cold — it runs against the entire trend of the program.

Why a softer tendon kills so much fatigueA more compliant tendon means the fiber doesn’t experience nearly as much tension in its stretched position — it doesn’t start producing real force until it’s more shortened. That dramatically cuts fascicle lengthening, which slams the stretch-activated calcium channels mostly shut, which collapses calcium-related fatigue. One transient tendon change, and the biggest chunk of the whole repeated-bout effect is delivered in a single jump.

How it hides the other three mechanismsThen the tendon reverses — compliance falls, stiffness climbs across the rest of the program, right on schedule. And as that fatigue-protection unwinds, the other three adaptations (sarcomere genesis, fiber-type shift, EC-coupling toughening) are ramping up in the opposite direction and quietly take over the job. So the tendon effectively pre-pays almost the entire fatigue-protection bill in the first two sessions, then the slower mechanisms refinance it as it fades. You never get to watch the other three work separately — the tendon cashed in their whole future contribution up front. That’s why the real curve is a cliff instead of a slope, and it’s about the strangest thing I’ve ever come across in this field. Physiology just being physiology.

The Research

Peer-reviewed sources for the concepts above (via PubMed) — supporting research, not necessarily the exact studies I reference above:

Want your week built around the 24-hour clock?

Knowing the stimulus lasts a day and atrophy is the default is one thing. Turning that into a frequency, a split, and a set count that fits your recovery is another — that’s exactly what my coaching is for.

Apply for 1:1 Coaching →
Advanced Physiology

Recovery, Cardio & Periodization

Cardio “interfering” with your gains, HRV straps promising to read your recovery, periodization models stacked three months deep — they look like three separate topics. They’re not. Every one of them collapses into a single idea: anything you add to a training week is just extra post-workout fatigue, and it obeys the exact same rules as an extra set. Once you see that, the cardio question, the recovery-monitor question, and the periodization question all answer themselves.

💡
The deep end: this is the graduate-level physiology behind everything I teach. Dense on purpose — you don’t need any of it to get results, but it’s the machinery under the rules.

Concurrent Training: The Interference Effect

the observation vs the hypothesis

Back in the 1980s, a group of powerlifters working in exercise science noticed something: when they started bolting aerobic work onto their weekly routine, their strength training stalled. The gains they expected didn’t show up. They floated the idea that the two kinds of training were somehow interfering with each other, and that idea ran around the world fast.

What matters is how the research then split onto two completely separate tracks, and how differently the two tracks aged.

1

Track one — is the observation even real?

One group just investigated the phenomenon itself: does adding aerobic exercise actually slow strength progress? They ran study after study and eventually had enough to pool into meta-analyses. Quiet, patient, empirical.

2

Track two — chase the mechanism

The other group chased the explanation the original observers had guessed at: that aerobic exercise was blunting hypertrophy. This track got the money, the interest, the time and effort — and it built an enormous, elaborate molecular model on a foundation that turned out to be sand.

The molecular model — here’s the story track two told. An aerobic workout drives local endurance adaptations: more mitochondrial density, more capillarization, more oxidative enzyme activity. A strength workout drives local force adaptations: hypertrophy, sarcomerogenesis, lateral force transmission. The proposed collision point was signaling. Aerobic work switches on AMPK — a cellular energy sensor that kicks off the endurance program. Strength work runs through mTOR, the molecule famous for hypertrophy. The claim was that AMPK’s signals were directly competitive with mTOR’s.

The way I’d picture their argument: two departments in the same company — an endurance department and a growth department — both filing a budget request with the same finance office, and finance can only fund one of them at a time. Train both in a week and each gets shortchanged. Neat story. It just wasn’t true.

“AMPK and mTOR compete, so cardio blunts your gains at the molecular level.”

It fell apart fast. AMPK and mTOR were shown not to be incompatible with each other. So the field jumped to the next signal down the line — is it that one? — and then the one after that. It was like tracing an electrical fault through a house: check the first junction box, nothing; open the second, nothing; keep pulling panels deeper into the wiring until you’ve got a thousand suspects and no culprit. Eventually there were a thousand competing hypotheses and nobody could see the wood for the trees. The investment dried up and the studies stopped. The molecular-interference model is dead.

The Order That Settles It

speed › power › strength › size

While the mechanism-chasers were opening panels, the quiet empirical track finished its meta-analyses — and buried in the results was the single most important finding in this whole area. When you rank the interference effect from largest to smallest, it lines up like this:

Speed
1 · BIGGEST HIT
The adaptation that suffers most when you add aerobic work. And roughly 80% of speed adaptation is neural.
Power
2 · LARGE
Next in line — still heavily neural, still hit hard.
Strength
3 · MODERATE
Interfered with, but noticeably less than the faster, more neural qualities above it.
Muscle Size
4 · SMALLEST HIT
Hypertrophy is the least affected of all — the exact opposite of what the blunting hypothesis predicted.

Sit with that order for a second, because it’s decisive. If aerobic exercise were interfering by blunting hypertrophy, then muscle size should take the biggest hit and everything downstream of it should follow. Instead size is dead last. The order is upside-down from the original hypothesis. That single ranking blows the hypertrophy basis of the whole thing to pieces — slower strength gains cannot be coming from blunted growth when growth is the least-interfered-with outcome on the list.

The Insight That Unifies Everything

Interference Is Post-Workout Fatigue — Full Stop

So what does that order fit? Post-workout fatigue. Post-workout fatigue is specifically poison for neural adaptations and barely an inconvenience for peripheral ones. And roughly 80% of speed adaptation is neural, power is next, strength less so, and hypertrophy is peripheral. Line those up and the interference order — speed, power, strength, size — is screaming at you that what you’re looking at is a fatigue effect, not a growth effect.

The mechanism seals it: aerobic exercise obeys the exact same rules as strength training and produces post-workout fatigue through calcium mechanisms, same as any hard set. So adding cardio isn’t some exotic molecular sabotage — it’s just adding more bits of strength-training fatigue into your week, no different from doing excessive volume.

Why this is bigger than cardioOnce you accept it, the rule generalizes to everything. A weekend of five-a-side, a bit of plyometric play, a hard hike — all of it is just extra post-workout fatigue to account for, exactly the way you’d account for an extra strength set. That’s not only the answer to the cardio question. It’s the engine for planning a whole training week: how much you can fit, what it costs, and where in the week it has to sit.

Cardio Without The Cost

reason it out, don’t just read the evidence

If cardio is just fatigue, then the game is picking cardio that delivers the cardiovascular hit while creating the least muscle damage. The five variables that drive calcium-related fatigue in lifting collapse, for aerobic work, into effectively three:

Duration
USUALLY MINOR
Very long sessions can theoretically cause more damage, but people naturally drop the intensity way down when they go long — so it rarely ends up mattering.
Intensity
THE BIG ONE
Pushing harder recruits more and faster fibers, which is exactly where calcium piles up. This is the lever that actually creates interference.
Stretch Position
MODALITY MATTERS
Running loads the muscle in a stretched, eccentric-heavy way and does more damage; cycling is far more concentric-only and does less.

The distinction almost everyone misses — the intensity of muscle activation is not the same thing as the intensity of cardiovascular output. You can hit an identical cardiovascular load through wildly different muscle activation. Deliver it through your arms alone on a hand-crank and you’ve crammed all that work into a small muscle mass — serious soreness tomorrow. Deliver the same cardiovascular output through your legs on a bike — probably fine. Deliver it through all four limbs at once on a cross-trainer and you’d likely just walk it off on the way home. Four limbs sharing the load gives a big kick to the cardiovascular system while spreading the muscular demand so thin you never really get into the fast-twitch fibers. It’s the mirror image of what I do with single-joint, single-arm work when I’m trying to maximize motor-unit recruitment — same dial, turned the opposite way.

Plenty of bodybuilding coaches push assault bikes and spin bikes as the “least interference” cardio, and the evidence does show less interference from cycling than running. So an evidence-based coach picks the bike and stops there. But evidence is only interesting when you have no idea what’s going on. If you actually understand the physiology, you don’t stop at the evidence — you ask why cycling wins, realize it’s the stretch and eccentric component, and then extrapolate: the cross-trainer beats the bike too, for the same reason, only more so. That’s a scientific process reaching a better answer than the evidence alone would hand you — and it’s the opposite of what a lot of coaches recommend.

Autonomic Recovery & The HRV Trap

two phases, one useful, one useless

Any hard cardiovascular effort flips you out of your resting parasympathetic state into a sympathetic one — heart rate up, blood pressure up, oxygen shuttled out to working muscle. Afterward you drift back to parasympathetic in two stages, and the difference between them is the whole story on recovery monitors.

1

Early phase — completely understood, driven by lactate

If the effort dumped lactate into your blood, the early phase lasts as long as it takes to clear that lactate. Easy, short, low-volume session: gone in a few minutes, maybe 10–15. High-volume, high-intensity session: can take a couple of hours. Fitter people clear it faster. So the early phase runs anywhere from minutes to roughly 4 hours, and then settles into a long, shallow trailing edge that lingers across the rest of an ~48-hour window.

2

Late phase — nobody has a clue, and it’s ~48 hours no matter what

This one is genuinely frustrating. It does not seem to matter whether you did a strength session, a cardio session, or ran an entire marathon — your autonomic nervous system takes about 48 hours to return all the way to parasympathetic baseline. You can’t say “I ran an Ironman, so my late phase is three or four days.” It’s still two days. Same as after a lifting session. We have no working explanation for why.

What the window costs you — inside that 48-hour window, your cardiovascular system is already sitting partway up the sympathetic ramp, so there’s less headroom left to climb to maximum — and a maximal cardiovascular effort will come up short. Attempt an all-out cardiovascular time-trial inside the window and you probably won’t hit a personal best; wait one extra day so you’re fully outside it, and — assuming you’ve prepared properly — you’ve got a real shot at beating your previous best. So autonomic state only registers as a fatigue mechanism when there’s an actual cardiovascular limitation.

“My HRV strap says I’m not recovered, so I shouldn’t lift heavy today.”

HRV reads your autonomic — cardiovascular — recovery state, and nothing else. If your lifting has no cardiovascular limitation — a couple of sets, long rests, heavier loads, a rep or two in reserve — then your fatigue is entirely local-muscular or supraspinal, and your autonomic reading tells you nothing about whether you’re recovered to lift. It’s useless for that. The only time a heavy day does throw an HRV signal is when the session itself is cardiovascularly taxing — think ten hard sets of leg press on two-minute rests to failure, where you’re sucking wind and gasping by the back half. That’s the cardiovascular system becoming the limiter, not your strength being unrecovered.

Where HRV actually earns its keep — it can tell you whether you’re still inside a 48-hour window from a previous cardiovascular workout — i.e. tapering for a race or time-trial. That’s real, but even there I’d hold it lightly. Endurance athletes don’t need to run their cardiovascular system at maximum to train it. Elite swimmers finish an Olympic final and are back in the pool that Monday, every single day until the next Games — ticking along at low intensity still delivers a cardiovascular stimulus, even inside the 48-hour window. For a cardiovascular-dependent competition I’d take the 48 hours beforehand off, absolutely. For a power competition I see no reason to chill out for two days first. HRV is, at best, of minimal importance.

A combat-sports aside — fighters will deliberately spike their heart rate for two or three minutes right before a match — a short, sharp ~80–90% burst. Skip that primer and you gas out embarrassingly early. That’s not a contradiction of the 48-hours-off idea — it’s the best of both worlds. Do a power session, take 48 hours off, then compete: you collect the delayed potentiation from the strength work plus the autonomic benefit of the rested window. Then, minutes before you step on, you hit the immediate potentiation mechanisms — both cardiovascular and local — and you get all three stacked at once.

Is Training Really “Stress”? The GAS Problem

the flaw under every periodization textbook

Open any periodization textbook ever written and you’ll find it leaning on the General Adaptation Syndrome to justify why we periodize. It’s worth knowing where GAS came from and why that justification doesn’t actually hold.

In the 1950s, researchers studying the sympathetic nervous system put animals through genuinely disagreeable conditions — including isolating them so they couldn’t see another animal for something like 23 hours a day. They described a two-part response: an alarm phase (the healthy stress reaction) and, if the stress ground on, a collapse phase (the pathological one). Useful physiology. Then exercise scientists borrowed it to model training as a “stressor,” and the actual stress researchers more or less lost their minds — because that borrowing skips the one requirement that defines a stressor in the first place.

“Training is a stressor, so GAS explains why we must periodize.”

For the brain to register something as a genuine stressor, it has to see the thing as uncontrollable AND unpredictable. Almost all exercise is neither — you chose it, you scheduled it, you know exactly what’s coming. You can watch this in the animal work: scoop a mouse up, drop it on a moving treadmill and prod it to keep running, and it’s stressed — that running is both unpredictable and out of its control. Put an identical running wheel in its home cage and the same running isn’t stressful at all, because it’s fully predictable and the mouse is in charge. Realistically, the only version of exercise a human brain files as a true stressor is something like your car dying on an empty mountain road in the cold, no phone signal, the nearest town a night’s walk away — you didn’t choose it, you can’t predict it, and your own legs are the only way out. Your Tuesday leg session is not that. Every textbook citing GAS to justify periodization is building on an invalid foundation, and that’s pretty fundamental.

The stress research that IS worth your attention — psychological stress genuinely matters, just not through GAS. Studies on life events make the point cleanly: take patients in for a minor operation — roughly a week until the stitches come out — and have them fill in a one-line questionnaire beforehand about big life events in the last six months or so (divorce, moving house, changing jobs). The higher the stress score, the longer the wound takes to heal. Psychological stress suppresses the same immune and inflammatory machinery that repairs muscle damage. So in a high-stress stretch of life, back off — leave more reps in reserve, drop a set. Sleep works the same way, on a threshold: normal is around 8 hours, and chronically running at ~5 (losing an hour or so a night, week after week) becomes a real stressor. But going from normal sleep to more sleep doesn’t buy you extra recovery — it’s a threshold, like protein, not a dial you keep turning up.

Periodization: A Spectrum, Not A Mandate

measured by wavelength

Strip periodization down to its essence and it’s just one thing: distributing the workout contents you’ve already decided you need, across time. The metric that defines any periodization scheme is what I’d call its wavelength — the length of time you go without changing a variable. That single number lets you lay every approach out on one spectrum.

Zero Periodization
WAVELENGTH ≈ 0
Everything, every session — one heavy set, one moderate set, one light set, all in the same workout. Nothing ever “waits.”
Daily Undulating
WAVELENGTH ≈ 1 DAY
Monday heavy, Wednesday moderate, Friday light. A different emphasis each session, cycling within the week.
Weekly Undulating
WAVELENGTH ≈ 1 WEEK
The emphasis holds for a week at a time before it rotates.
Block
WAVELENGTH = LONG
A month heavy, then a month moderate, then a month light — you commit to one focus for a long stretch.

Draw the line at zero periodization and every step away from it just stretches the wavelength longer. As you slide from zero toward block, five physiological factors shift in equal and opposite ways — that’s the part that actually decides how to program. Block wins on some, loses on others, and zero periodization is the exact mirror.

1

Getting good at the specific thing — advantage: block

Hammer one squat variation for a month and you get genuinely good at it, with hypertrophy concentrated in the specific fibers that movement activates. Spread yourself across everything every session and you’re thinner on each — you don’t get as sharp, and fiber-specific growth comes slower.

2

Concentrated adaptation feeding the next one — advantage: block

Battering, say, motor-unit recruitment for a solid month drives it to a higher level than touching it once a week ever could — and that higher level opens the door to further adaptation on top of it.

3

Losing your untrained adaptations — advantage: zero

Block’s big cost. Spend a month on one squat variation and the fibers and coordination for the other variations aren’t being trained — they shrink, the skill stalls, adaptations quietly dissipate. Do everything all the time and there’s no dissipation problem at all. This is a serious point in zero periodization’s favor.

4

Fatigue piling up in one place — advantage: zero

Concentrate everything on the same tissues and motor patterns and fatigue accumulates right there. Spread it out and that local pile-up shrinks to almost nothing.

5

Overuse injury — advantage: zero

Battering the same tissue for weeks on end is exactly how overuse injuries happen. A spread-out, minimal-periodization approach carries far less of that risk.

Add it up and I’m not a huge proponent of aggressive periodization. I don’t think it has an enormous amount to offer over just building a program that works and sticking with it. People assume a “periodized” program requires a month heavy, a month moderate, a month light — but if that variation wasn’t part of your ideal workout plan to begin with, why is it suddenly buried in your program now? Periodization isn’t a licence to vary things for the sake of varying them. It’s only ever redistributing contents you already decided you needed.

1
Start From (Near) ZeroParadoxically, begin with essentially no periodization — everything, all the time. Doing every variable in every session means nothing sits untrained and nothing dissipates. That’s your floor.
2
Build A Maintenance BaseLay down the minimum volume needed to hold your adaptations, or progress very slowly. It’s a genuinely valuable use of time — soccer teams now feed athletes a single set once or twice a week year-round rather than cramming a block once a summer, because detraining hits in about two weeks. Some adaptations (the neural ones) are stickier than others.
3
Lay A Focus Block On TopWith any spare capacity, overlay a block-style focus on your weak point — hamstrings first every session, an extra set there. It sits on top of the base, so you push the priority forward while maintaining everything else. That’s what specialization actually is.
4
Apply The Goal TestAsk one question: did the goal change? If it’s the same, you’ve got the same program — just periodized. If the goal fundamentally changed, that’s a new program, not periodization. It’s like hitting failure, racking the bar, resting, then starting again: that next effort is a brand-new set, a different thing entirely.

The Research

Peer-reviewed sources for the concepts above (via PubMed) — supporting research, not necessarily the exact studies I reference above:

Want your cardio, recovery and week engineered?

If everything you add is just fatigue to account for, the skill is fitting it all into one week that still lets you grow. That’s exactly what my coaching builds.

Apply for 1:1 Coaching →